The Armored Transports quest in ARC Raiders is one of the trickiest missions you’ll encounter in Tian Wen’s storyline. It’s not just about grabbing loot — it’s about survival, timing, and making sure you don’t lose your key halfway through the run. This guide walks you through every step you need to complete the mission smoothly, from finding the Armored Patrol Key Card to safely extracting after unlocking the vehicle.
Starting the Armored Transports Quest
You’ll unlock the quest by speaking to Tian Wen once you’ve advanced far enough in her chain of assignments. Before heading out, double-check your gear setup — the mission takes place in contested areas around Blue Gate, where you’ll face both raiders and ARC machines. Bring loadouts that balance mobility and firepower, and keep at least one slot in your Safe Pocket free — you’ll need it for the key card.
Step 1 – Reach the Checkpoint
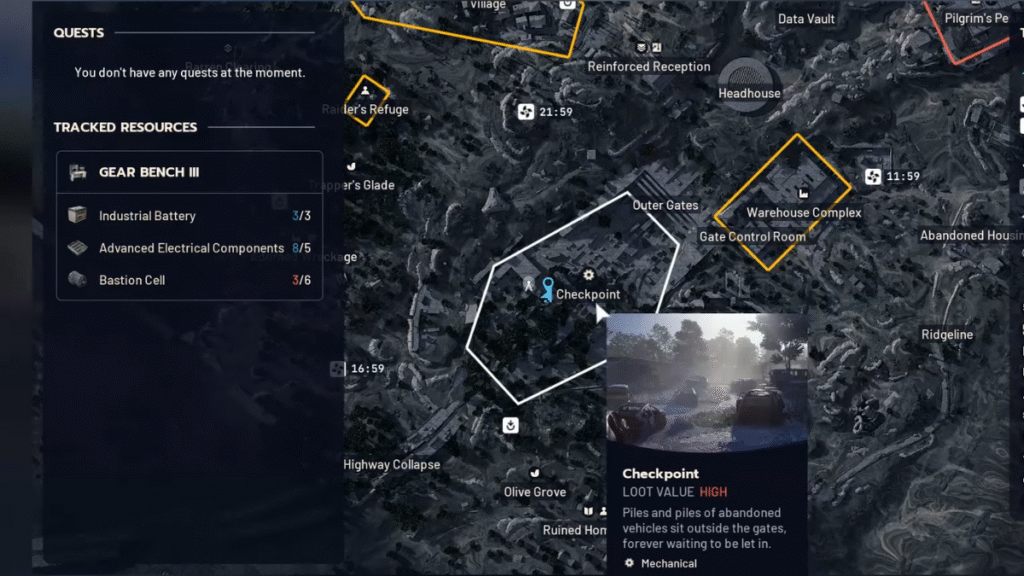
Your first task is to make your way to the Checkpoint POI in Blue Gate. The area is marked once you pick up the quest. As you approach, you’ll spot a few guard huts near the toll booth — this is where you’ll start searching for the key card.
Step 2 – Find the Armored Patrol Key Card
The Armored Patrol Key Card is essential for completing the mission.
Inside one of the guard huts, check the table or drawers — you’ll find a small folder you can interact with to collect the key. Once you have it, immediately place it in your Safe Pocket. If you die before doing so, the key disappears and won’t respawn in that location.
If it doesn’t appear at the Checkpoint, possible alternative spawns include:
- The Farmlands (Blue Gate) – near a destroyed building on the western edge.
- Dam Battlegrounds – Ruby Residence or the second floor of the Research and Admin building.
- Headhouse tunnels – inside crates, shelves, or suitcases.
If you still can’t find it, consider teaming up with a friend who already has the key — as long as they open the car, the quest still counts for you.
Step 3 – Travel to the Traffic Tunnel
Once you’ve secured the key card, head northeast toward the Headhouse POI. Descend the stairs and move toward the Traffic Tunnel near the Blue Gate Checkpoint. You don’t need to enter from the upper structure — go straight for the tunnel entrance at ground level. Simply stepping onto the tunnel stairs will mark this stage complete.
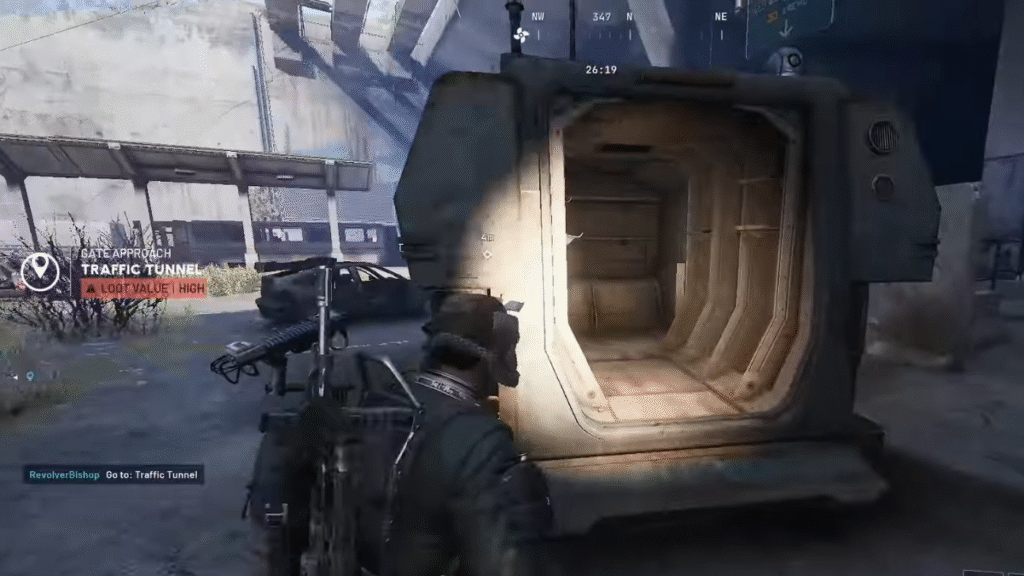
Step 4 – Locate and Unlock the Armored Patrol Car
Inside the tunnel lies the real challenge. Several Armored Patrol Cars can spawn here — some unlocked, some locked. You’ll need to find the one with the rear door locked, as only that vehicle can be opened using your key card.
Possible spawn spots include:
- The right side of the tunnel entrance.
- Just past the main stairs at the start of the tunnel.
- Deeper along the underground road, including the far left end.
The area is usually packed with drones, fireball enemies, and raiders, so move cautiously. Take down smaller targets first and avoid loud gunfire to prevent drawing more hostiles. Remember — if you die before unlocking the car or extracting, the quest progress resets.
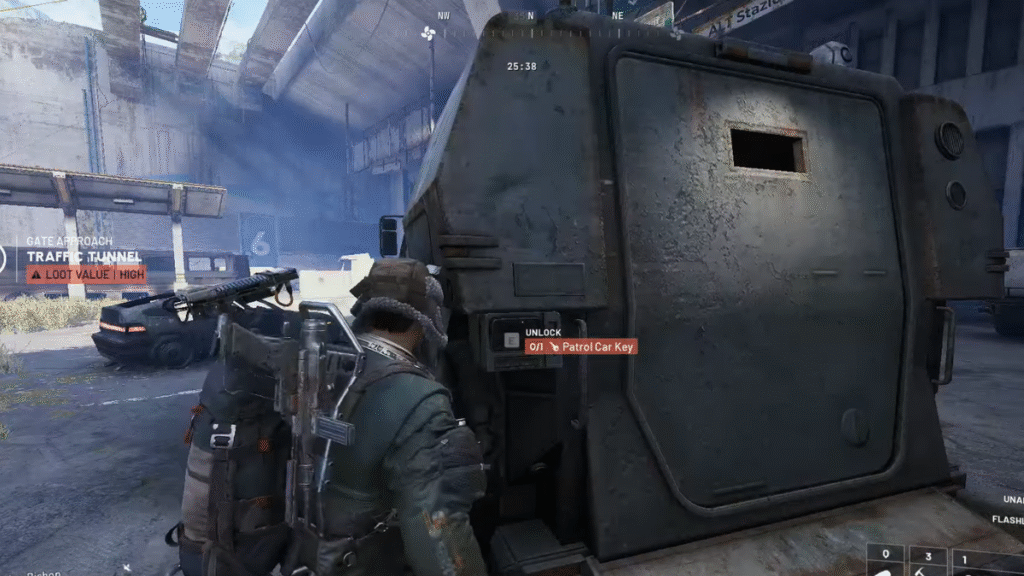
Once you find the correct vehicle:
- Approach the rear door.
- Use the Armored Patrol Key Card to unlock it.
- Loot the weapon case and supplies inside.
- Extract safely to complete the mission.
Step 5 – Complete the Quest and Extract
After unlocking and looting the car, head toward the entrance of the Traffic Tunnel. Leaving the tunnel area usually triggers the quest completion prompt, confirming that progress is locked in. Don’t extract before finishing the final interaction — otherwise, you’ll need to redo the entire mission in a fresh run.
Armored Transports Quest Rewards
Finishing the quest rewards you with a combination of cosmetic and utility items:
| Reward | Quantity | Description |
|---|---|---|
| Raider Outfit (Aviator Color) | 1 | Cosmetic skin for your raider |
| Smoke Grenade | 3 | Tactical gear for stealth and cover |
| Defibrillator | 3 | Used for reviving teammates in raids |
Pro Tips for Players
- Always safeguard the key: Place it in your Safe Pocket immediately.
- Don’t rush the tunnels: Clear smaller threats before moving deeper.
- Stay quiet: Noise attracts drones and fireball units.
- Finish in one session: Progress resets if you die or extract too early.
- Coordinate in co-op: A teammate with the key can complete the step for you.
The Armored Transports quest in ARC Raiders rewards players who combine patience, smart inventory management, and situational awareness. The Blue Gate tunnels are dangerous, but the loot and completion rewards make it worth the effort. Keep your key secure, watch your corners, and extract clean — that’s the true way to survive Tian Wen’s toughest assignment. Play Now!
Related Guides You Might Like:
- ARC Raiders: Spaceport Hidden Bunker Location Guide
- ARC Raiders: How to Find Damaged Heat Sink
- How to Complete The Root of the Matter Quest in ARC Raiders
- How to Complete A Warm Place to Rest Quest in ARC Raiders
- A Balanced Harvest ARC Raiders Guide – Location & Rewards
- Spaceport Trench Tower Key ARC Raiders Guide
- Best ARC Raiders FPS Settings & Visibility Guide
- A Reveal in Ruins ARC Raiders – ESR Analyzer Location Guide
- Marked for Death Quest Guide – ARC Raiders Walkthrough
- ARC Raiders All Quests List – Complete Quest Guide
- How to Find Bilguun’s Hideout in ARC Raiders
- All ARC Raiders Workshop Upgrades and Materials Guide
- ARC Raiders Weapon Tier List – The Best Guns to Take Topside
- Great Mullein ARC Raiders – How to Find and Use It

