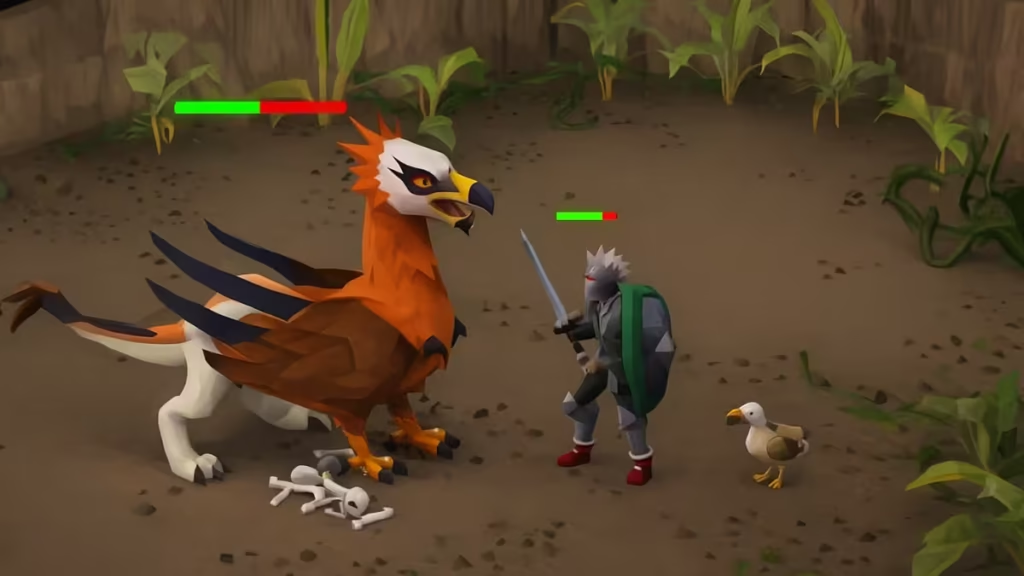
The Shellbane Gryphon is one of the newest mid-level Slayer bosses, designed to help players experience real boss mechanics much earlier than usual. Even though it’s accessible at just 51 Slayer, this encounter demands awareness, proper gear weight, and movement discipline.

What Makes the Shellbane Gryphon Unique?
Unlike regular gryphons, this boss mixes melee pressure, ranged chip damage, and several mechanics that punish standing still or wearing the wrong gear weight. The fight is solo-instanced, meaning you always get the room to yourself as long as you’re on-task.
You must bring a Tortugan shield. Without it, the boss’ attacks will tear through you, and your character will even warn you that you’re not protected. With the shield equipped, Protect from Melee completely negates its melee hits.
Location and Requirements
- Slayer Level: 51
- Accessibility: Only during a gryphon Slayer task, or if you’re following an elite clue requiring its kill
- Where to Find It: A dungeon on the Great Conch, north of fairy ring CJQ
- Quest Requirement: Troubled Tortugans
- Travel Requirement: 45 Sailing
- Fight Type: Solo instance (does not respawn after task completion)
Fight Mechanics Explained
The Shellbane Gryphon uses a mix of familiar gryphon behavior and brand-new mechanics that force consistent movement and proper gear planning. Here’s what you need to handle:
1. Corrosive Spit
This ability fires an orange projectile directly at your character. Moving just one tile away prevents the effect entirely.
If it hits you:
- Your armour begins corroding
- The gryphon’s attacks deal more damage
- The debuff isn’t instantly lethal, but avoiding it helps keep the fight cleaner
This is an easy mechanic to dodge—just step away when you see the spit animation.
2. Whirlwinds
This is the most dangerous part of the encounter. Every few ticks, the gryphon summons a Whirlwind under your position. If you stay still, they start stacking, and stacked whirlwinds become extremely damaging.
Key details to track:
- Whirlwinds spawn every 3 ticks
- Up to five can exist at once
- Repeating spawns on the same tile increase their strength
- Once formation finishes, standing on them deals damage each tick
- After about 15 seconds, whirlwinds explode in an area, with radius scaling by strength
- A maximum-strength whirlwind covers the entire room
How to handle it: Move one tile per attack cycle. The goal isn’t running around—it’s avoiding letting swirl effects stack under your feet.
3. Slam
Your gear weight matters more in this fight than almost anywhere else.
- If your worn gear weighs under 45 kg, the boss knocks you back and deals ~20 damage
- If you weigh 45 kg or more, the Slam is interrupted
- When you successfully cancel the Slam, you can click the boss for a free extra hit with no attack delay
This mechanic rewards heavy, tank-oriented melee gear.
Recommended Gear Setup
Why Melee Works Well
The boss is weak to Magic, but melee provides strong consistency, especially when stacking weight to disable Slam. Heavy body and leg pieces make it easier to reach the 45 kg threshold while still boosting your DPS.
Core Items to Bring
Mandatory:
- Tortugan shield – without it you will take severe unavoidable damage
- Protect from Melee – full melee immunity when combined with the shield
High-Value Gear Choices:
- Black mask (i) or Slayer helmet (i)
- Bandos chestplate or Torva platebody
- Torva platelegs, Bandos tassets, or any heavy alternative
- Scythe of Vitur, Soulreaper axe, Ghrazi rapier, Osmumten’s fang, or Blade of Saeldor
- Avernic treads, Echo boots, or Guardian boots for extra weight and defence
- Ultor ring or Berserker ring (i)
- Ferocious gloves or Barrows gloves
The idea is balancing weight and high melee strength. Items like the Bandos chestplate and Torva legs provide excellent stats while helping push you past the 45 kg requirement.
Strategy: How to Win the Fight
1. Keep Moving
This boss discourages standing still. The safest rhythm is:
Attack → Step → Attack → Step
This prevents Whirlwinds from stacking under you and makes Corrosive Spit easy to dodge.
2. Maintain Weight Above 45 kg
This removes Slam from the fight entirely and grants free hits every time the boss attempts the move.
3. Keep Protect from Melee Active
With the Tortugan shield equipped, this prayer eliminates all melee damage. Ranged attacks are rare and manageable through food.
4. Don’t Panic When Whirlwinds Activate
If multiple appear around you:
- Shift into a slow circular movement
- Avoid walking through high-strength whirlwinds
- Plan small, safe tiles rather than sprinting around the room
Remaining calm and stepping methodically is key.
Notable Drops
The Shellbane Gryphon provides two rolls per kill on its common drop table, making each fight feel rewarding even without rares.
Unique Drops
- Belle’s Folly (tarnished) – used to create the upgraded Belle’s Folly weapon (1/440)
- Jar of Feathers – rare vanity item (1/1297)
Always Drops
- Big bones
- 7–10 Gryphon feathers
Other Loot
Includes bulk feathers, cannonballs, seeds, herbs, raw fish, and various mid-level weapons and resources.
A pet drop (Gull) is also possible at 1/3000.
Read More:
- OSRS Yama Boss Guide – Full Strategies, Gear, Drops & Phases
- OSRS Fishing Guide: Level 1–99 Training, Profit Methods & Gear
- How to Beat First Sinner in Silksong: Full Boss Strategy and Attack Guide
- All Acts and Quests in Of Ash and Steel – Full Quest Guide
- Automotive Appeal Quest Walkthrough in Disney Dreamlight Valley

