Some Windows 11 users want the classic Speech Recognition app—the offline tool that lets the computer learn their voice. They do not want cloud-based dictation. They want local voice training, just like in Windows 10.
In Windows 11, Microsoft hides this feature, which makes it appear missing. However, on many systems, the offline Speech Recognition engine still exists and works if you open it correctly.
Why Windows + Ctrl + S No Longer Opens Classic Speech Recognition
Many users try Windows + Ctrl + S to open Speech Recognition. But in Windows 11, this shortcut opens Voice Access, not the classic offline Speech Recognition app.
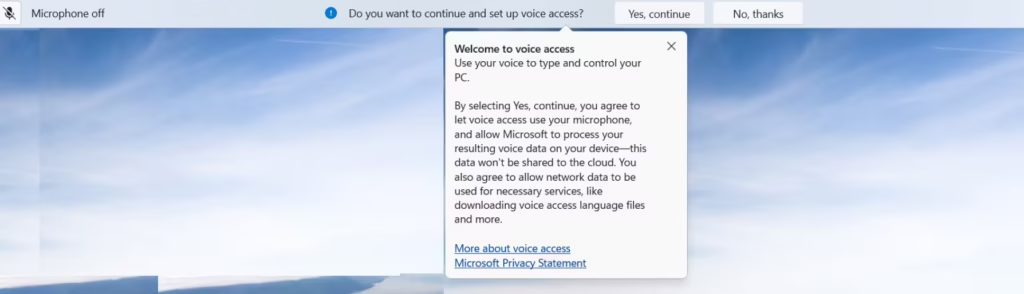
Voice Access does not support personal voice training. It uses a generic speech model and is not the same feature found in Windows 10.
Because of this change, the shortcut no longer opens Classic Windows Speech Recognition on Windows 11.
This guide shows exactly how to open it.
Step 1: Open the Offline Speech Recognition App Manually
Windows 11 does not list this app in Settings → Time & Language, but the executable still works on supported systems.
- Press Windows + R
- Paste this command:
%windir%\Speech\Common\sapisvr.exe -SpeechUX- Press Enter
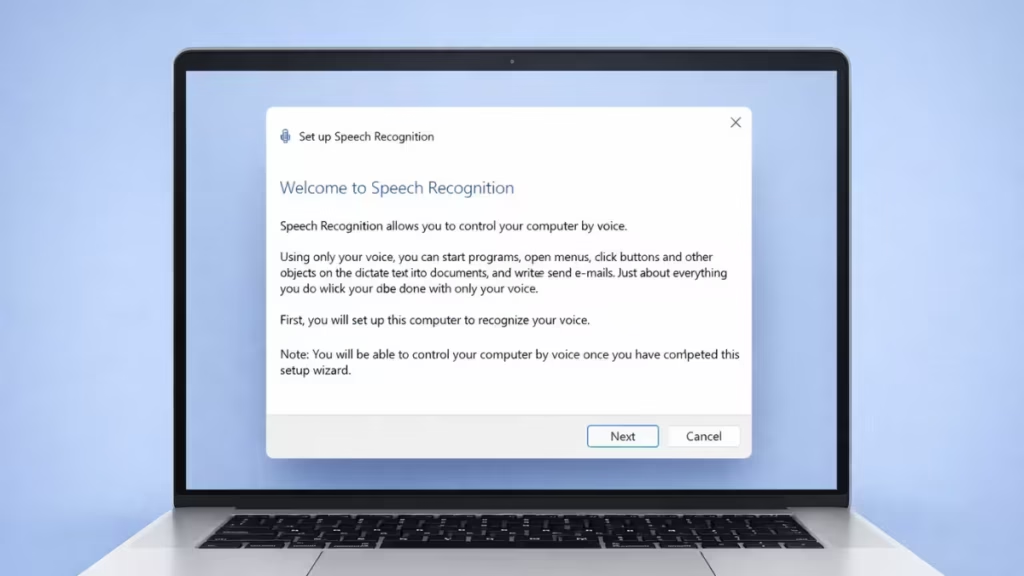
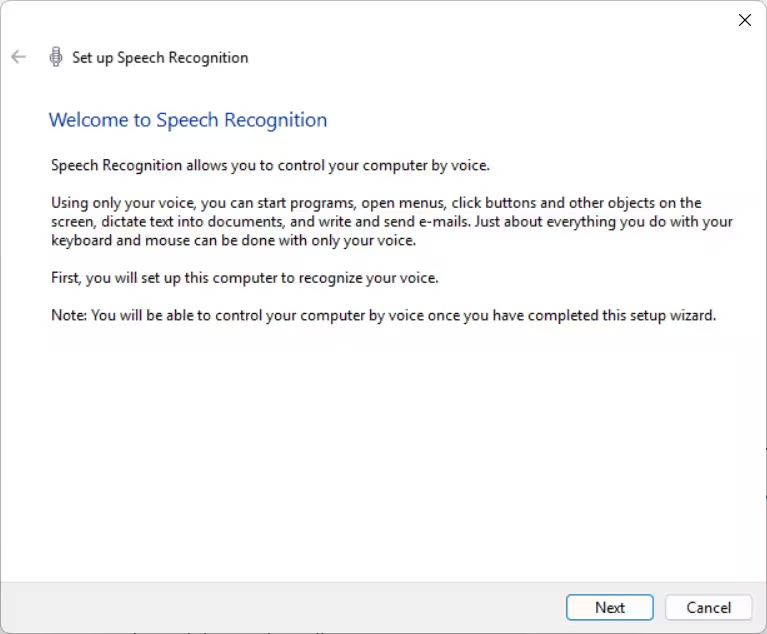
If the “Welcome to Speech Recognition” window opens, your system supports offline voice training.
Step 2: Set Up and Train Your Voice
Once the Speech Recognition window opens:
- Click Next
- Select and configure your microphone
- Complete the voice training wizard
Windows now trains your computer to recognize your voice locally, without using online speech services.
Step 3: Allow Microphone Access (Required)
Speech Recognition will not work if Windows blocks microphone access.
- Open Settings
- Go to Privacy & security → Microphone
- Turn Microphone access ON
- Turn Let desktop apps access your microphone ON
Restart Speech Recognition after changing this setting.
Step 4: Optional Control Panel Method (If Available)
Some systems still expose the classic interface through Control Panel.
- Press Windows + R
- Type:
control /name Microsoft.SpeechRecognition- Press Enter
If the app opens, it links to the same offline Speech Recognition engine.
By following the steps above, you may be able to open the classic offline Speech Recognition app in Windows 11. If the setup wizard opens, your computer can still learn your voice locally. If it does not open, your Windows 11 build no longer includes this feature, and it cannot be restored.

