You take a screenshot on Windows 11, open it, and the image looks flat, faded, or blown out. The file is not the problem. Windows is capturing the image through an HDR, SDR, or color-profile pipeline that is out of sync with your display settings. The fix is to correct that pipeline, not keep retaking screenshots.
This issue hits hardest on HDR displays, laptops with vivid panels, and external monitors using a custom ICC profile. Windows 11 now exposes more display color controls directly in Settings, which means a wrong toggle, bad profile, or broken calibration can throw screenshot colors off fast.
Quick Fix Order
Use this order first:
- Turn off HDR and test a new screenshot.
- Adjust SDR content brightness.
- Toggle Snipping Tool’s HDR screenshot color corrector.
- Reset the active color profile.
- Turn on Auto Color Management if your display supports it.
- Recalibrate the display.
- Reinstall or update the graphics driver.
Why Screenshots Look Washed Out on Windows 11
Windows 11 handles SDR and HDR differently. If HDR is enabled and SDR brightness is pushed too high, screenshots can look overexposed, pale, or low-contrast after capture. A bad ICC profile creates the same problem by forcing the wrong color translation on the image. The result is simple: the screenshot looks different from what you saw on screen.
A viewer app can also make the problem look worse. The same screenshot can appear normal in one app and washed out in another because color handling is not always consistent across apps. That is why you need to test both Windows display settings and the app you use to open the image.
Fix 1: Turn Off HDR and Test Again
Start here because HDR can directly affect screenshot colors.
Open: Settings > System > Display > HDR
Now do this:
- If you see “Use HDR” → Turn it OFF
- If you only see “HDR video streaming” → Skip this fix
Take a fresh screenshot using Win + Shift + S.
If colors look normal after turning HDR off, your HDR settings are causing the issue.
Fix 2: Lower SDR Content Brightness
If you want HDR on, fix SDR brightness next.
Go to: Settings > System > Display > HDR
Find SDR content brightness and lower it. Then capture another screenshot.
This slider controls how SDR content appears on an HDR screen. Push it too high and screenshots start looking washed out or blown out. If your captures look too bright, this setting is one of the first places to correct.
Fix 3: Toggle Snipping Tool’s HDR Screenshot Color Corrector
Open Snipping Tool and go to:
Three-dot menu > Settings
Look for HDR screenshot color corrector.
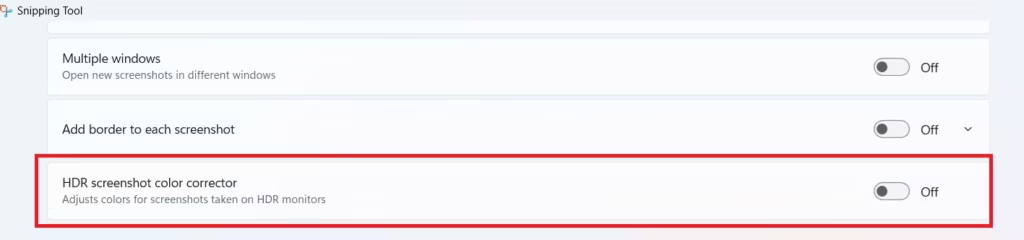
Turn it on and test a screenshot. If the issue gets worse, turn it off and test again.
This setting exists specifically to correct HDR screenshot color handling. On some systems it fixes the problem instantly. On others, switching it the other way works better. Test both states and keep the one that produces accurate color.
Fix 4: Reset the Active Color Profile
A bad ICC profile breaks screenshot color fast.
Open: Settings > System > Display > Color management
If you do not see it there, open:
Control Panel > Color Management

Then:
- Select the affected display.
- Review the installed profiles.
- Remove old or unnecessary custom profiles.
- Set the correct default profile for that monitor.
- Test again.
Windows 11 now gives direct access to color profile controls in Settings. If you installed monitor software, calibration tools, GPU utilities, or creator apps, check here first. One wrong default profile is enough to make every screenshot look faded.
Fix 5: Turn On Auto Color Management
If your display supports it, enable Auto Color Management.
Go to: Settings > System > Display > Advanced display
Turn on Automatically manage color for apps.
This feature improves color consistency across apps on supported displays. It is especially useful on wide-gamut panels where screenshots look different between Photos, browsers, and editing tools.
Fix 6: Recalibrate the Display
If the whole screen looks off, not just screenshots, recalibrate the panel.
Use: Windows HDR Calibration
or search for: Calibrate display color
Run the calibration fully, then retake a screenshot.
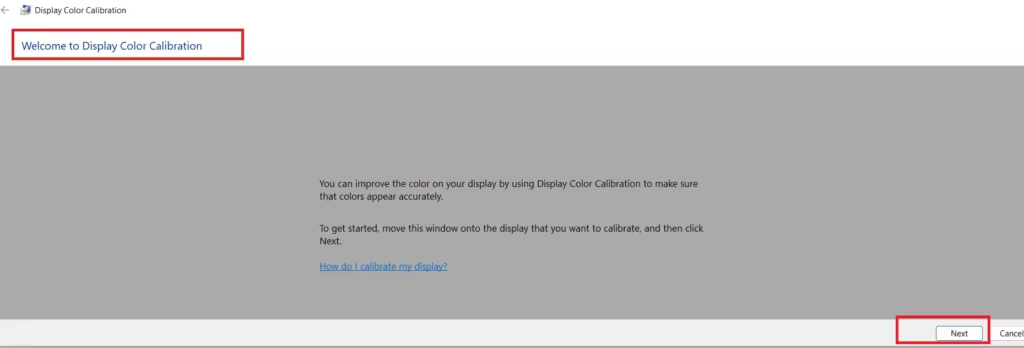
A broken calibration profile can flatten highlights, crush contrast, or shift color balance across the entire desktop. Recalibration resets the display path and fixes the mismatch at the source.
If you use HDR, run the Windows HDR Calibration tool from the Microsoft Store to calibrate brightness, contrast, and color levels correctly.
Fix 7: Check Adaptive Brightness and Content-Based Brightness
Open: Settings > System > Display > Brightness
Then check the Change brightness based on content option.
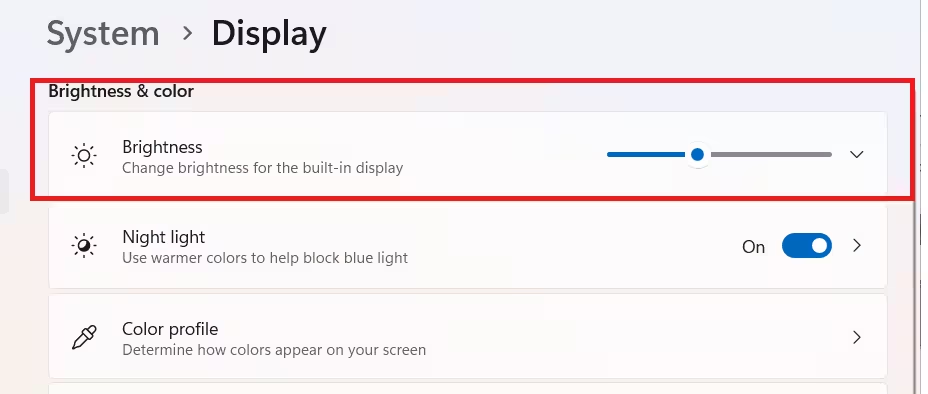
Turn it off and test again.
If Windows keeps adjusting screen brightness and contrast based on what is on screen, your display can look inconsistent while you capture images. Disable content-based brightness changes before you troubleshoot anything else.
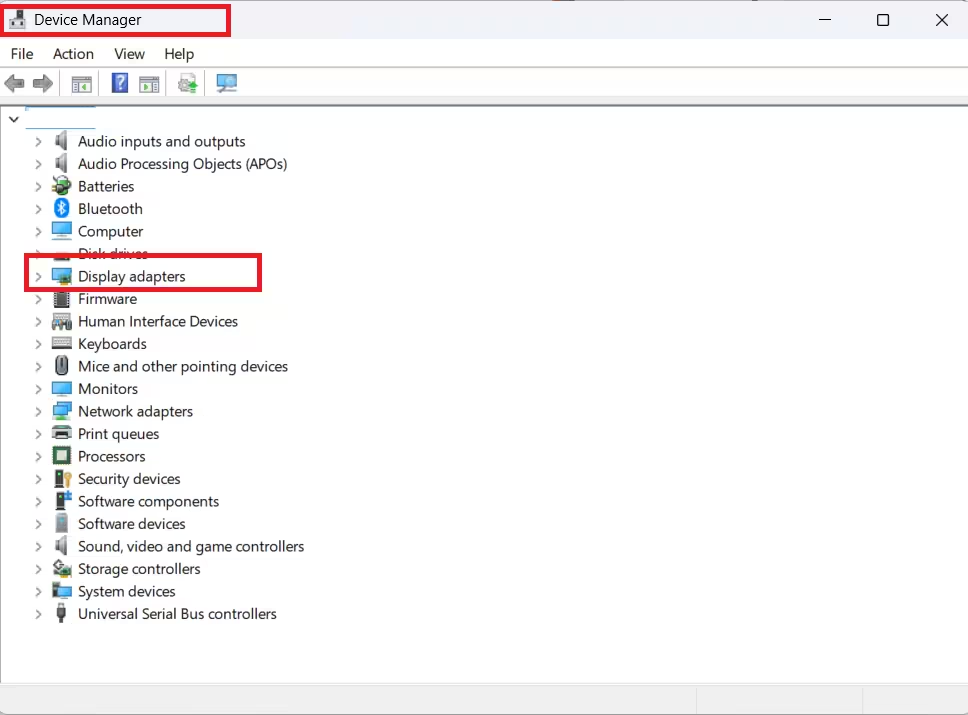
Fix 8: Update or Reinstall the Graphics Driver
If display settings look correct but screenshots still look wrong, clean up the driver next.
Open Device Manager and expand Display adapters.
Then:
- Right-click your GPU.
- Select Update driver.
- If the issue started after an update, roll the driver back.
- If it still persists, uninstall the display adapter and restart Windows.
The driver controls HDR behavior, color depth, and display output. A bad driver update can break all three and make screenshots look wrong even when Windows settings look fine.
Fix 9: Test the Screenshot in Another App
Do not trust one viewer.
Open the same screenshot in:
- Photos
- Paint
- another browser
- an image editor
If the image looks normal in Paint but washed out in a browser, the file is fine. The app is handling color poorly. Keep the screenshot and change the app you use to preview or edit it.
Fix 10: Reset Monitor-Level Color Controls
If you use an external monitor, reset the monitor too.
Open the monitor’s on-screen menu and disable or reset:
- dynamic contrast
- HDR effect modes
- black equalizer
- gaming color presets
- custom saturation controls
- panel enhancement modes
A monitor-level color preset can make screenshots look wrong even when Windows is configured correctly. Reset the display to a neutral mode before you troubleshoot deeper. Windows display behavior still depends on the physical panel it is driving.
Quick Fix to Restore Screenshot Colors in Windows 11
If you want the shortest path to a fix, do this:
- Turn off HDR.
- Take a test screenshot.
- Turn HDR back on.
- Lower SDR content brightness.
- Toggle Snipping Tool’s HDR screenshot color corrector.
- Reset the active color profile.
That sequence fixes the majority of washed-out screenshot issues because it checks the three most common break points first: HDR, SDR brightness mapping, and color profile assignment.

