The Buddha’s Light Jade is at the center of The Promised Light, a major Lost Chapter quest in Where Winds Meet. Although the pagoda is visible early on, you cannot enter it until both halves of the Light Jade are assembled—and many players get stuck tracking down these pieces. This guide explains exactly where each half is found, how the Jade is used, and what happens once you place it atop the Buddha’s Light Pagoda.

What the Buddha’s Light Jade Does
The Light Jade acts as the key that opens the Buddha’s Light Pagoda at Halo Peak. Once placed on the pedestal during the Wu Hour, the pagoda unlocks and the full dungeon beneath it becomes accessible. This is the only way to begin The Promised Light, which serves as the final Qinghe Jianghu Legacy and unlocks the Halo Peak Campaign.
Where to Find the Buddha’s Light Jade
Unlike most items in Qinghe, the Light Jade is not found as a single object. It is formed by combining two campaign rewards earned from separate storylines.

Buddha’s Light Jade: Yang
Location: Palace of Annals
The Yang half is awarded automatically after clearing the Palace of Annals campaign. Once you defeat the final boss at the end of that story chapter, the game gives you the Jade: Yang as a completion reward. No optional steps are required.
Buddha’s Light Jade: Yin
Location: Bodhi Sea
The Yin half comes from the Bodhi Sea campaign. Like the Palace of Annals, you simply progress through the chapter, defeat its boss, and the Jade: Yin is added to your inventory. Together, these pieces form the complete Buddha’s Light Jade needed for the pagoda.

- Lightweight aluminum frame with premium memory foam cushions.
- Virtual 7.1 surround sound for accurate positional audio.
- Detachable noise cancelling microphone.
- Compatible with PC, PlayStation, Xbox, and Nintendo Switch.
How to Use the Buddha’s Light Jade
1. Travel to Halo Peak
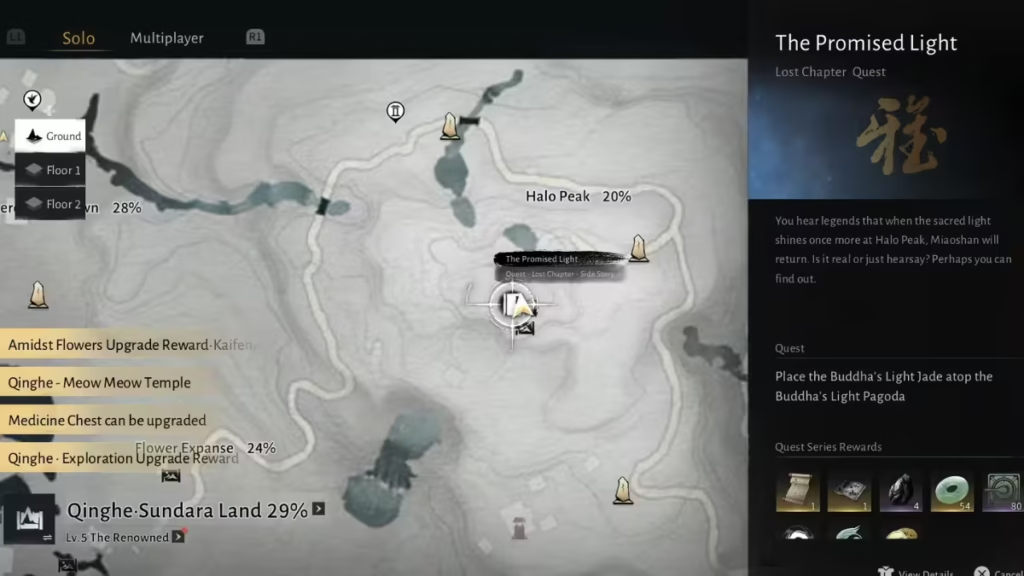
Head to Halo Peak in Sundara Land. The pagoda sits at the top of the area and can be reached by climbing the scaffolding attached to its base or by gliding from higher ground.
2. Climb the Pagoda
Reach the rooftop platform where the pedestal sits. Interact with the circular opening at the top.
If you see:
“The hour is not yet right.”
You must set the in-game clock to Wu Hour (12 PM). This can be changed instantly in the system menu.
3. Place the Buddha’s Light Jade
Once the time is correct, insert the Light Jade. A cutscene plays, and the main entrance at the bottom of the pagoda unlocks, marking the beginning of The Promised Light.
What Happens After You Use the Light Jade
Placing the Jade grants entry into the pagoda’s hidden dungeon—a multi-stage sequence involving puzzles, traps, collapses, and finally a major boss fight. Here is a concise breakdown of each stage while keeping the flow streamlined for players who only want clarity on progression.

Light-Reflection Puzzle Beneath the Pagoda
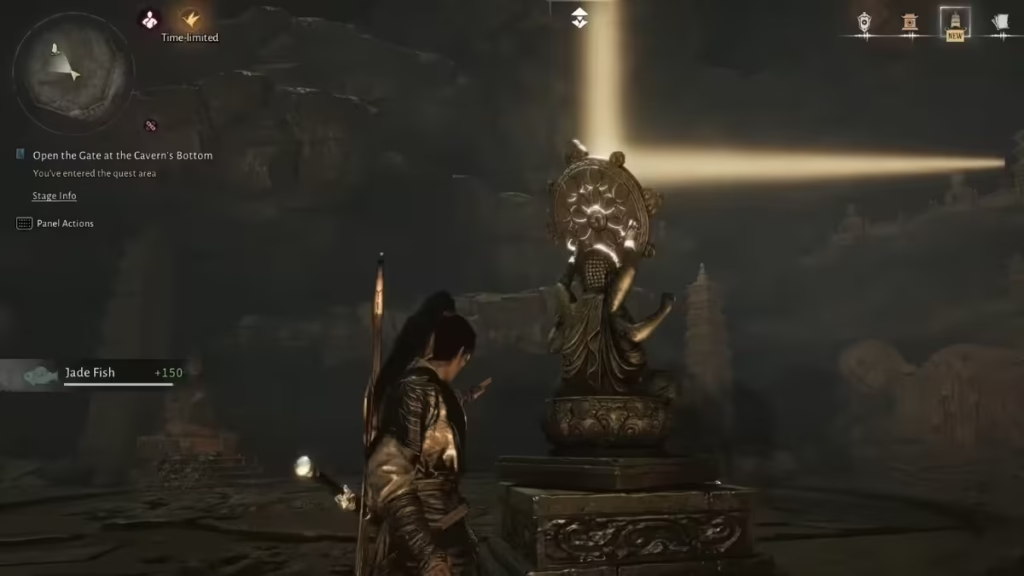
Inside the pagoda, you’ll find a Buddha statue holding a mirror. Activate Meridian Touch to rotate it. Guide the light beam to the symbol on the wall and open a narrow passage leading deeper underground.
Bronze Mirror Contraption Puzzle
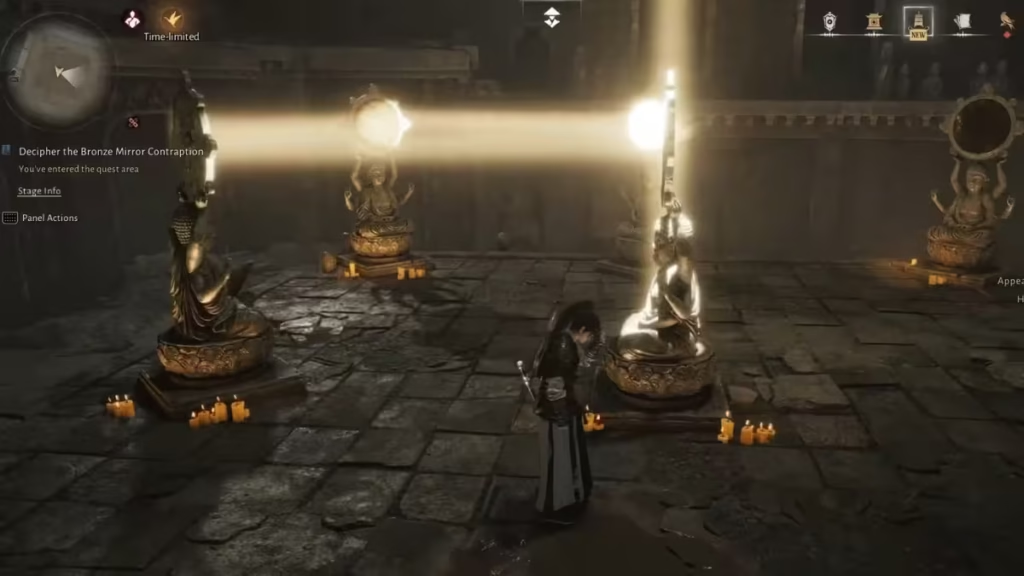
The next chamber contains seven statues with bronze mirrors. The goal is to redirect the beam of light until it reaches the seal on the far wall. The sequence requires gradual adjustment of each statue until the beam escapes the loop and strikes the target, opening the way forward.
Falling-Floor Trap and Mechanical Puppets
After crawling through the small opening, the ground collapses. Investigate the corpse to trigger a fight with three Mechanical Puppets. These enemies cannot be damaged normally—only parries break them. Defeating them grants the Arhat Hall Key used to unlock the next door.
Upper Cavern and Additional Puppets
Move through the narrow stone passage and defeat another group of puppets. This leads to the Mural Corridor.
Mural Corridor and Thousand-Buddha Cavern
You’ll find murals, a collectible scroll (Handwritten Copy), and a platforming path leading downward. After a cutscene, the descent continues through ropes, ledges, and collapsing floors.
At the very bottom, rotate one final mirror to break a sealed stone door and enter the Buddha Grotto.
Boss Fight: Tian Ying (Miaoshan)
The final chamber features Tian Ying, one of the toughest early-game encounters. The fight unfolds across three escalating phases—ranging from deliberate single-strike patterns to wide-area shockwaves, statue attacks, and summoned clones. Mastery of parries and movement is essential.
Once Tian Ying falls, an underwater escape sequence completes the quest.
All Rewards for Completing The Promised Light
Upon reaching the Floral Expanse Beyond, the quest ends and you receive a substantial set of rewards:
- Yaksha Rush (Mystic Skill)
- Medicinal Tales
- Ebon Iron ×4
- Echo Jade ×54
- Qinghe Exploration Points ×80
- Enlightenment Points ×100
- Character EXP ×17,000
- Zhou Coins ×17,000
These rewards support crafting, martial arts progression, exploration advancement, and overall character growth, making this one of Qinghe’s most rewarding chapters.
Read More:
- Where Winds Meet Twin Lions Guide: How to Beat the World Boss
- Where Winds Meet Dragon Keys: How to Get and Use Them
- Where Winds Meet Drunken Precision or Rhetoric Edge: Which Talent Should You Choose First?
- Where Winds Meet Giveaway Emote: How to Unlock It
- How to Get to Kaifeng in Where Winds Meet: Requirements, Unlock Steps & Travel Guide
- How to unlock Celestial Seize in Where Winds Meet
- How to Create a New Character in Where Winds Meet
- How to Get a Horse in Where Winds Meet – All Methods to Get Your First Mount
Collecting both halves of the Buddha’s Light Jade is not optional—The Promised Light cannot begin without them. Once placed atop the pagoda, the quest unfolds as a full dungeon experience that blends puzzles, exploration, and one of the region’s major boss encounters. Completing it also unlocks the Halo Peak Campaign, offering repeatable fights and additional rewards. Play Now!

