The Tomb of Gibborim in Indiana Jones and the Great Circle: The Order of Giants is one of the most intricate challenges in the Cloaca Maxima section. To progress, you’ll need to solve a series of puzzles tied to the Nameless Crusader’s journey, using multiple scepters to rotate discs on the chamber floor. Each step reveals more of the Crusader’s story and eventually grants you a piece of the Cylinder.
Getting Started: Entering the Tomb
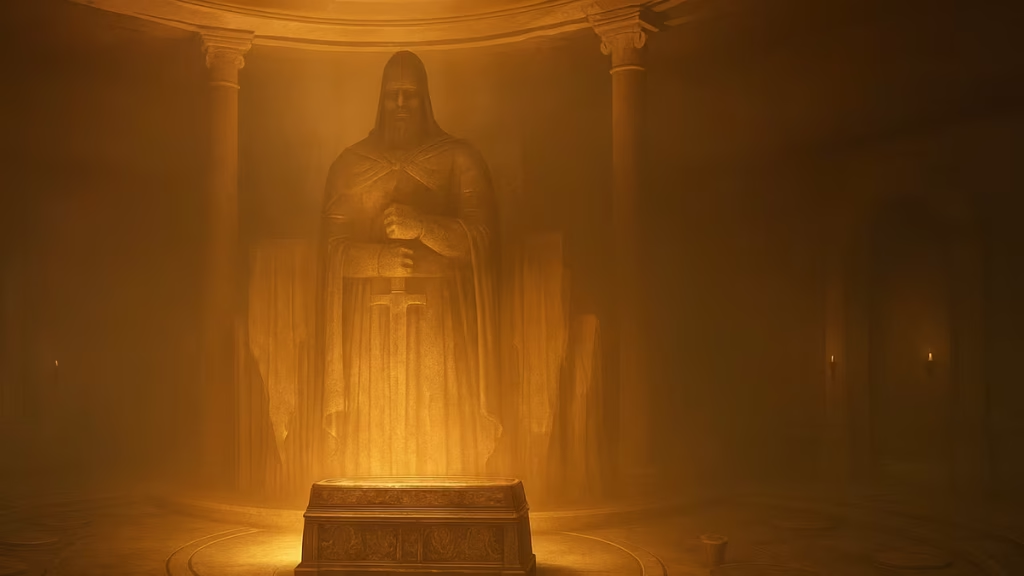
After navigating through the sewer system and passing the underground tree, you’ll reach the Tomb of Gibborim chamber. Inside, you’ll see large Crusader statues surrounding a coffin, with several circular discs embedded in the floor.
Take a photo of the statue in the center to start. From here, your goal is to collect and use four scepters—Cross, Shield, Sword, and Trinity—each tied to different murals and directional disc puzzles.
Cross Scepter Puzzle
- Pick up the Cross Scepter near the Cross wall and insert it into the panel to reveal a mural.
- Photograph the mural to learn that the Crusader journeyed from Halygast (sunrise) and then to Aethopolis (facing west).
- Use the scepter on the floor discs to align:
- Halygast → East
- Aethopolis → West
Solving this opens the first door.
Shield Scepter Puzzle
- Enter the new chamber and pull the lever. Flames will circle around in a repeating pattern.
- Follow the fire safely and rotate the three knobs to release the Shield Scepter.
- Return to the Shield wall, insert the scepter, and photograph the mural.
- The clues indicate the Crusader moved south to the ruins of Nakhla and aided Hori Castrum from the east.
- Align the discs:
- Nakhla Pagus → South
- Hori Castrum → East
This opens the next chamber.
Sword Scepter Puzzle
- Inside, you’ll find the Sword Scepter and a Skeleton’s Note. Ignore the note—it’s incorrect.
- Photograph the mural to reveal three key hints:
- Al-Mansur Castra saw a ship to the west.
- At Rudera, the Crusader faced east.
- At Pugna, he faced north.
- Align the discs:
- Al-Mansur Castra → West
- Rudera → East
- Pugna → North
Another part of the tomb unlocks, leading you to the final challenge.
Trinity Scepter Puzzle
- Retrieve the Trinity Scepter from the Ring of Sigils room. To unlock it, rotate the brazier handles in the order shown on murals with Roman numerals:
- Keys (I) → Shield (II) → Apple (III) → Snake (IV)
- Insert the scepter into the Trinity wall and photograph the mural.
- The story reveals the Crusader and Marie gazed at Castle Malum, ran toward the fire, and sought salvation to the north.
- Align the discs:
- Santi Luciani Ecclesia → South
- Malum → North
- Custodis Fastigium → East
The Final Step: Claiming the Cylinder
Once all scepter puzzles are complete, the coffin in the center opens, revealing the Sword of Gibborim. Take the sword and plunge it into the Crusader statue’s heart. The statue opens its hand, granting you the Cylinder Piece.
See also: The Tomb Easter Egg Guide – Complete Walkthrough for Black Ops 6 Zombies
Be prepared: three cultists ambush you immediately after. Grab a weapon from the nearby table and finish the fight to exit the tomb.
Quick Tips: Tomb of Gibborim Puzzle
- Always take photos of murals—they act as memory aids and give Indy’s commentary on directions.
- Think of the chamber floor like a compass: facing the statue means you’re looking north.
- Be patient during the flame puzzles; observe the pattern before making your move.
- Don’t rely on the Skeleton’s Note—it’s a red herring.
The Tomb of Gibborim puzzle is one of the standout moments in Indiana Jones and the Great Circle: The Order of Giants. With its layered mechanics, mix of combat and exploration, and the unfolding story of the Nameless Crusader, it feels like a true Indiana Jones set piece—rewarding both your puzzle-solving skills and your sense of adventure. Play Now!

