Totenreich is the fourth Zombies map in Call of Duty: Black Ops 7, arriving with Season 3 Reloaded. The map drops players into Eidskallen, a Norse fishing village dragged into the Dark Aether, with a new Wonder Weapon, a multi-step main quest, and a multi-phase boss fight waiting at the end. Despite the length, the quest is beatable solo with the right preparation.
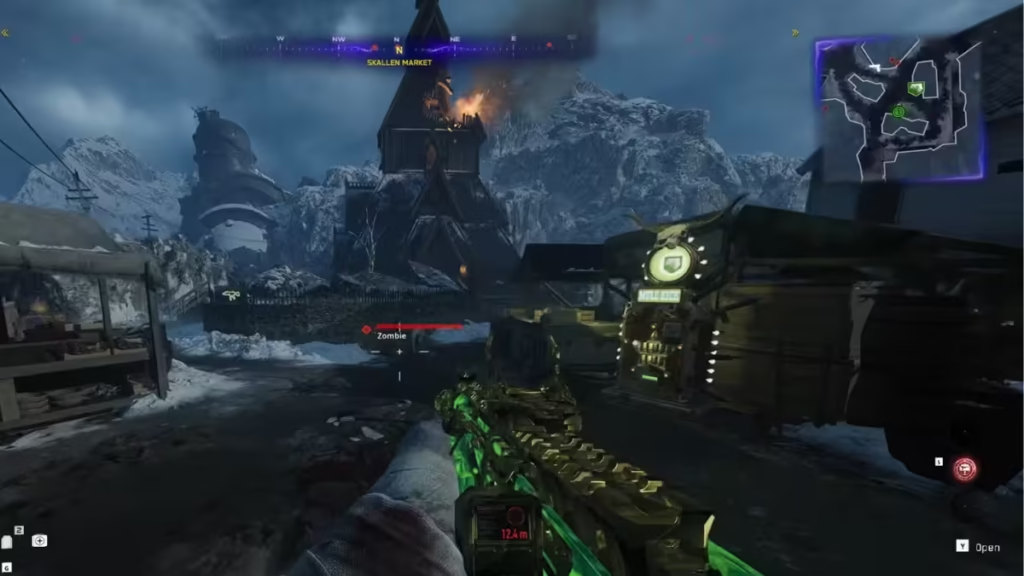
This guide walks every step in order, from activating Pack-a-Punch through the Uranium puzzles, Atomkraft Core defense, and the full Dravakar boss fight.
Table of Contents
All Main Quest Steps for Totenreich Easter Egg
- Activate Pack-a-Punch
- Acquire the Jotunn Star Wonder Weapon
- Get the Crowbar, Flak Gun Round, and Transmitter
- Solve the Tyr Blinking Lights Puzzle and get the Wunderbarrage Controller
- Collect all three Uranium pieces
- Solve the Claw Machine puzzle and get the Atomkraft Core
- Charge and deliver the Atomkraft Core
- Cook the Dravakar Shard with the Disciple Injection
- Activate Runes with the Sun Stone (Sky Compass Puzzle)
- Defeat Dravakar
Recommended Loadout Before You Start
Entering the easter egg unprepared at round 8 wastes a 90-minute run. Set up this loadout first:
- Primary weapon: Triple Pack-a-Punch a fast-firing AR or SMG. The MP-40 is a strong pick for most steps.
- Perks: Quick Revive, Stamin-Up, Speed Cola, and Juggernog as the core four.
- GobbleGums: Near Death Experience, Shields Up, and Idle Eyes for boss safety.
- Armor: Always run full plates into defense phases and the boss.
- The Jotunn Star: Mandatory for most quest steps and the boss fight. Triple Pack-a-Punching it dramatically increases its damage output.
The Black Ops 7 Zombies Weapons Guide covers the full available arsenal, all equipment options, and how to obtain each weapon in the mode.
Step 1: Turn on the Power and Activate Pack-a-Punch
After spawning, make your way to Fishery Island. Take ziplines to both ends of the map and activate the power switches in Core Foundry and Skallen Market.
With power active, head northeast to the collapsed Origins giant robot, Tyr. Interact with Tyr’s Foot or Tyr’s Shoulder to enter. Hit the console inside to activate the robot, then exit. A corpse near your landing point drops the Admin Keycard.
Take the Admin Keycard to the War Factory bunker outside Core Foundry. Open the admin door inside to find the Glocke Drop Controller. Carry it to Fishery Island and activate it. Survive the wave that follows, and Pack-a-Punch spawns.
Step 2: Acquire the Jotunn Star Wonder Weapon
This step chains several sub-tasks together. Each one flows directly into the next.
Get the Chain Links
Enter the Dry Dock and find the Titan Crane building on the west side. Press the button on the right wall to lower a wall from the crane. Run, jump off the lowered wall, and interact with the front of the ship as you fall to collect the Chain Links.
Get the Chilly Chunks
On Storm Bridge, find the truck parked near Deadshot Daiquiri. Look into the truck bed to pick up Chilly Chunks. Place them on the table by the middle tree in Skallen Market.
Kill the White Zursa Bear and Get the Lantern
Wait in Skallen Market for a Special Round of Frost Zombies. A white Zursa bear spawns during this round. Kill Vornaketh to collect the Lantern.
Head east of Skallen Market to a hut in the Burial Grounds. Interact with the left side of the front door to open it. Inside, place the Lantern on the stone altar.
Solve the Constellation Puzzle
Four symbols appear on each side of the altar. Match each side’s symbol to the corresponding constellation rotating around the walls, in this exact order:
- Left side (facing south)
- Right side (facing north)
- Back side (facing west)
- Front side (facing east)
If you interact in the wrong order, the symbols vanish. Interact with the table symbol again to reset. Once all four sides match correctly, Astrid spawns.
Follow Astrid to the Lighthouse
Follow Astrid from Skallen Market toward Eidskallen Square, killing zombies near her at each stopping point to feed souls. Do not sprint ahead. She unlocks a jumping puzzle at the square that leads to the Lighthouse entrance.
Climb the stone platforms up the Lighthouse. At the top, enter the room and pick up the Jotunn Star Wonder Weapon, which replaces your dedicated melee slot.
Step 3: Get the Crowbar, Flak Gun Round, and Transmitter
Get the Crowbar
Return to the Lighthouse second floor. On the east-facing shelf, pick up the Crowbar.
Find the Flak Gun Round
Check the Cargo Manifest note on the shelf inside the War Factory Admin Room. It lists ID codes for all four crates and marks which one contains the Flak Gun Round (PZGR .39). The ID is randomized per run, so check it before you start opening crates.
Crate locations:
- Crate 1: Core Foundry, downstairs near the Wall-Buy weapon
- Crate 2: War Factory, northwest wall
- Crate 3: Dry Dock, southwest corner behind Speed Cola
- Crate 4: Fjord Road, south wall
Use the Crowbar to open each crate. Three of the four crates stun you. Only the correct crate drops the Flak Gun Round. Opening all four without checking the manifest means absorbing three stuns in a row.
Fire the Flak Gun and Get the Transmitter
Take the Flak Gun Round to the cannon on the southwest side of Beacon Island. Load the round by interacting with the cannon, then melee the back of it with the Jotunn Star to fire. The round hits the robot head at Eidskallen Landing.
Zipline to Eidskallen Landing and approach the damaged robot head. Hold the interact button to search through the wreckage and pick up the Transmitter.
Enter Tyr’s Head, climb the ladder inside, and place the Transmitter on the left side of the upper platform.
Step 4: Solve the Tyr Blinking Lights Puzzle and Get the Wunderbarrage Controller
Return to Tyr’s Head the following round. Stand back from the main console and watch the left and right blinking lights. After both lights flash simultaneously, they begin blinking individually. Count the blink total for each light to get your first code pair (left blinks = Amplitude, right blinks = Frequency). Wait for the second simultaneous flash, then count the second sequence the same way.
Tip: Record this on your phone. The lights blink fast and you only have about a minute inside Tyr’s Head.
Head to Core Foundry and find the frozen rope leading to the array tower near Double Tap. Throw a Molotov or use a Napalm Burst ammo mod to melt the ice. Climb the rope to the top.
Interact with the radio dial transmitter and set the left dial (Amplitude) to your left-light count and the right dial (Frequency) to your right-light count. After the first set of rockets fires, interact again and input the second code. Once both sequences are confirmed, the Wunderbarrage Controller appears in the room opposite Double Tap inside Core Foundry.
Step 5: Collect All Three Uranium Pieces
All three Uranium pieces can be collected in any order. The methods below are the standard routes confirmed across multiple runs.
Uranium 1: Fishing Rod and Irradiated Ravager
Pick up a fishing rod from barrels around the map. Find a fishing spot where a glowing green fish is visible in the water. Fishing spot locations:
- East and west of Eidskallen Landing
- East and northwest of Eidskallen Square
- East, south, and northeast of Beacon Island
- Southwest of Tyr’s Shoulder and southeast of Tyr’s Foot
- Northeast of Dry Dock
- East and north of Fishery Island
Interact with the red rod holder to cast. When the rod glows blue, interact again to reel in. This spawns a horde of Ravager zombies. Find the Irradiated Ravager inside the horde (look for the dark green gas cloud surrounding it). Damage it until it teleports, track it down using the HVT marker on your tac-map, and kill it a total of three times to drop the first Uranium.
Note: If the Ravager disappears immediately after the rod glows, progress to the next round and return to that same fishing spot.
Uranium 2: ARC-XD and the Genetic Lab
Grab the free ARC-XD from the crate in the southwest area of Eidskallen Square. Head to Core Foundry and attack open the wall vent on the left side of the zipline area (top floor).
Deploy the ARC-XD through the vent. Drive it down the stairs, use the speed boost to launch across the ramp to the boat, then detonate it near the red barrels blocking the door. This opens access to the Group 935 Genetic Lab entrance on Fishery Island, near the Pack-a-Punch machine.
Inside the lab, look into the green-lit hallway. Two doors display a nuclear hazard symbol beneath their number (1 through 5). Note those numbers. Each number maps to a letter (1=A, 2=B, 3=C, 4=D, 5=E). Find the two matching lettered jars around the lab and place both on the south wall machine. They fill with purple liquid. Collect them and use them on the skeleton at the north table to produce the Necrospike.
Take the Necrospike to the holding cell door. Lockpick it by rotating until each pin glows and sets. Pick up the Uranium inside.
Uranium 3: Glocke Drop Controller
Craft a Glocke Drop Controller at any Crafting Table for 2,000 Salvage, or fish for one as a random drop. Wait until you have a large group of zombies following you, then deploy the Glocke Drop in an open area. It will periodically pulse and launch nearby zombies into the air. Shoot every airborne zombie before they land.
Repeat across multiple pulses until you reach 20 floating zombie kills. The Glocke Drop then releases the third Uranium.
Step 6: Solve the Claw Machine Puzzle and Get the Atomkraft Core
Take the Wunderbarrage Controller to the building southeast of Melee Macchiato in Dry Dock. Aim it at the ground near the closed door and fire. The explosion clears the debris from the Machine Workshop stairs.
Head inside and interact with the Claw Machine. You need to connect the three Uranium canisters so the power dial arrow lands in the green zone without crossing into the red. The exact configuration is random each run.
Strategy: Place one Uranium piece to activate the large main circuit cluster. Then place the remaining two pieces in isolated positions away from the cluster. This usually keeps the charge within the green zone. If you overshoot or undershoot, wait for the next round and try a different configuration.
When the dial holds green, pick up the Atomkraft Core.
Important: You cannot sprint or use ziplines while carrying the Atomkraft Core.
Step 7: Charge and Deliver the Atomkraft Core
Carry the Atomkraft Core to Eidskallen Landing and place it on the crate to the right of Quick Revive. Enter Lief’s Boat Repair next door and interact with the generator facing west to start a 2-minute charging countdown.
Defend the Atomkraft Core from zombies during the countdown. If the generator cuts out mid-defense, walk back inside and restart it. Once the timer ends, pick up the Charged Atomkraft Core.
Warning: The Charged Core drains your health while you carry it. Drop it (hold Circle/B) briefly to recover health, then keep moving. Watch out for ice spikes erupting from the ground on the path north. The Jotunn Star can destroy them as you go.
Head to Storm Bridge. Find the drum with the yellow stripe in the center of the bridge. Place the Charged Atomkraft Core on it to trigger the Tyr vs. Dravakar event.
Step 8: Cook the Dravakar Shard with the Disciple Injection
After the event, head to the northwest side of Tyr’s Foot and pick up the Dravakar Shard.
Carry the shard to Blodheim Hall in Eidskallen Square and place it on the central fire pit. Use a charged Jotunn Star Flame Strike on the pit. The fire turns purple when done correctly.
Grab the free Disciple Injection inside the Eidskallen Stave Church next to Skallen Market. If you already used it earlier in the run, craft a replacement at the nearby Crafting Table for 2,500 Salvage.
Return to Blodheim Hall and use the Disciple Injection to transform. Make sure several zombies are nearby. Use the Disciple’s Scream ability on the shard until it starts spinning on its own. Then switch to the Grab ability and throw zombies directly onto the spinning shard. Once enough zombies hit the shard, a lockdown begins.
An HVT Necropincer spawns inside the lockdown. Kill it to drop the Sun Stone. Pick it up once the lockdown ends.
Step 9: Activate the Runes with the Sun Stone (Sky Compass Puzzle)
Carry the Sun Stone to the Eidskallen Stave Church and place it on the central altar pedestal. Melee it with the Jotunn Star to fire a beam into the sky that generates a floating compass above the church.
The compass shows three arrows. Each arrow has horizontal tick marks indicating the order to light the bonfires:
- 1 tick mark = light first
- 2 tick marks = light second
- 3 tick marks = light third
Each arrow points at a unique symbol. Note which symbol each arrow points to and the order tied to its tick marks. The symbols change every run.
Around the map, find floating platforms with matching symbols at these possible locations:
- Burial Grounds (east side)
- Eidskallen Square (center)
- Eidskallen Square (left of the Lighthouse)
- Eidskallen Landing (near the landing area)
- Tyr’s Foot (left of Storm Bridge)
Charge the Jotunn Star by killing zombies, then use a Flame Strike on each symbol location in the correct tick-mark order. Leave plenty of zombies alive between bonfires so you can recharge the Jotunn Star. When all three bonfires are lit in sequence, all three arrows merge into one. The boss fight is now available.
Step 10: Defeat Dravakar (Full Boss Fight Guide)
Enter Tyr’s Head and interact with the console to input the coordinates. This transports you to Shadowsmith’s Lair and begins the boss fight.
Come prepared with Triple Pack-a-Punch weapons, a fully charged Jotunn Star, all perks, and full armor plates. Dravakar has a massive health pool and multiple phases.
Phase 1: Red Weak Spots
Tyr wrestles Dravakar while you hold off zombies. Glowing red weak spots appear on Dravakar’s body. Shoot them whenever they appear between zombie waves. Deal enough damage and Dravakar retreats.
Phase 2: Ice Attacks and the Flammenfale Trap
Tyr temporarily disappears. Dravakar launches ice attacks across the arena floor. Dodge them while clearing zombies. When Tyr returns, Frost Zombies spawn in large numbers.
Purchase the Flammenfale fire trap at the center of the arena for 2,000 points. It keeps you warm and slows Frost Zombie spawns temporarily. Continue shooting Dravakar’s red weak spots when they appear. Repeat the Phase 1 and Phase 2 damage loop two more times.
Phase 3: Gjallafrost Floating Heads
Dravakar retreats and sends one Gjallafrost floating head. This head is fully immune until its eyes turn red. Wait for the eyes to glow red, then fire a charged Jotunn Star shot directly into its mouth to drop its shield. Follow up immediately with bullet weapons to destroy it. Activate the arena traps to avoid freezing damage while the head is active.
Phase 4: Meteor Shower
Dravakar returns with red weak spots exposed and adds a meteor shower to its attacks. Use the stone pillars around the arena for cover. Step out to fire at weak spots, then duck back behind a pillar before the next meteor wave arrives.
If Dravakar freezes the entire arena, sprint to the center Flammenfale trap, activate it to defrost your weapons, then resume shooting the weak spots.
Phase 5: Two Gjallafrost Heads
Dravakar retreats again and sends two Gjallafrost heads. This time each head can also launch iceberg attacks that knock you into the air. Take both heads down as fast as possible using the same charged Jotunn Star mouth-shot method, then deal with them individually. After both fall, Dravakar returns for another round of the meteor shower and weak spot loop.
Phase 6 (Final): Eyes Weak Spot
Dravakar seals all exits with ice pillars, locking you in the center of the arena. He launches a continuous meteor barrage. His glowing eyes are now the only weak spot.
Dodge meteors by strafing left and right or going prone when a volley comes in. Zombies stop spawning in this phase, so your only concern is dodging and shooting. Focus all firepower on his eyes. Once his health drains, Tyr grabs Dravakar, the Shadowsmith is freed from the ice, and the easter egg ends.
Totenreich Easter Egg Rewards
Completing the Totenreich main quest earns the following:
| Reward | Condition |
|---|---|
| Ambition Richtofen Operator Skin | Complete the main quest |
| Totenreich Main Quest Calling Card | Complete the main quest |
| 10,000 XP | Complete the main quest |
| Calling Card + 5,000 XP | Complete the Totenreich Mastery Challenge |
| Calling Card + 10,000 XP | Collect all Intel (Audio Logs, Documents, Artifacts) |
| Exclusive Calling Card Variant | Complete the quest before Directive Mode unlocks |
The Ambition Richtofen Operator Skin is the headline reward. The XP is also worth grabbing if you are working through camo challenges on your current loadout, as a full easter egg run dumps a large chunk of weapon and player XP in one go. Play Now!

