Diablo 4 Season 9 introduces Horadric Spells, which players can unlock and improve. Horadric Strongrooms are an important part of this season because they help players gather the items needed to upgrade these spells. Here’s how to find Horadric Strongrooms, complete them, and earn rewards.
Note: Horadric Strongrooms are part of the seasonal content. You need to create a seasonal character to access them, and they aren’t available in the main game outside of the seasonal cycle.
What Are Horadric Strongrooms?
Horadric Strongrooms are small dungeons found inside Nightmare Dungeons and Escalating Nightmares. They’re timed events where you fight monsters, choose modifiers that affect how the fight goes, and battle a boss at the end. Running Strongrooms helps you collect Horadric Phials, Horadric Knowledge, Arcana, and modifiers for Horadric Spells.
Each Strongroom takes place on one floor with Shrines spread out across the area. The layout is similar to the Kurast Undercity activity from Vessel of Hatred, but it’s all contained in a single level. Your goal is to fight enemies and earn Horadric Attunement, which decides how good your rewards will be when you’re done.
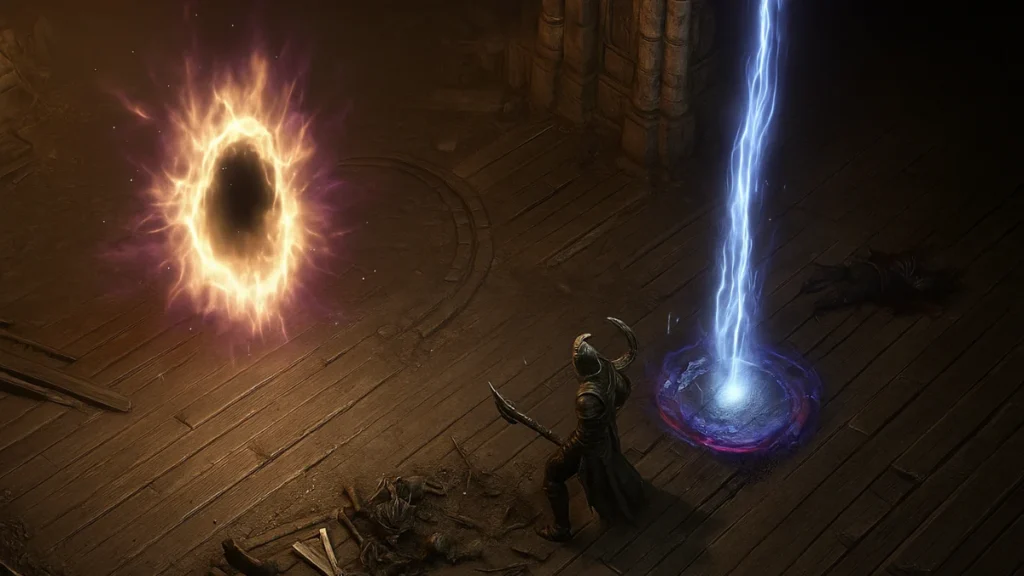
How to Find Horadric Strongrooms
Horadric Strongrooms can appear in any Nightmare Dungeon. Higher difficulties give you a better chance of finding one, but they can show up on almost any level.
Sometimes, an energy wisp appears while you’re in a Nightmare Dungeon. If you follow it, it can guide you straight to a Horadric Gateway, saving time while you search.
Horadric Wayfinder
Before you can start finding Strongrooms, you’ll need the Horadric Wayfinder. You get it by finishing Briona’s first task, which is clearing Eldhaime Keep. Once you have the Wayfinder, it points you toward Horadric Gateways when you’re exploring Nightmare Dungeons or Escalating Nightmares.
When you reach a Gateway, activating it makes monsters appear. After you defeat them, a portal opens up that takes you into the Strongroom.
Ways to Improve Your Chances
Not every Nightmare Dungeon guarantees you’ll find a Strongroom. Here’s how you can improve your odds:
- Run Nightmare Dungeons on higher difficulties.
- Clear the entire dungeon instead of skipping parts.
- Upgrade your Horadric Wayfinder using Horadric Phials.
- Look for Nightmare Sigils that say they have the Horadric Strongroom Affix. These Sigils guarantee you’ll find a Strongroom in that dungeon.
Each Nightmare Dungeon or Escalating Nightmare only has one Strongroom. However, during Escalating Nightmares, you can find multiple Strongrooms if each one is in a different tier or dungeon in the sequence. To run more Strongrooms, you’ll need to explore other dungeons with the right Sigils.
How to Complete Horadric Strongrooms
Starting the Pillar Ritual
When you enter the Strongroom, you’ll see the Horadric Artifact Pillar. Activating this starts the Pillar Ritual, which causes waves of monsters to spawn. Killing these enemies gives you Horadric Attunement, which increases the rewards you’ll earn. Finishing the Pillar Ritual also gives you a bonus chunk of Attunement.
Players have 100 seconds to clear as many enemies as they can and build up their Attunement score. The more Attunement you have, the better the rewards when you’re finished. If you fill your Attunement meter before time runs out, the boss will spawn early instead of waiting for the countdown to finish.
If you’re defeated while inside the Strongroom, you’ll respawn and can keep fighting, but dying costs you precious time.
Choosing Horadric Statue Tests
After finishing the Pillar Ritual, you’ll see Horadric Statues. Each statue changes how the Strongroom works by adding modifiers. Some make enemies stronger, while others affect how quickly you need to move or fight. The number of statues you have to activate depends on how high the dungeon’s difficulty is.
Here’s a list of the Horadric Statues and what they do:
| Test Name | Effect |
|---|---|
| Test of Restlessness | Getting close to Pillars causes extra ambushes. |
| Test of Doom | Gives you an Idol worth +25% Horadric Attunement, but it drops if you use a potion. |
| Test of Chains | Makes you kill tethered monsters during the Pillar Ritual. |
| Test of Resistance | Reduces all resistances by 20% each time you interact with a Shrine; also gives +5 Swiftness Motes. |
| Test of Might | Summons a special demon when you reach 2,000 Horadric Attunement. |
| Test of Vitality | Raises potion cooldowns by 5 seconds after using Shrines; killing monsters gives +25% Horadric Attunement for 10 seconds. |
| Test of Movement | Every second Shrine gives 3 Swiftness Motes. |
| Test of Ferocity | Monsters deal 50% more damage and the Pillar Ritual is 25% faster. |
| Test of the Unsettled | Completing Pillar Events triggers more ambushes. |
| Test of Speed | Moving close to Pillars grants 2 Swiftness Motes. |
| Test of Mentality | Monsters have 50% more health and the Pillar Ritual goes 25% faster. |
| Test of Frenzy | Activating Shrines triggers ambushes. |
| Test of Efficiency | Speeds up the Pillar Ritual by 25% but deals damage to you near Pillars. |
| Test of Lunatics | Pillars link to nearby Lunatics; killing them gives +8 Horadric Attunement. |
| Test of Slaughter | Forces you to kill nearby monsters as part of the Pillar Ritual. |
| Test of Agility | Raises Evade cooldowns by 5 seconds after using Shrines; killing monsters gives +25% Horadric Attunement for 10 seconds. |
| Test of Weight | Gives an Idol worth +25% Horadric Attunement, but you lose it if you Evade. |
| Test of Celerity | Staying close to Pillars gives you 3 Swiftness Motes. |
| Test of Tethering | Requires killing tethered monsters during the Pillar Ritual. |
| Test of Wandering | Catching Wisps of Energy gives +25 Horadric Attunement. |
| Test of Lure | Luring Mummies to Pillars grants +40 Horadric Attunement. |
Picking which statues to activate can make a Strongroom either manageable or extremely tough, depending on how risky you’re feeling.
Collecting Horadric Attunement
Once you’ve chosen your Statues, you’ll head into the Main Chamber to fight as many monsters as you can before the timer hits zero. The more Attunement you earn, the better the loot waiting for you at the end.
Some players choose to lower their game’s difficulty before running a Strongroom to kill enemies faster and earn higher Attunement. However, this also reduces the rewards you’ll get for each rank
Using Horadric Artifact Pillars
Throughout the Main Chamber, you’ll find Horadric Artifact Pillars. Staying near these Pillars completes rituals that help boost how much Attunement you get from killing monsters. Interacting with these Pillars is key if you want to hit higher reward ranks.
Activating Sacrifice Shrines
Sacrifice Shrines are scattered around the Main Chamber. They spawn extra enemies when activated, giving you more chances to earn Attunement. While they don’t directly give Attunement, they help increase the number of monsters you can defeat during the run.
Fighting the Final Boss
When the timer runs out—or earlier if you hit maximum Attunement—the boss of the Strongroom will appear. Taking down this boss completes the Strongroom and lets you collect your rewards. The boss can be tough, so make sure you’re stocked up on potions and ready to fight.
Horadric Strongroom Rewards
Beating the boss unlocks the Grand Horadric Cache, which can hold:
- Horadric Phials
- Horadric Knowledge
- Arcana
- Modifiers for Horadric Spells
The rewards you get depend on how much Horadric Attunement you collected during your run. Players can earn over 2,000 Horadric Attunement in a single Strongroom, which greatly improves your chances of getting high-quality loot. After leaving the Strongroom, you’ll get to choose from different Horadric Caches based on your total Attunement.
The main reason for farming Horadric Strongrooms is to progress the seasonal Horadric mechanics. Running these dungeons helps you gather materials to unlock new Horadric Spells, upgrade spellcraft modifiers, and build reputation with the seasonal vendor, which are all important for getting the most out of Diablo 4 Season 9.
Horadric Strongrooms are a big part of powering up your builds in Season 9. Running these challenges lets you collect Horadric Phials, Horadric Knowledge, and other valuable items, helping you become stronger and unlock the full potential of your Horadric Spells- Play Now.
Related Guides You Might Like:

