The One Flew mission drops you inside the Curdsville Nuthouse, one of the more puzzle-heavy levels in Mouse: P.I. for Hire. You will need to crack a three-digit door code, fill the Inkwell, solve a piano puzzle, and track down Millie across multiple floors all while hunting seven collectibles you can grab in a single run without backtracking.
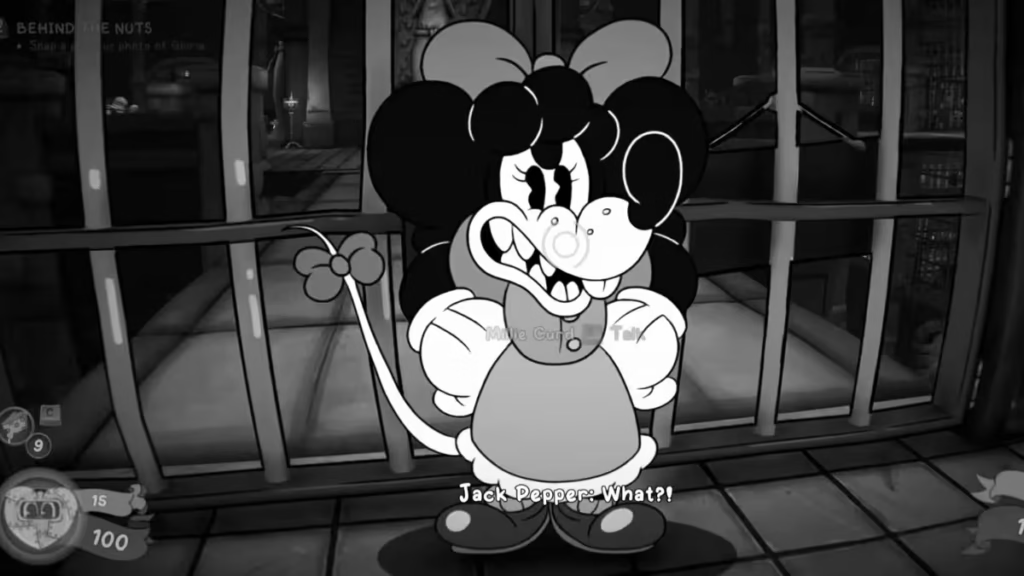
This walkthrough covers every step in order, including all Schematic, Comic Book, Baseball Card, and Optional Clue locations.
Table of Contents
One Flew Mission Key Objectives
- Open the three-digit code door in the Nuthouse
- Fill the Inkwell and obtain the Jar-Head gun
- Solve the piano puzzle, find Gloria, and photograph her for the Behind the Nuts side mission
- Chase after Millie and reach the lift
Before you start: Talk to Tammy in the P.I. Office area to activate the Behind the Nuts side mission. You need to trigger it before entering the Nuthouse, or you will miss the Gloria photo opportunity.
All One Flew Collectibles at a Glance
There are seven collectibles to find in One Flew. Here is the full breakdown:
| Collectible | Count |
|---|---|
| Comic Books | 1 |
| Baseball Cards | 1 |
| Schematics | 4 |
| Optional Clues | 1 |
| Total | 7 |
Heads up: You cannot return to the Curdsville Nuthouse after finishing One Flew. Any missed Comic Books, Newspapers, or Baseball Cards can be purchased from Soup to Nuts in the P.I. Office area or from Roadhouses.
How to Complete One Flew in Mouse PI for Hire
Step 1: Unlock the Rear Gate and Enter the Sewer
Pass through the rear gate and work through the sewer area. Defeat all enemies you encounter before moving forward.
Step 2: Open the Three-Digit Code Door (Code: 4-5-1)
In the northeast corner of the second sewer room, you will find a door locked by a three-digit code. Set the levers on the wall to 4-5-1 and press submit to open it.
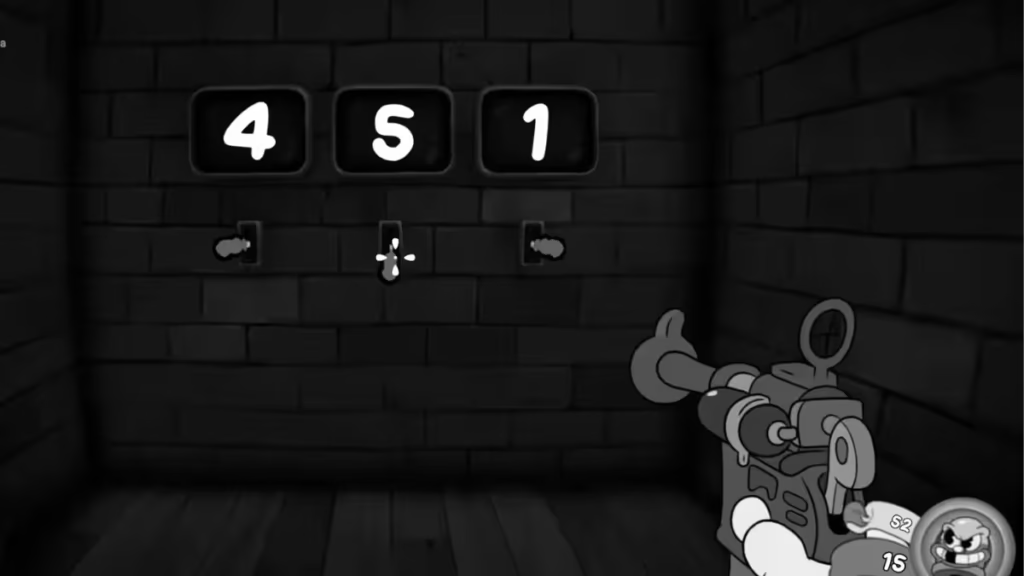
Opening this door is optional and not required for 100% completion, but it is worth doing for the extra loot inside.
After dealing with the door, return to the second sewer room and climb the ramp on the west side. Go through the vent at the top.
Step 3: Enter the Prison and Grab the Optional Clue
Collectible: Optional Clue
Enter the prison area and defeat every enemy on the floor. Climb the stairs and use your Wall Jump to reach the open door of a nearby office. On the desk inside, you will find the Optional Clue.
After grabbing it, shoot the barrel on the ground in the office to destroy the floor below. Drop through the hole, flip the switch when you land, and follow the path through the prison into the Decontamination Chamber.
Step 4: Talk to Millie and Enter the Water Area
When the Decontamination Chamber door opens, approach Millie and speak with her. Shoot the target that appears above her head and enter the water-filled room ahead.
Collectible: Schematic #1
Dive into the water and swim under the bridges to find an opening into the central structure. Follow the path inside and pick up the Schematic sitting on top of a crate.
Swim back out and return to the bridge at the start of the area. Use Wall Jumps on the platforms the statues hold to cross the room. Shoot the targets in the walls to rotate the statues as needed. At the last bridge, shoot the target and step into the Warp-Pipe.
Flip the switch in front of you, cross the bridge, flip the switch on your left, and continue forward to catch up with Millie.
Step 5: Visit the Jar-Head Room and Get Schematic #2
Collectible: Schematic #2
Talk to Jar-Head in the next area. Before you leave the room, grab the Schematic from the chalkboard in the northwest corner.
Move along the path, flip the switch, and drop into the area below. Kick the skeleton onto the surgical table to see what happens, this is the mechanic you need for the next section.
Step 6: Fill the Inkwell
In the Inkwell room, you will face several enemies. You do not need to kill them. Instead, lure each enemy toward one of the four restraint beds in the corners of the room and kick them onto the table. The machine will extract ink automatically each time you land an enemy on a bed.
Repeat this process until the Inkwell is full. Do not worry if you accidentally kill an enemy — another will spawn to replace it.
Step 7: Collect the Jar-Head Gun
After the Inkwell fills, head back up the ladder to the control room and flip the switch to transfer the ink to the brain chamber. Return to the room where you first met the brain and speak to it. The brain will transfer itself into the gun on display grab the Jar-Head gun from the case that opens.
The Jar-Head gun stuns enemies rather than dealing direct damage, making it a situational but useful tool.
Step 8: Grab the Comic Book and Schematic #3
Collectible: Comic Book
Head forward from the brain chamber and pass through the Warp-Pipe across from the typewriter. Look through the gate that opens on your right to find a Comic Book resting in a wheelchair.
Collectible: Schematic #3
Continue forward and climb the ladder. In the next area, check the right side and grab the Schematic on top of a crate before heading back to Millie.
Step 9: Solve the Piano Puzzle (C-A-G-E)
Talk to Millie and shoot the target above her head. Cross the bridge and look left to find a piano on the wall.
Piano Solution: Press C, A, G, E in this order.
The bridge to the south drops when you play the correct notes. Cross it and follow the path to find Gloria in a cell at the end of the hallway. Photograph her to complete the Behind the Nuts objective for Tammy.
Step 10: Chase Millie Through the Upper Floors
Continue after Millie. When flying enemies spawn, shoot the targets on the moving birdhouses to clear them. Cross the bridge that drops and press the button at the gate ahead to keep progressing.
Defeat the enemies in the next room and flip the switch at the bottom to open the gate. Jump on the trampoline past the gate, head to the next switch, use Wall Jumps to cross the gap, and work through the laundry area. Flip a switch and shoot a target to open the giant washing machines.
Step 11: Find the Baseball Card and Final Schematic
Collectible: Baseball Card
Exit through the top of the laundry room and enter the Warp-Pipe across from the next typewriter. Go through the gate on your left and jump onto the pipe on the left wall. Jump across the platforms to reach a second Warp-Pipe in a new area. Follow the path to the gate at the end and check the cabinet on your right to find the Baseball Card.
Collectible: Schematic #4
Return through the Warp-Pipe and talk to Millie again. Shoot the target above the gate on your right and proceed. On the wooden section of the path, jump onto the banister and jump across to the top of the central structure. Open the safe here to collect the fourth and final Schematic.
Head back to the path and flip the switch to lower the bridge into the central structure.
Step 12: Reach the Lift and Complete the Mission
Go inside the structure and enter the lift in the middle. Flip the switch to ride it up and step through the portal at the top. Passing through the portal completes the One Flew mission. Play Now!
All One Flew Collectibles Locations
| Collectible | Location |
|---|---|
| Optional Clue | Desk in the prison office, reached via Wall Jump |
| Schematic #1 | On a crate inside the central structure in the water room |
| Schematic #2 | Chalkboard in the northwest corner of the Jar-Head room |
| Comic Book | Wheelchair through the gate after the Warp-Pipe (post Jar-Head) |
| Schematic #3 | Crate on the right after climbing the ladder |
| Baseball Card | Cabinet at the end of the secret east hallway (via Warp-Pipe after laundry) |
| Schematic #4 | Safe on top of the central structure near the final lift area |
FAQs
What is the door code in the Curdsville Nuthouse in Mouse PI for Hire?
The three-digit door code is 4-5-1. Pull the first lever four times, the second lever five times, and the third lever once, then press the submit button to open the door.
How do you solve the piano puzzle in One Flew?
Approach the piano and press the keys in this exact order: C, A, G, E. The south bridge drops after the correct sequence, giving you access to Gloria’s cell.
How many collectibles are in the One Flew mission?
There are seven collectibles in One Flew — one Comic Book, one Baseball Card, four Schematics, and one Optional Clue. You can grab all seven in a single run without backtracking.
Can you miss collectibles in the Curdsville Nuthouse?
Yes. Once you complete One Flew, the Curdsville Nuthouse locks permanently. However, any missed Comic Books, Newspapers, or Baseball Cards can be bought from Soup to Nuts in the P.I. Office area or from Roadhouses.
How do you fill the Inkwell in Mouse PI for Hire?
Do not kill the enemies in the Inkwell room. Instead, lure each enemy to one of the four restraint beds in the corners and kick them onto the table. The machine extracts ink automatically. If you accidentally kill an enemy, another spawns to replace it.

