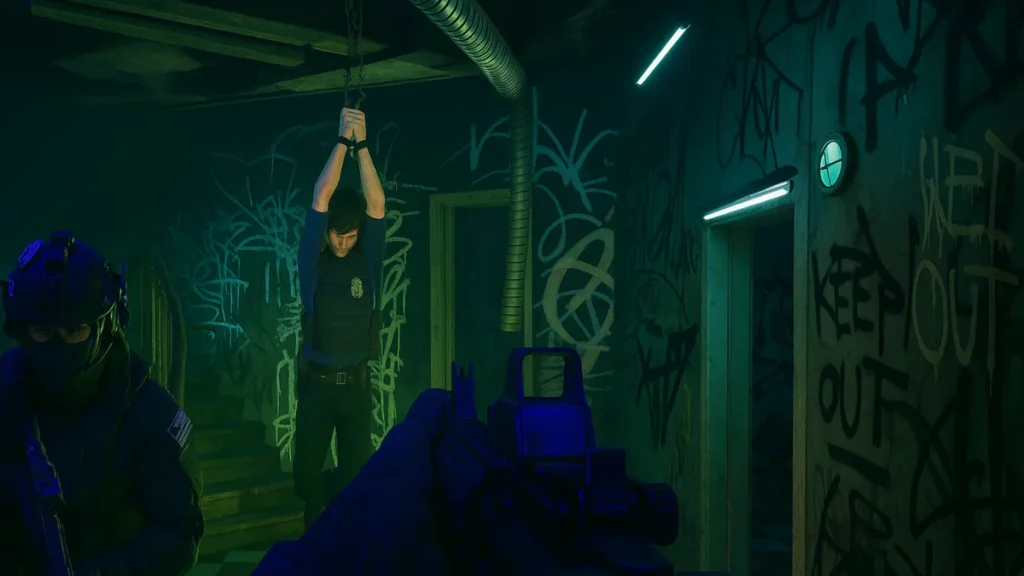
Stolen Valor drops players into one of the most haunting deployments in Ready or Not. A missing LSPD officer has been traced to a crumbling high-rise deep in 213 Hillside Rollers territory—an area known for its decaying infrastructure and violent resistance. What begins as a standard rescue op quickly spirals into a tense crawl through graffiti-covered corridors, booby-trapped doorways, and heavily armed gang members guarding a disturbing arsenal.
Set in the heart of Los Sueños’ criminal decay, this mission forces you to think like a tactician, move like a ghost, and act with absolute precision.
Mission Overview
- Map Name: Stolen Valor
- Location: Edgeware Apartments
- Faction: 213 Hillside Rollers
- Mode Type: Search and Rescue, Evidence Collection
- Mission Structure: 3-story apartment building
- Combat Style: Tight CQB with trap-heavy doors and flanking enemies
- Release Type: Los Sueños Stories free mission
- Unique Feature: Missing officer + 4 required evidence items
The mission opens with a teaser referencing the crumbling state of Los Sueños, adding narrative depth to your deployment.
Like the “23 Megabytes a Second” mission, Stolen Valor takes place in a multi-floor building where you need to clear each level carefully. However, Stolen Valor is more dangerous—traps are hidden behind doors, and enemies are more likely to ambush you from hallways and balconies.
Mission Objectives
There are 4 required pieces of evidence to collect, along with rescuing or recovering the missing officer. Proceed slowly—each floor has aggressive hostiles and frequent traps.
Objective 1: Recover the Missing Officer
- Location: Bottom Floor
- Access: Ramp entrance at side of building
- Steps:
- Enter through the lower floor door
- Move past the kitchen toward the central square staircase
- At the foot of the stairs, turn left, open the door, and enter
- Locate a room filled with narcotics and the downed officer
- Action: Inspect the officer’s body to log the first piece of evidence
This room often contains contraband that may count as soft objectives in future updates. Check and report them.
Inspecting the officer is also key to confirming the success of your primary rescue objective—not just gathering evidence.
Objective 2: Suitcase of Weapons – Flat 1 (Middle Floor)
- Location: First flat on the middle floor
- Steps:
- Return to square stairs and ascend to the first upper floor
- First door encountered leads to a kitchen and dining room
- Inside, a suitcase full of firearms is visible on a table
- Action: Inspect to gather the second piece of evidence
Peek doorways first—this flat can sometimes host a surprise suspect near the refrigerator or behind the kitchen island.
Objective 3: Suitcase of Weapons – Flat 2
- Location: Second flat on the same floor
- Warning: This flat is often booby-trapped
- Steps:
- Cross the stairwell to the opposite flat
- Check for traps on the door
- Suspects may appear from balcony access
- Locate a second suitcase full of weapons
- Action: Log it as the third evidence item
Flashbang before breaching to neutralize balcony campers. Some may attempt to jump down and flank.
Objective 4: Heavy Weapons Shelf (Top Floor)
- Location: Only flat on the top floor
- Steps:
- Head up to the third floor
- Clear the single apartment
- In the living room, inspect a weapons shelf loaded with heavy gear
- Action: This is the final evidence objective
Suspects in this room are more likely to rush or use body armor—non-lethal attempts may fail if not flash-stunned.
Tips for Securing S-Rank
To earn an S-rank, simply collecting evidence isn’t enough. You’ll need disciplined, non-lethal, and highly controlled execution:
- Do not kill suspects unless absolutely unavoidable
- Handcuff all suspects and civilians
- Avoid officer casualties and friendly fire
- Report every trap, civilian, and suspect
- Preserve rules of engagement—no early shots
Use the “Hold” command frequently while scouting tight corners—breaking formation leads to crossfire deaths.
Replay the mission with HUD off for immersion but ensure you check bodycams post-run to confirm missed reports.
Best Loadouts for Stolen Valor
Lethal Loadout – Balanced Mid-Range Setup
| Gear Slot | Recommendation |
|---|---|
| Primary | G36C (Steady AR, mid-range focus) |
| Sidearm | PC19 (Reliable backup) |
| Equipment | Mirrorgun (for checking traps) |
| Armor | Heavy |
| Throwables | 3x Flashbang |
| Facewear | NVG or Anti-Flash Goggles |
The G36C is an excellent choice for this mission due to its steady recoil and fast rate of fire, making it highly effective in tight, mid-range engagements where precision matters. While it may not hit as hard as some other rifles, its ease of control allows for quick follow-up shots—crucial in CQB environments like Edgeware Apartments.
Pair it with a mirrorgun, which becomes essential in Stolen Valor due to the high number of door traps and hidden enemies waiting in tight corners. Since the mission takes place at night, night vision goggles (NVGs) are strongly recommended. If the default green display is uncomfortable, you can switch to white-phosphor vision for better contrast.
Avoid using IR lasers when running with AI teammates, as their flashbangs can be unintentionally triggered by the beam reflection—leading to accidental blinding or premature breaches.
Non-Lethal Loadout – High Risk, High Reward
| Gear Slot | Recommendation |
|---|---|
| Primary | VPL-25 (Pepper rounds, non-lethal) |
| Sidearm | TRPL (Non-lethal sidearm) |
| Equipment | Tactical Shield |
| Armor | Heavy |
| Throwables | 3x Flashbang |
| Facewear | Gas Mask (protection from pepper) |
The Tactical Shield is highly effective in Stolen Valor due to the narrow hallways and the high likelihood of ambushes. It offers valuable front-facing protection while allowing you to peek around corners and advance under fire—especially useful when suspects rush with melee weapons.
For the VPL-25, ammo management is critical; the weapon can burn through magazines quickly, so switching to single-fire mode helps conserve rounds and maintain control during prolonged engagements. Since pepper rounds take time to incapacitate enemies, it’s vital to deploy flashbangs before breaching any room, buying time for safe arrests.
To enhance crowd control, consider bringing an M320 Flash launcher—particularly helpful during the top-floor engagement where multiple hostiles may be grouped together.
Mission Flow & Enemy Behavior
- Room Layouts: Most rooms are tight and interconnected, creating natural choke points and kill zones. Be cautious when breaching, as many rooms have multiple entry angles that can leave you exposed.
- Balcony Enemies: Suspects will frequently flank from balconies or take cover outside, then re-enter to catch players from behind. Always check outdoor lines of sight before pushing through interior doors.
- Traps: Expect wire traps or rigged doors, especially in second and third floor flats. Use a mirrorgun before opening doors and avoid rushing entries without visual confirmation.
- Hostile AI: Suspects often fake surrender to bait players into lowering weapons. Others will charge with melee weapons or shoot from obscure angles, such as through stair rail gaps or behind furniture. Enemies may also fire through small openings—like the gaps between stair railings—so maintain spacing and angle discipline when ascending.
If your squad fails the mission multiple times, consider assigning at least one AI teammate a non-lethal loadout. This can help secure more arrests and improve your final score, especially when going for an S-rank.
How It Fits in the Los Sueños Lore
- Lore Arc: Part of the Los Sueños Stories expansion, Stolen Valor is one of the post-launch missions that expands the city’s narrative beyond the core 18-mission structure.
- Timeline: Its exact chronological placement is undisclosed, but it thematically fits alongside missions involving gang territory control and officer-endangering operations, such as “Twisted Nerve.”
- Thematic Tie-In: The mission highlights the breakdown of law and order in gang-dominated zones. The capture of an LSPD officer reflects rising tension between SWAT units and the increasingly emboldened Hillside Rollers.
- Location Connection: Set in Edgeware Apartments, the same urban decay and gang-controlled spaces seen in nearby missions like “Twisted Nerve” and “Greased Palms” are present—forming a localized arc focused on the 213 Hillside Rollers’ grip over Los Sueños’ housing blocks.
- Narrative Role: While not part of the official chronological mission order, Stolen Valor reinforces the growing instability in Los Sueños and the personal risk faced by officers involved in gang suppression.
Related Guides You Might Like:
- Donkey Kong Bananza Gameplay Secrets & Voxel Tech Explained
- Donkey Kong Bananza Beginner Tips and Tricks Guide
- Donkey Kong Bananza Jump Shot Guide (Double Jump Tips)
- Zenless Zone Zero 2.1 Release Date and New Banners Guide
- Is Your PC Ready for Wuchang Fallen Feathers? System Specs Inside
Stolen Valor is a high-risk, high-intensity mission best approached with methodical precision and strong teamwork. Between deadly traps, aggressive suspects, and the pressure of saving a fellow officer, every decision counts.
Expect a challenge on par with missions like “23 Megabytes a Second,” but with a heavier emotional weight and more environmental traps. Play Now!

