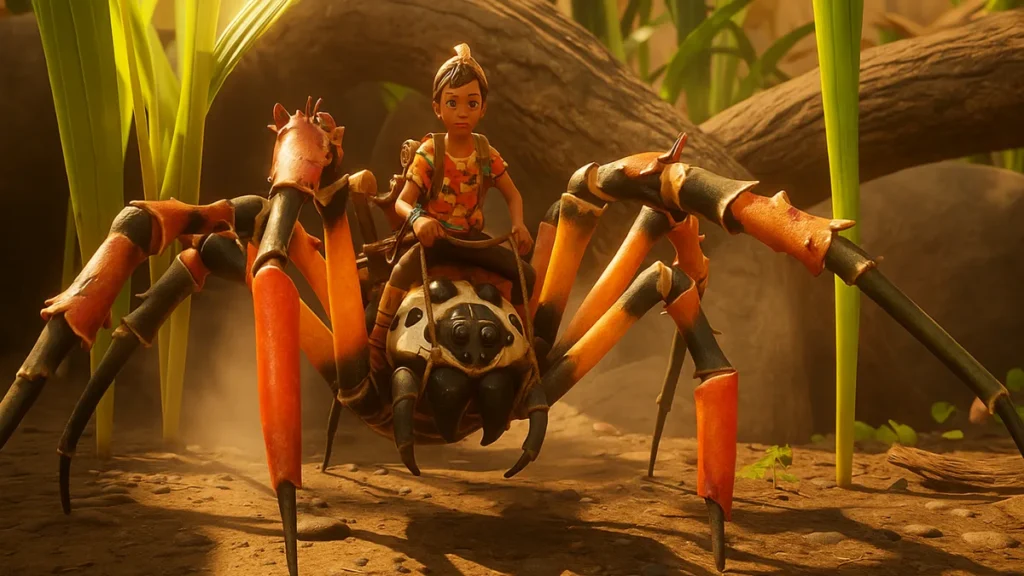
The Orb Weaver Buggy is a late-game mount in Grounded 2 that lets you ride your very own spider through Brookhollow Park. Unlike the Red Soldier Ant Buggy, which is unlocked early, the Orb Weaver requires progressing through the main story and collecting its rare eggs. This guide covers how to find the eggs, unlock incubation, and make the most of your new spider companion.

Step 1: Prepare Before Hunting Orb Weaver Eggs
Before you can even think about hatching an Orb Weaver Buggy, there are a few important preparations you need to make first.
1. Secure an Ant Buggy:
- You’ll need it to transport eggs quickly and safely. The Ant Buggy is faster and lets you haul eggs without being slowed down. The Ant Buggy can carry eggs just like planks or weed stems, making it the safest way to escape pursuing spiders.
2. Build an Egg Storage Workstation:
- Analyze a Mint Shard to unlock the blueprint. This workstation prevents Orb Weaver eggs from decaying before you’re ready to hatch them.
3. Set Up Your Base and Stock Supplies:
- Carry healing items, smoothie buffs, and venom antidotes for safe exploration, as Orb Weaver territories are heavily guarded. Picking up an Orb Weaver egg immediately triggers nearby spiders to attack, so plan an escape route or have your Ant Buggy ready for a quick getaway.
Step 2: Locate Orb Weaver Eggs
Orb Weaver eggs are found in dangerous spider dens across Brookhollow Park. Timing and preparation are key, as picking up an egg triggers nearby spiders to attack. Here are the best spots to check:
- Beneath Headless BURG.L (Snack Bar Front): Located in the center of the map. This is one of the safest egg locations if you wait until the Orb Weaver patrols away.
- Under the Lamp Post North of BURG.L: A high-risk, high-reward area, often patrolled by a wolf spider. Time your entry when the spider leaves to avoid direct combat.
- Tunnel Northeast of the Ice Cream Cart: Darker and more confined, so bring a torch. Eggs are easy to spot but expect multiple spiders lurking nearby.
Using the Ant Buggy to transport eggs is highly recommended. Its speed and egg-carrying ability reduce the risk of being cornered by aggressive spiders.
Step 3: Advance the Story to Unlock Incubation
Even if you collect eggs early, you can’t hatch them until Act One is complete. Here’s how the progression works:
- Complete the “Networking” Quest: You must confront the Masked Stranger at the top of the Network Center statue in the northeastern flower garden.
- Prepare for the Boss Fight:
- Bring a Fresh-damage weapon for the Masked Stranger.
- Bring a Spicy-damage weapon for her pet wolf spider.
- Stock smoothies, bandages, and venom antidotes to survive her raid-style attacks.
- Use pillars for cover and practice dodging to avoid lethal hits.
- Claim the Network Center TURBO Optical Disk: After defeating the Masked Stranger, a locked room opens containing the optical disk. Be sure to also grab the Sizzling Key and Charred Recipe, which unlock the powerful Spicy Coaltana weapon.
- Unlock the Hatchery Recipe: Insert the disk at a Ranger Station terminal to unlock the Orb Weaver Buggy and its nest for 5,000 Raw Science.
Step 4: Hatch Your Orb Weaver Buggy
Once you have an Orb Weaver Egg and the recipe unlocked:
- Place the egg into your Hatchery (previously unlocked with the Ant Buggy).
- Wait 24 in-game hours for the egg to hatch.
- Optionally, build a Spider Nest to store your Buggy safely when not in use.
Materials Needed to Hatch:
- Orb Weaver Egg ×1
- Blueberry Leather ×3
- Red Ant Mandibles ×4
- Acorn Shell ×3
Hatching takes a full in-game day, so ensure your base is secure and stocked with resources while you wait.
Step 5: Make the Most of Your Orb Weaver Buggy
The Orb Weaver Buggy is designed for combat and mobility, with several unique perks:
- Web Immunity & Climbing – Walk through webs and use cobweb bridges to access shortcuts.
- Intimidation Screech – Scares off smaller creatures and distracts larger ones.
- Web Trap Attack – Throws webs to immobilize enemies, giving you time to attack or escape.
- Instant Small-Creature Kills – Runs over Aphids, Mites, and Weevils, especially effective against O.R.C. Weevils during MIX.R events.
- Gather Mode – Can follow you and assist, though it cannot carry building materials like the Ant Buggy.
For utility and base-building, rely on the Ant Buggy. For combat and high-risk exploration, the Orb Weaver Buggy is your ultimate companion.
Why You Should Unlock the Orb Weaver Bugg
Although it requires story completion and resource gathering, the Orb Weaver Buggy is a powerful ally for late-game exploration and combat. Its web traversal, intimidation abilities, and combat perks make dangerous areas and swarms much easier to handle. Pair it with the Ant Buggy for the perfect balance of utility and firepower, and you’ll dominate Brookhollow Park with ease. Play Now!
Related Guides You Might Like:
- Grounded 2 Armor Sets & Bonuses Guide (Tier 1 to Tier 3)
- Grounded 2 Main Story Quests: Full Mission List and Objectives Guide
- Where to Find Praying Mantis in Grounded 2: All Spawn Locations & Farming Tips
- Grounded 2 Mint Shards: All Locations, Crafting Uses, and Farming Tips
- Grounded 2 Blueberries: All Locations, Farming Tips & Blueberry Leather Guide
Enjoyed this walkthrough? A small coffee from you keeps us going!
Buy Me a CoffeeYour support keeps Fdaytalk alive and helps us create more free gaming guides for the community.

