Many users search for Snipping Tool Mac after switching from Windows, expecting the same app on macOS. But Apple takes a different approach. Instead of a separate tool, macOS includes a built-in screenshot system that lets you capture your screen instantly using simple keyboard shortcuts—no downloads or setup required.
Once you understand how it works, taking screenshots on Mac becomes faster and more flexible than the traditional Snipping Tool. You can capture the full screen, a specific window, or just a selected area using shortcuts like Shift + Command + 4 and Shift + Command + 5, along with a powerful toolbar for advanced options.
What Is Snipping Tool on Mac?
Mac does not have the Windows Snipping Tool app, but it has a built-in screenshot tool called Screenshot / Screen Capture.
You can use it to:
- Capture full screen
- Capture selected area
- Capture a window
- Record screen
- Save screenshots automatically
The tool opens using keyboard shortcuts instead of an app icon.
How to Open Snipping Tool on Mac
Press:
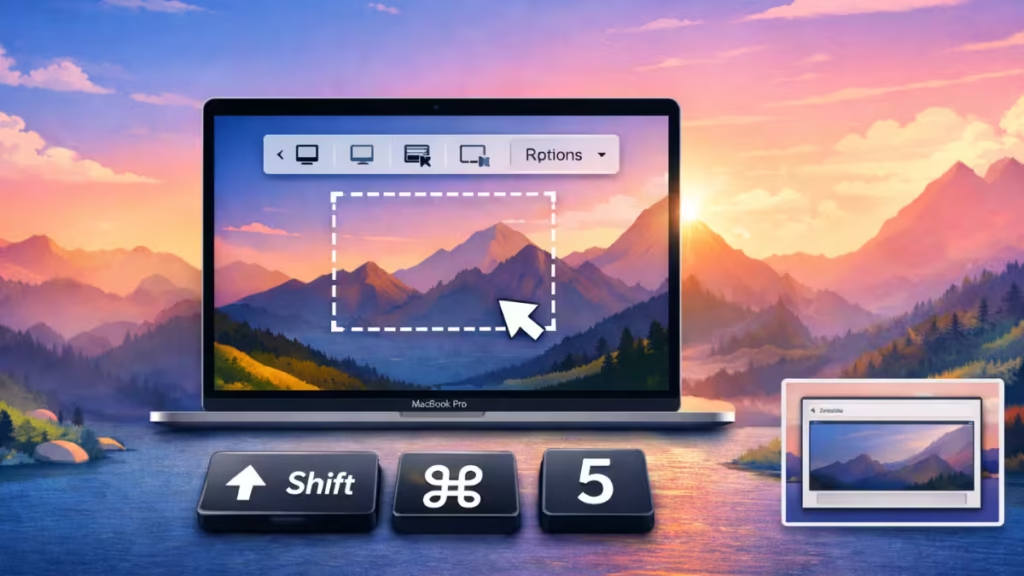
Shift + Command + 5This opens the Screenshot toolbar.
From here you can choose different capture options, including full screen, selected area, and screen recording.
How to Screenshot Selected Area on Mac (Snipping Tool Style)
Press:
Shift + Command + 4Your cursor becomes a crosshair.
Steps:
- Press Shift + Command + 4
- Drag mouse to select area
- Release mouse to capture
- Screenshot saves automatically
This method works exactly like Windows Snipping Tool.
How to Screenshot Entire Screen on Mac
Press:
Shift + Command + 3Mac captures the whole screen and saves the image on the desktop.
Use this method when you need full screen capture.
How to Screenshot One Window on Mac
Press:
Shift + Command + 4 → SpaceSteps:
- Press Shift + Command + 4
- Press Space bar
- Click the window
- Screenshot saves automatically
This captures only the selected window.
How to Use Screenshot Toolbar on Mac
Press:
Shift + Command + 5You will see these options:
- Capture entire screen
- Capture selected window
- Capture selected portion
- Record entire screen
- Record selected portion
- Options (timer, save location, cursor)
You can also change where screenshots are saved.
Where Screenshots Are Saved on Mac
By default, macOS saves screenshots to:
DesktopYou can change this from the toolbar:
Options → Save to → Select folder
Best Snipping Tool Alternatives for Mac
The built-in tool works for basic screenshots, but some users need more features.
Popular alternatives:
- Snagit – advanced editing and recording
- Lightshot – quick screenshots
- Monosnap – capture + cloud sharing
- TextSniper – extract text from image
- Greenshot – lightweight snipping tool
Third-party tools offer annotation, cloud storage, and better editing features.
Why Mac Does Not Have Snipping Tool
Windows uses a separate Snipping Tool app. Mac uses built-in screenshot shortcuts instead.
This design makes screenshots faster because you can capture without opening any app.
Mac does not include the Windows Snipping Tool, but the built-in Screenshot tool provides the same features and more. You can capture the entire screen, selected area, or window using simple keyboard shortcuts like Shift + Command + 4 or Shift + Command + 5.
If you need advanced editing, screen recording, or annotations, you can install third-party snipping tools. For most users, the built-in macOS screenshot tool is enough for daily use.
FAQs
How do I open Snipping Tool on Mac?
You can open the screenshot toolbar by pressing: Shift + Command + 5
This gives you options to capture screen, record video, and change settings like save location and timer.
What is the shortcut for snipping on Mac?
The most common shortcut is: Shift + Command + 4
This lets you select and capture a specific area of the screen, similar to the Snipping Tool in Windows.
Where are screenshots saved on Mac?
By default, screenshots are saved to the Desktop. You can change the save location by opening the screenshot toolbar (Shift + Command + 5) and selecting a different folder from the Options menu.
Can I capture a specific window on Mac?
Yes, you can capture a single window by pressing: Shift + Command + 4 → Spacebar → Click the window. This method captures only the selected window without background clutter.
Is there a better alternative to Snipping Tool Mac?
The built-in tool is enough for most users, but if you need advanced editing, annotations, or cloud sharing, you can use tools like Snagit, Lightshot, or Monosnap for more features.

