A DHCP Lookup Failed error means your device cannot reach the DHCP server to get a valid IP address. Without an IP address, your device cannot connect to the internet. This error appears on both Windows PCs and Chromebooks, and several causes can trigger it: a misconfigured network adapter, a router issue, too many devices on the network, or a corrupted network profile.
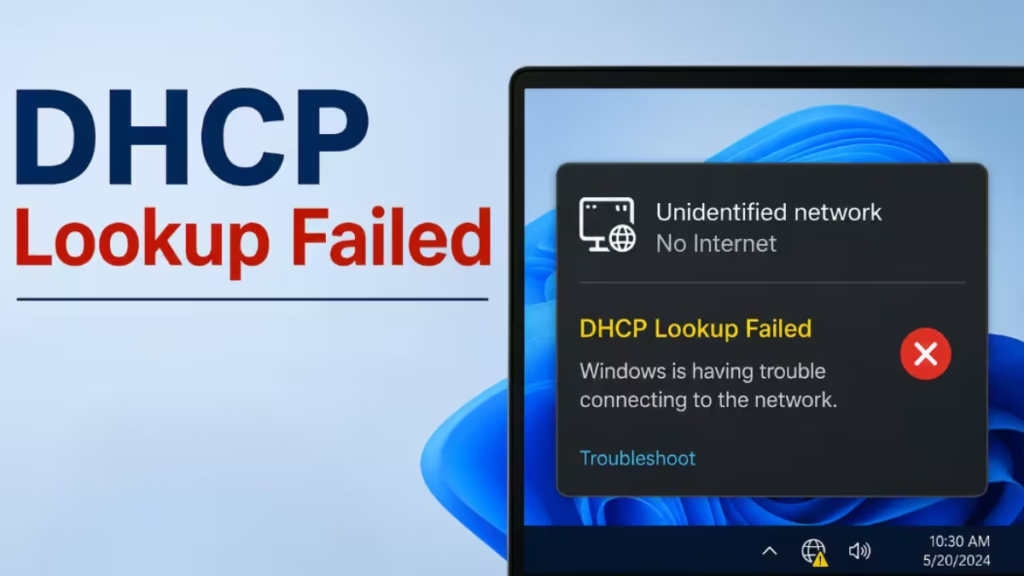
This guide covers every real fix, starting with the quickest solutions and moving to deeper network-level repairs.
What Causes the DHCP Lookup Failed Error
DHCP stands for Dynamic Host Configuration Protocol. Every time your device connects to a network, it sends a request to the DHCP server (usually your router) asking for an IP address. If that request fails, you see the DHCP Lookup Failed error.
Common causes include:
- Your router or modem needs a restart
- Your network adapter is set to use a manual (static) IP instead of automatic
- Your network profile is corrupted
- Your IP address lease expired and the router could not renew it
- Too many devices are connected to the router, exhausting the IP pool
- A faulty Ethernet cable or loose connection
- Outdated ChromeOS or Windows network drivers
How to Fix DHCP Lookup Failed on Windows
Fix 1: Restart Your Router and Computer
A simple restart clears temporary faults in both your router and your PC.
- Shut down your computer.
- Unplug your router or modem from the power outlet.
- Wait at least 30 seconds.
- Plug the router back in and wait 60 seconds for it to fully boot.
- Turn your computer back on and check the connection.
This fix resolves the error in many cases where the router simply failed to assign an IP during the last session.
Fix 2: Run the Windows Network Troubleshooter
Windows includes a built-in troubleshooter that detects and corrects DHCP configuration issues automatically.
- Press Win + I to open Settings.
- Go to System > Troubleshoot > Other troubleshooters.
- Find Internet Connections and click Run.
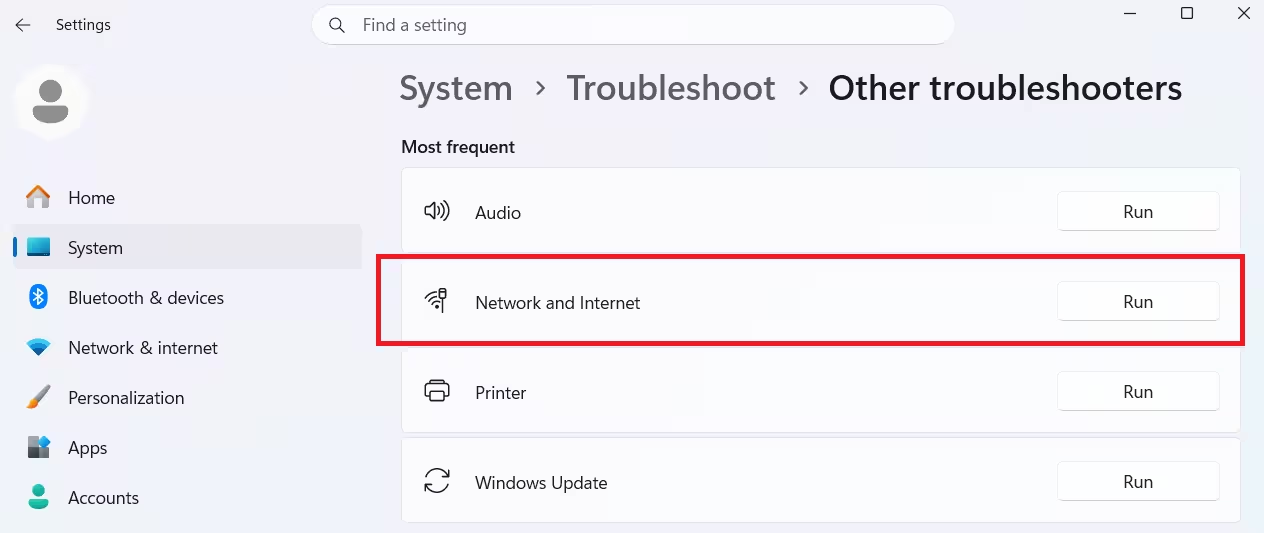
- Follow the prompts and apply any suggested fixes.
If the troubleshooter detects a DHCP error, select Apply this fix to let Windows correct it.
Fix 3: Set Your IP Address to Automatic
If your network adapter uses a manually assigned IP address, it may conflict with another device on the network. Setting it back to automatic lets the DHCP server assign a unique IP.
- Press Win + R, type
ncpa.cpl, and press Enter. - Right-click your active network adapter and select Properties.
- Double-click Internet Protocol Version 4 (TCP/IPv4).
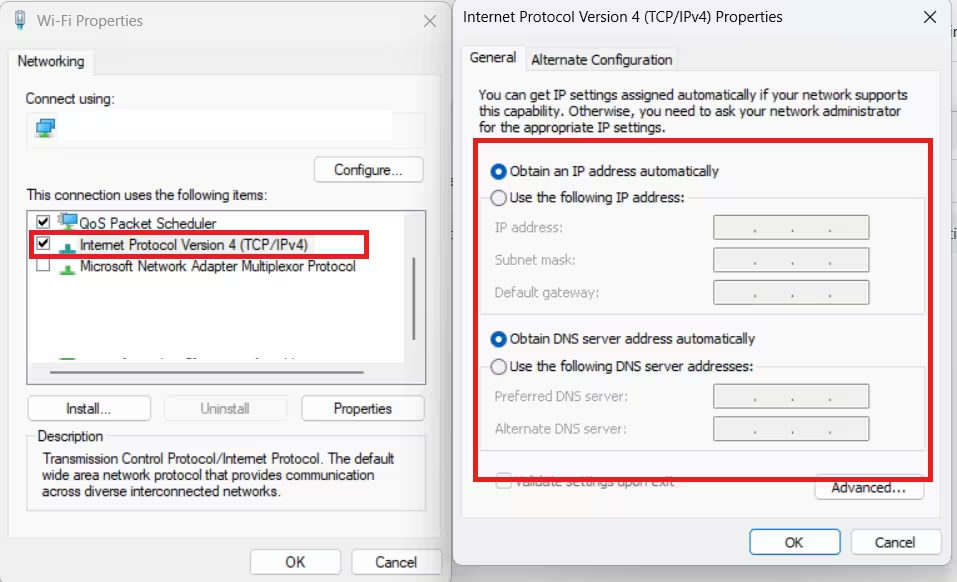
- Select Obtain an IP address automatically.
- Select Obtain DNS server address automatically.
- Click OK and close all windows.
- Reconnect to your network.
Fix 4: Renew Your IP Address via Command Prompt
Releasing and renewing your IP address forces your router to assign a fresh one.
- Press Win + S and type cmd.
- Right-click Command Prompt and select Run as administrator.
- Run the following commands one at a time, pressing Enter after each:
ipconfig /release
ipconfig /flushdns
ipconfig /renew
After the commands complete, check if your internet connection works.
Fix 5: Reset Your Network Settings
A full network reset removes all saved network adapters and reinstalls them with default settings. This fixes deeper configuration issues that a simple restart cannot resolve.
- Press Win + I to open Settings.
- Go to Network and Internet > Advanced network settings.
- Scroll down and click Network reset.
- Click Reset now and confirm.
Your PC will restart. After reboot, reconnect to your Wi-Fi or wired network. Note that VPN software and custom network configurations will need to be set up again.
Fix 6: Check Your Ethernet Cable
If you use a wired connection, a damaged or loose cable can prevent DHCP communication.
- Make sure the Ethernet cable clicks firmly into both the PC port and the router port.
- Inspect the cable for visible damage, kinks, or bent pins.
- Try a different Ethernet cable to rule out a hardware fault.
- Test using a different port on the router.
Fix 7: Update Your Network Adapter Driver
An outdated or corrupted network adapter driver can block DHCP requests.
- Press Win + X and select Device Manager.
- Expand Network adapters.
- Right-click your active adapter and select Update driver.
- Choose Search automatically for drivers.
- Restart your PC after the update completes.
How to Fix DHCP Lookup Failed on Chromebook
Fix 1: Restart Your Chromebook and Router
Start here before trying anything else.
- Shut down your Chromebook fully.
- Unplug your router, wait 30 seconds, and plug it back in.
- Wait for the router to fully restart, then power on your Chromebook.
Fix 2: Forget and Reconnect to Your Wi-Fi Network
A corrupted Wi-Fi profile can block DHCP requests. Forgetting the network and reconnecting creates a clean profile.
- Click the time in the bottom-right corner of the screen.
- Click the Settings (gear) icon.
- Click Network, then Wi-Fi.
- Turn off Wi-Fi, then turn it back on.
- Click Known networks.
- Click the three-dot menu next to your network and select Forget.
- Reconnect to your network and enter the password.
Fix 3: Set the Name Server to Automatic
If your Chromebook uses a custom DNS server that is unavailable, DHCP lookup will fail.
- Click the time in the taskbar.
- Go to Settings > Network.
- Click your active network connection.
- Under Name servers, select Automatic name server.
- Reconnect and test.
Fix 4: Switch to Google Name Server
If the automatic name server does not work, try Google’s DNS server as an alternative.
- Go to Settings > Network.
- Click your active connection.
- Under Name servers, select Google name server.
- Reconnect and check if the error is gone.
Fix 5: Update ChromeOS
An outdated ChromeOS version can contain network bugs that trigger DHCP failures.
- Connect your Chromebook to a wired internet connection if Wi-Fi is unavailable.
- Go to Settings > About ChromeOS.
- Click Check for updates.
- Install any available update and restart your Chromebook.
Fix 6: Reset Your Router to Factory Defaults
Incorrect router settings can stop your Chromebook from getting an IP address. A factory reset restores the default DHCP configuration.
- Locate the reset button on the back or bottom of your router.
- Press and hold it for 30 seconds using a paperclip or pin.
- Release and wait for the router to fully restart (30 to 60 seconds).
- Reconnect your Chromebook using the default network credentials (printed on the router label).
Note: A factory reset removes all custom router settings, including Wi-Fi name and password changes. You will need to reconfigure the router after this step.
Fix 7: Perform a Hard Reset on Your Chromebook
If network settings on the Chromebook itself are corrupted, a hard reset can fix them.
Warning: A hard reset may delete locally stored files. Back up important files to Google Drive first.
- Turn off your Chromebook.
- Press and hold the Power and Refresh buttons simultaneously.
- Hold until the Chromebook reboots.
- Reconnect to your network and test.
Advanced Fix: Too Many Devices on the Network
If the DHCP Lookup Failed error appears on multiple devices in an office or school network, the DHCP server may have run out of IP addresses to assign.
Most home routers use the subnet mask 255.255.255.0, which supports up to 254 devices. In larger networks, ask your IT administrator to:
- Switch to a Class B subnet (255.255.0.0) to support up to 65,534 devices.
- Expand the DHCP IP address pool range in the router settings.
- Check for IP address conflicts or exhausted lease pools in the router dashboard.
Frequently Asked Questions
What does DHCP Lookup Failed mean?
It means your device sent a request for an IP address to the DHCP server (your router) and got no valid response. Without an IP address, your device cannot connect to the internet.
Why does my DHCP keep failing repeatedly?
Repeated DHCP failures usually point to a router issue, an exhausted IP pool, or a corrupted network profile on your device. Renewing your IP address and restarting the router are the first steps to try.
Can a VPN cause DHCP Lookup Failed?
Yes. Some VPN clients modify network adapter settings or change IP assignment behavior. If the error started after installing a VPN, disable or uninstall it temporarily to test.
How do I fix DHCP Lookup Failed on a Kindle Fire?
Go to Settings > Wi-Fi, press and hold your connected network, and select Modify Network. Enable Show advanced options, set IP settings to Static, and manually enter an IP address, gateway, and DNS values.

