Surviving the backyard in Grounded 2 isn’t just about having the right weapons—armor is your lifeline. Each armor set not only provides protection but also unlocks unique set bonuses that enhance your combat or exploration capabilities. Whether you prefer tanking hits, dashing around as a rogue, or using ranged attacks, there’s an armor set that fits your playstyle.
This guide breaks down every armor set and its bonuses, including the crafting resources you’ll need to collect. It also explains armor durability, piece effects, and special utility armor to ensure you never miss any important gameplay mechanics.
See also: Grounded 2 Main Story Quests: Full Mission List and Objectives Guide
How Grounded 2 Armor Sets and Bonuses Work
Armor in Grounded 2 is typically crafted in three-piece sets: a helmet, chestplate, and leg guards. Equipping the full set grants exclusive set bonuses, while individual pieces offer base defense and sometimes minor effects.
- Tiers: Armor is classified into Tier 1 (early game), Tier 2 (mid-game), and Tier 3 (late game).
- Set Bonuses: These activate only when all three pieces of the same set are worn.
- Special Effects: Some pieces grant passive buffs like Gas Resistance or Venom buildup.
- Durability & Repair: Each armor piece has durability and can break after repeated use. Players can repair armor using bug parts or plant materials listed in its recipe. Higher-tier armor lasts longer and blocks more damage.
- Sleek Effects: When upgraded, certain armor pieces unlock Sleek Effects such as faster stamina recovery, reduced elemental damage, or bonus harvesting speed.
Grounded 2 Tier 1 Armor Sets – Best Early Game Armor
Tier 1 armor sets are the easiest to craft and are perfect for surviving early encounters, managing stamina, and learning the game’s combat mechanics.
Clover Armor (Tier 1)
- Pieces: Clover Hood, Clover Poncho, Clover Shin Guards
- Set Bonus: Lucky Break – Reduces stamina cost while dodging.
- Crafting Highlights: Clover Leaves, Sprigs, Crude Rope
- Best For: Early exploration with better stamina management.
Tip: This set has very low durability, so repair it often if you plan to dodge frequently.
Acorn Armor (Tier 1)
- Pieces: Acorn Face Mask, Acorn Plate, Acorn Greaves
- Set Bonuses:
- Max Health – Increases your max HP.
- Fighter Armor – Generates more threat when using melee attacks.
- Crafting Highlights: Acorn Shells, Clover Leaves, Sap
- Best For: Beginners looking for durability and melee survivability.
- Piece Effect: Acorn Plate provides a sturdier defense early on, making it a great first “tank” option.
Red Ant Armor (Tier 1)
- Pieces: Red Ant Helmet, Red Ant Arm Guards, Red Ant Knee Guards
- Set Bonuses:
- Rogue Armor – Final hits in 3-hit combos have increased critical chance.
- Attack Stamina: Ant – Reduces stamina cost of ant-based weapons.
- Crafting Highlights: Red Ant Parts, Mite Fuzz, Crude Rope
- Best For: Early combat and resource gathering inside anthills.
Note: This set also lets you carry grass planks and weed stems more efficiently while exploring anthills.
Grub Armor (Tier 1)
- Pieces: Grub Goggles, Grub Vest, Grub Leggings
- Set Bonuses:
- Ranger Armor – Deals more damage to enemy weakpoints.
- Quickcharge – Charges heavy attacks faster.
- Crafting Highlights: Grub Hide, Gnat Loot, Dry Grass
- Best For: Players using bows or charge-based melee attacks.
See also: Where to Find Praying Mantis in Grounded 2: All Spawn Locations & Farming Tips
Grounded 2 Tier 2 Armor Sets: Mid-Game Armor & Bonuses
Tier 2 armor opens access to elemental resistances, specialized combat roles, and environmental protection for exploring dangerous areas of Brookhollow Park.
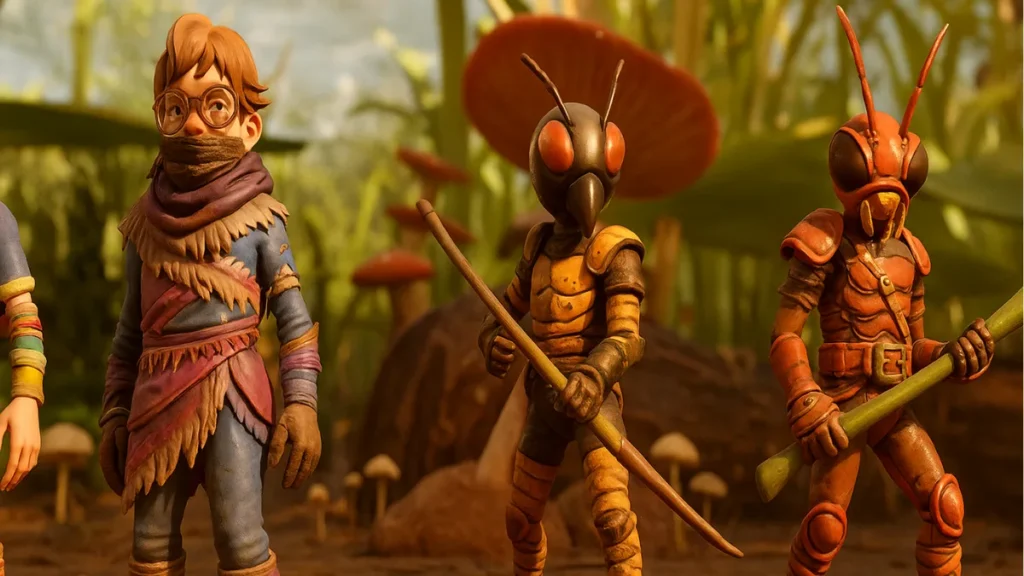
Bee Armor (Tier 2)
- Pieces: Bee Face Mask, Bee Shoulder Pads, Bee Shin Guards
- Set Bonuses:
- Ranger Armor – Increased damage to weakpoints.
- More Better Draw – Extends the perfect bow draw window.
- Crafting Highlights: Bee Fuzz, Silk Rope, Blueberry Leather
- Best For: Dedicated ranged fighters.
- Piece Effect: Bee Face Mask grants extra crit synergy with bows, making it a must for archers.
Fuzzy Armor (Tier 2)
- Pieces: Fuzzy Hat, Fuzzy Parka, Fuzzy Mukluks
- Set Bonus: Chill Reduction – Slows the rate of cold damage.
- Crafting Highlights: Bee Fuzz, Gnat Fuzz, Lingonberry Leather
- Best For: Surviving colder regions like the ice cream cart.
- Sleek Effect: Upgrades can further reduce chill buildup, allowing longer exploration in cold zones.
Ladybug Armor (Tier 2)
- Pieces: Ladybug Faceplate, Ladybug Chestplate, Ladybug Shin Guards
- Set Bonuses:
- Fighter Armor – Melee attacks generate threat.
- Bargain Block – Blocks consume less stamina.
- Crafting Highlights: Ladybug Parts, Flower Petals, Blueberry Leather
- Best For: Defensive, tank-style gameplay.
Roach Armor (Tier 2)
- Pieces: Roach Helmet, Roach Chestplate, Roach Greaves
- Set Bonuses:
- Fighter Armor – Generates melee threat.
- Feeding Frenzy – Looting corpses restores health.
- Gas Resistance (Helmet) – Reduces gas damage.
- Crafting Highlights: Roach Chunks, Bug Rubber, Stinkbug Gas Sack
- Best For: Sustained melee fights and exploring gas zones.
Tip: This set’s health recovery makes it excellent for long resource runs without stopping to heal.
Butterfly Armor (Tier 2)
- Pieces: Butterfly Circlet, Butterfly Robes, Butterfly Boots
- Set Bonuses:
- Parrier Barrier – Perfect blocks create a stacking damage shield.
- Frosty Focus – Boosts fresh damage when Parrier Barrier is active.
- Mage Armor – Reduces stamina use for staff attacks.
- Crafting Highlights: Butterfly Scales, Butterfly Chunks, Mint Shards
- Best For: Defensive play with elemental staff builds.
Sizzling Armor (Tier 2)
- Pieces: Sizzling Circlet, Sizzling Robes, Sizzling Boots
- Set Bonuses:
- Sizzle Reduction – Slows heat/sizzle damage.
- Mage Armor – Staff attacks consume less stamina.
- Crafting Highlights: Bombardier Parts, Boiling Gland, Lingonberry Leather
- Best For: Exploring hot zones safely.
Northern Armor (Tier 2)
- Pieces: Northern Mask, Northern Spaulders, Northern Breeches
- Set Bonuses:
- Rogue Armor – Increases crit chance on combo finishers.
- Double Deal – Deals extra damage to venom-affected enemies.
- Crafting Highlights: Scorpion Chunks, Scorpion Venom, Blueberry Leather
- Best For: Aggressive rogue and venom builds.
Weaver Armor (Tier 2)
- Pieces: Weaver Hood, Weaver Spaulders, Weaver Leggings
- Set Bonuses:
- Rogue Armor – Crit boost on final hits in combos.
- Dual Dasher – Dash Strikes with dual weapons hit harder.
- Crafting Highlights: Orb Weaver Chunks, Silk Rope, Spine Nubs
- Best For: Fast melee and dash-focused players.
See also: Grounded 2 Mint Shards: All Locations, Crafting Uses, and Farming Tips
Grounded 2 Tier 3 Armor Sets – Late Game Domination
Tier 3 armor sets are the ultimate gear for endgame players, offering the highest defense, powerful set bonuses, and synergy with aggressive or tanky playstyles.
Wolf Spider Armor (Tier 3)
- Pieces: Wolf Hood, Wolf Spaulders, Wolf Leggings
- Set Bonuses:
- Rogue Armor – Crit chance boost on combo finishers.
- Venomous Dasher – Dash strikes inflict venom buildup.
- Crafting Highlights: Wolf Spider Fangs, Wolf Spider Chunks, Spider Venom
- Best For: High-risk, high-reward rogue playstyles.
Snail Shell Armor (Tier 3)
- Pieces: Snail Shell Casque, Snail Shell Plastron, Snail Shell Greaves
- Set Bonuses:
- Fighter Armor – Increases threat generation in melee.
- Block Stun – Blocks inflict stun damage.
- Crafting Highlights: Garden Snail Fragments, Acid Glands, Lingonberry Leather
- Best For: Defensive tanks who want to control fights with stuns.
Miscellaneous & Utility Armor
In addition to full sets, Grounded 2 features standalone gear for special tasks:
- Mitey Muffs: Chill Reduction (Grub Hide + Mite Fuzz)
- Gas Mask: Gas Guard (Weevil Nose + Gnat Fuzz + Stinkbug Part)
- Eyepatch: Boosts Attack but reduces Defense (Sap + Fiber Bandages)
- Marksman’s Cap: Enhances Bow Attack and Crits (Crow Feather Pieces + Silk Rope)
- Aphid Slippers: Boosts movement speed with The Quickness bonus
- Swimming Gear: Bubble Helmet, Gill Tube, and Fin Flops allow long underwater exploration and faster swimming.
- Firefly Head Lamp: Provides light at night and boosts busting harvest speed.
How to Choose the Right Armor in Grounded 2
Picking the right armor in Grounded 2 depends on your progression stage and playstyle. Early in the game, survival and stamina management matter most, while later stages demand armor sets that offer specialized bonuses for combat or environmental hazards. Here’s how to choose effectively:
- Early Game (Tier 1): Clover and Acorn provide basic survivability, while Red Ant is great for stamina-efficient combat and carrying resources.
- Mid Game (Tier 2): Switch to Bee and Butterfly for ranged damage, Ladybug and Roach for tanking, and Fuzzy or Sizzling for cold or heat resistance.
- Late Game (Tier 3): Wolf Spider is best for high-risk crit and venom builds, while Snail Shell excels at blocking and stunning enemies.
Pro Tip: Always keep a utility piece like Gas Mask or Fin Flops in your hotbar for instant swaps in hazardous environments. Play Now!
Enjoyed this walkthrough? A small coffee from you keeps us going!
Buy Me a CoffeeYour support keeps Fdaytalk alive and helps us create more free gaming guides for the community.

