Windows 11 offers multiple power-saving features, with Hibernate being one of the most useful. Unlike Sleep, which keeps your apps and files stored in RAM, hibernation saves everything to the hard drive and then shuts down your PC completely. This makes it ideal for conserving battery on laptops while still allowing you to resume your work quickly.
In this guide, we’ll show you how to enable or disable hibernation in Windows 11 using different methods, along with tips on when you should use it.
Why Use Hibernation in Windows 11?
Hibernation offers a middle ground between Sleep and Shutdown:
- Saves all open apps, files, and settings to a hidden system file (
hiberfil.sys). - Turns off your computer completely (unlike Sleep, which still uses power).
- Restores your session when you turn your PC back on.
Best suited for: Laptop users who need to save power during long breaks.
Not necessary for: Desktop users or those who rely mainly on Sleep mode.
How to Enable or Disable Hibernation in Windows 11
Method 1: Using Command Prompt
This is the quickest way to turn hibernation on or off.
- Press Win + S, type cmd, right-click on Command Prompt, and select Run as administrator.
- Enter one of the following commands:
- To enable hibernation:
powercfg /hibernate on- To disable hibernation:
powercfg /hibernate off- Press Enter.
- Disabling will also delete the
hiberfil.sysfile, freeing up disk space.
- Disabling will also delete the
Method 2: Enable Hibernate from Power Options
You can make Hibernate appear in the Power menu.
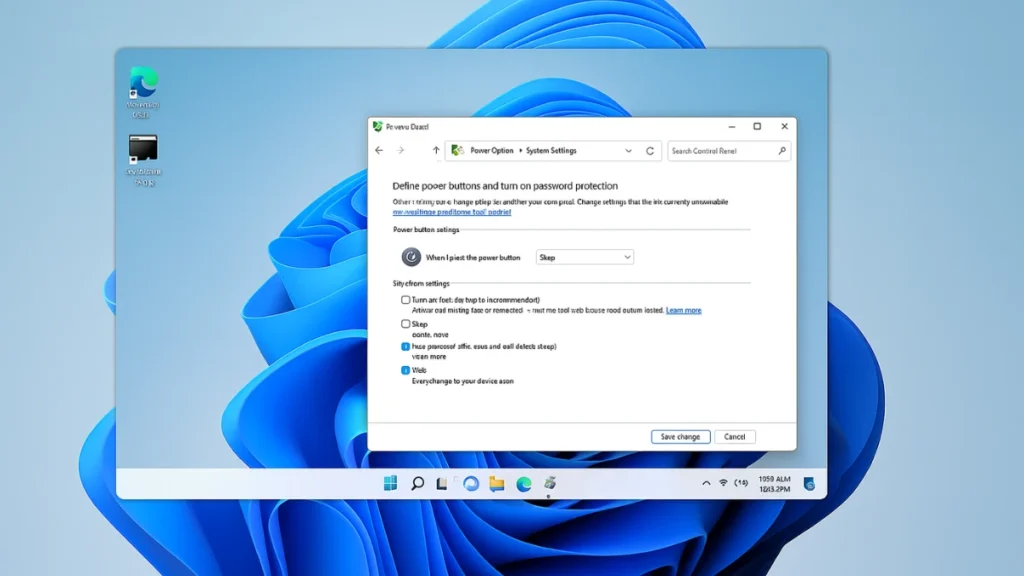
- Open Control Panel → Hardware and Sound → Power Options.
- Click Choose what the power buttons do (left panel).
- Select Change settings that are currently unavailable.
- Under Shutdown settings, check or uncheck Hibernate.
- Click Save changes.
Method 3: Enable/Disable via Registry Editor (Advanced Users)
If you prefer registry tweaks, here’s how:
- Press Win + R, type
regedit, and hit Enter. - Navigate to:
HKEY_LOCAL_MACHINE\SYSTEM\CurrentControlSet\Control\Power- On the right side, find HibernateEnabled (DWORD).
- Value 1 = Enabled.
- Value 0 = Disabled.
- Restart your PC to apply changes.
Caution: Editing the Registry incorrectly may cause system issues.
How to Check If Hibernation is Available
To verify if hibernation is supported on your PC:
- Open Command Prompt (Admin).
- Type the command:
powercfg /availablesleepstates- Look for Hibernate in the list of available sleep states.
Should You Enable or Disable Hibernation?
- Enable if you’re a laptop user who needs longer battery life and quick resume.
- Disable if you’re on a desktop or using an SSD and don’t rely on hibernation.
FAQs: Hibernation in Windows 11
1Q. Does disabling hibernation affect sleep mode?
No. Sleep and Hibernate are separate features. Disabling hibernation won’t affect Sleep mode.
2Q. How much space does hibernation take?
The hiberfil.sys file usually takes up 30–70% of your installed RAM. For example, with 16 GB RAM, it may take 5–10 GB of disk space.
3Q. Can I use Fast Startup without hibernation?
No. Fast Startup depends on hibernation. If you disable hibernation, Fast Startup will also be turned off.
Hibernation in Windows 11 is a useful feature for saving battery and resuming work quickly, especially on laptops. Whether you keep it enabled depends on your usage – for most desktop users, Sleep is enough, while laptop users may find Hibernate invaluable.

