Jammer Nodes show up as part of the “Overwriting a Wrong” side mission in Borderlands 4. They’re part puzzle, part combat encounter, and if you’re not careful, you’ll either fail the hack or get overwhelmed by enemies. This guide breaks down where to find each jammer, how to solve the node puzzles, and what to do if you run into the known bug that prevents nodes from spawning.
Starting the Mission
The quest begins in the Carcadia District of Dominion. Speak with Terry, an inventor who accidentally created the killer drones now patrolling the city. He wants your help to upload a virus to shut them down.
- Accept the modified ECHO log from Terry.
- Use the grapple point above him to enter the drone factory.
- Head south inside to find a disabled drone on a truck bed. Interact with it to start the virus upload.
The attempt fails due to interference, and Terry sends you to destroy three jammers around the factory.
Jammer #1: North Roof
- Look for a small building in the northern part of the factory.
- Use the stairs or grapple point to reach the roof.
- Interact with the terminal to trigger the first node puzzle.
Puzzle Mechanics:
- Red triangular prisms appear above the computer—these are the jammer nodes.
- Destroy all the red prisms with a precise weapon. Avoid shotguns or explosives that might scatter damage.
- Once cleared, enemies will spawn—deal with them before moving on.
Jammer #2: Western Factory
The second jammer is located on the west end of the factory.
- Interact with the terminal to spawn another node puzzle.
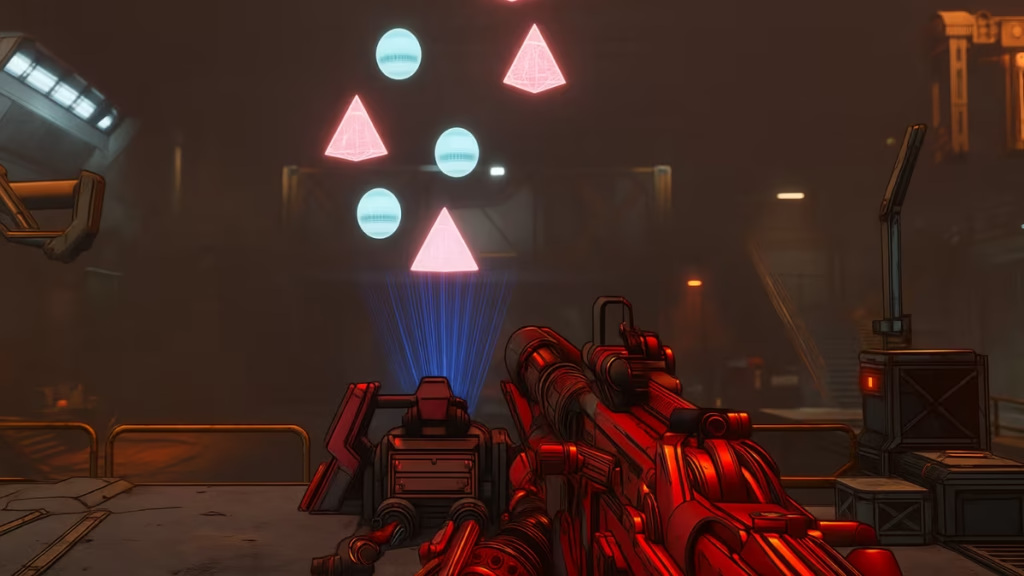
- This one adds a new complication: blue spheres appear alongside the red prisms.
Key Rule:
- Only destroy the red prisms.
- If you hit a blue sphere, the hack fails and you’ll need to restart.
Bug Warning:
Some players encounter a glitch where the nodes don’t appear. If this happens:
- Use a Fast Travel station (Final Defiance is closest), then return to the factory.
- If that fails, return to the Main Menu and reload. You’ll respawn inside the factory and the nodes should reappear.
Jammer #3: Southern Upper Level
The last jammer is located further south in the factory.
- Head into an open room, look up, and use a grapple point to reach the upper floor.
- Interact with the terminal to trigger the final node puzzle.
Puzzle Mechanics:
- Same as before: destroy only red prisms, avoid blue spheres.
- Failing by hitting a blue node resets the puzzle.
Once complete, all three jammers are disabled. Head back to the drone for the final stage.
Virus Upload and Code Compilation
With the jammers down, interact with the disabled drone again. This time the upload works.
- Another red node puzzle appears—destroy red prisms while leaving blue spheres intact.
- A progress bar begins compiling code from 0% to 100%.
- The process lasts about 100 seconds, during which waves of enemies attack.
Critical Interruptions:
- At 60%, 70%, and 92%, the upload halts.
- Each time, a red prism appears—destroy it to continue.
- Watch for Seeker Drones; if they reach the hacked drone, they spawn more red prisms that must be shot before progress resumes.
Stay focused, defend the drone, and keep the area clear. Once the compilation hits 100%, the mission completes, and the drone is successfully reprogrammed.
Best Weapons for Jammer Nodes
- Precision Rifles/SMGs: Ideal for hitting red prisms without splash damage.
- Avoid Shotguns/Explosives: Spread or AoE can accidentally hit blue spheres.
- Shock Weapons: Useful against shielded enemies during enemy waves.
Related Guides You Might Like:
Quick Tips to Destroy Jammer Nodes Borderlands 4
- Always clear surrounding enemies before starting a puzzle—focus is key.
- Don’t panic if the bug strikes; Fast Travel or Main Menu reloads fix it.
- Seeker Drones are your top priority during the upload phase.
Completing the mission doesn’t just progress the story — it also grants useful rewards. You’ll receive experience points (XP), some cash, and an SMG that can roll at green or purple rarity. While not endgame loot, it’s a nice bonus for the time spent on the puzzles and combat. Play Now!

