If you run into problems on Windows 11, Microsoft already includes several built-in ways to get help. You don’t need third-party apps or random fixes from the internet. Windows 11 offers official tools that guide you to the right solution based on your issue.
This guide explains every reliable way to get help in Windows 11, step by step, so you can fix issues on your own.
1. Use the Get Help App for Microsoft Support
The Get Help app connects you directly to Microsoft’s support system for issues with Windows, Office, OneDrive, Xbox, or your Microsoft account.
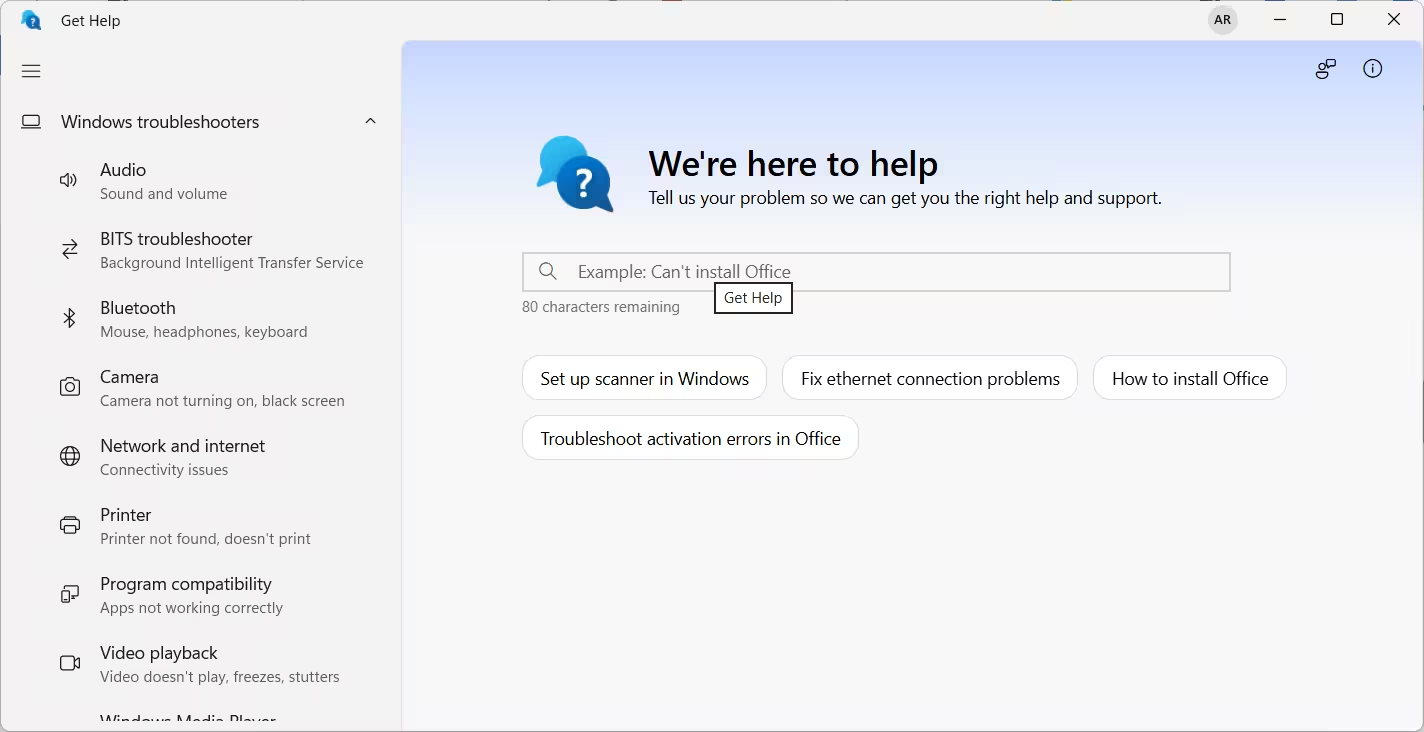
Search for Get Help in the taskbar search box and open the app. Sign in with your Microsoft account, then describe your issue to the Microsoft Virtual Agent. It offers a solution you can try, and you confirm whether it worked. If it does not, the agent offers more suggestions.
Get Help also includes built in troubleshooters for common problems, including camera, Microsoft 365, Outlook, and Teams issues. Search for the troubleshooter by name inside the app to run it.
To contact Windows Support directly:
- Open the Get Help app.
- Click Contact Support.
- Select the product, such as Windows or Office.
- Choose the type of support you need: billing, subscription management, password recovery, technical support, or activation.
- Pick an available time slot.
2. Use Quick Assist for Remote Help
Quick Assist lets a trusted person connect to your PC remotely and see or control your screen to fix an issue for you. This is useful when a problem is hard to explain over the phone and you want someone to just show you.
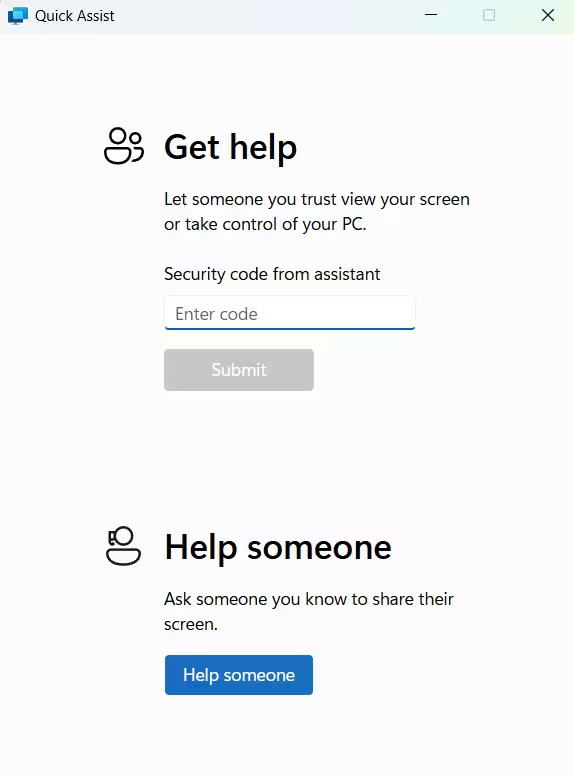
The helper can only view your screen or take full control, depending on what you allow. This works well for common problems like:
- Settings that changed unexpectedly
- Apps that freeze or misbehave
- Printer or Wi-Fi setup issues
Once connected, your helper can do the following to guide you:
- Use the laser pointer tool to point at things on your screen, so you know exactly where to click
- Add annotations directly on your screen to highlight an area or step
- Chat with you throughout the session for any questions
Control stays with you throughout, and you can end the session instantly.
A Windows 11 PC with an internet connection is all you need on your end. Your helper needs a Windows 11 PC and a Microsoft account.
How to open Quick Assist
Press Win + Ctrl + Q to open it instantly.
You can also open it manually:
- Select Start on the taskbar
- Type Quick Assist
- Select Quick Assist from the results
Or find it under Start > All apps > Quick Assist.
3. Get Help Through Windows Settings
Windows Settings includes built-in troubleshooting tools for common problems.
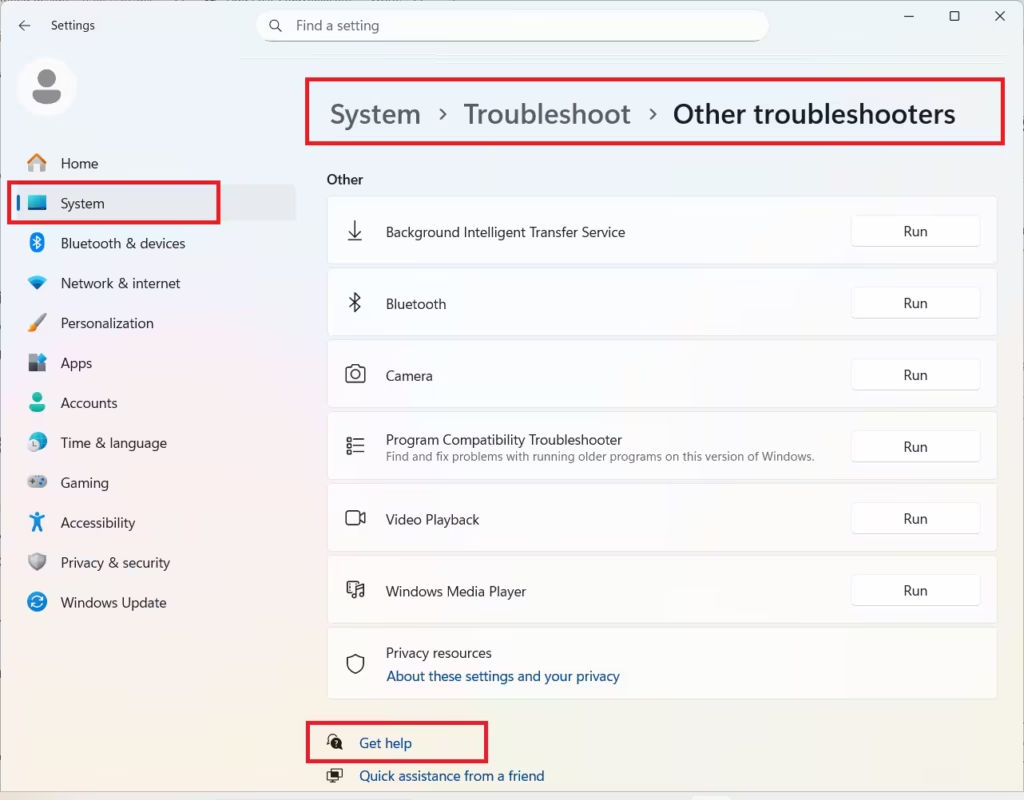
Steps to access troubleshooting
- Open Settings
- Go to System
- Select Troubleshoot
- Click Other troubleshooters
Problems you can fix here
- Internet and Wi-Fi issues
- Audio not working
- Bluetooth connection errors
- Printer problems
- Windows Update failures
Run the recommended troubleshooter and follow the on-screen instructions.
4. Press F1 to Open Windows Help
You can press F1 on your keyboard to open Windows help.
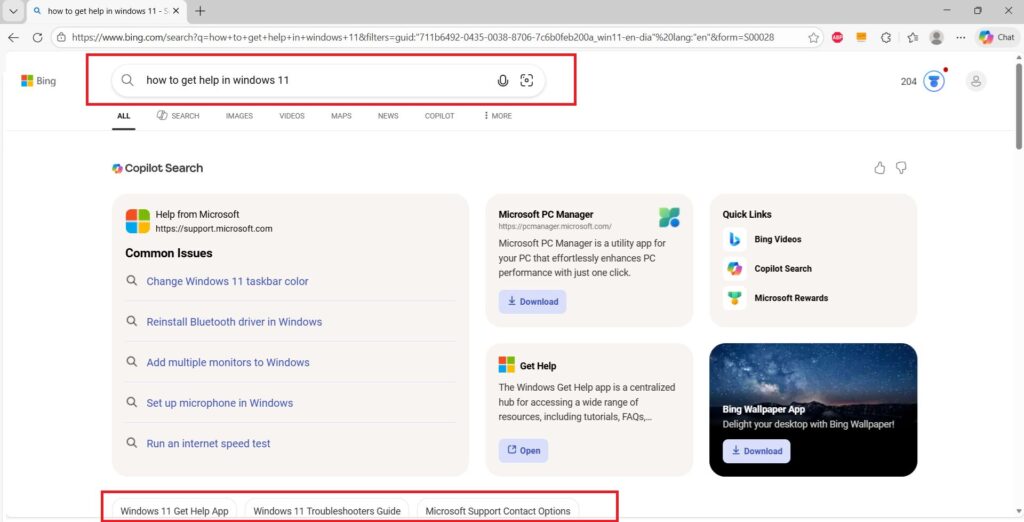
What happens when you press F1
- Windows opens Microsoft’s online help page
- Your browser displays support articles related to Windows 11
This method works well for learning features and basic how-to instructions, but it does not fix system issues automatically.
5. Use Windows Search to Find Help Instantly
Windows Search acts as a quick help tool for common tasks.
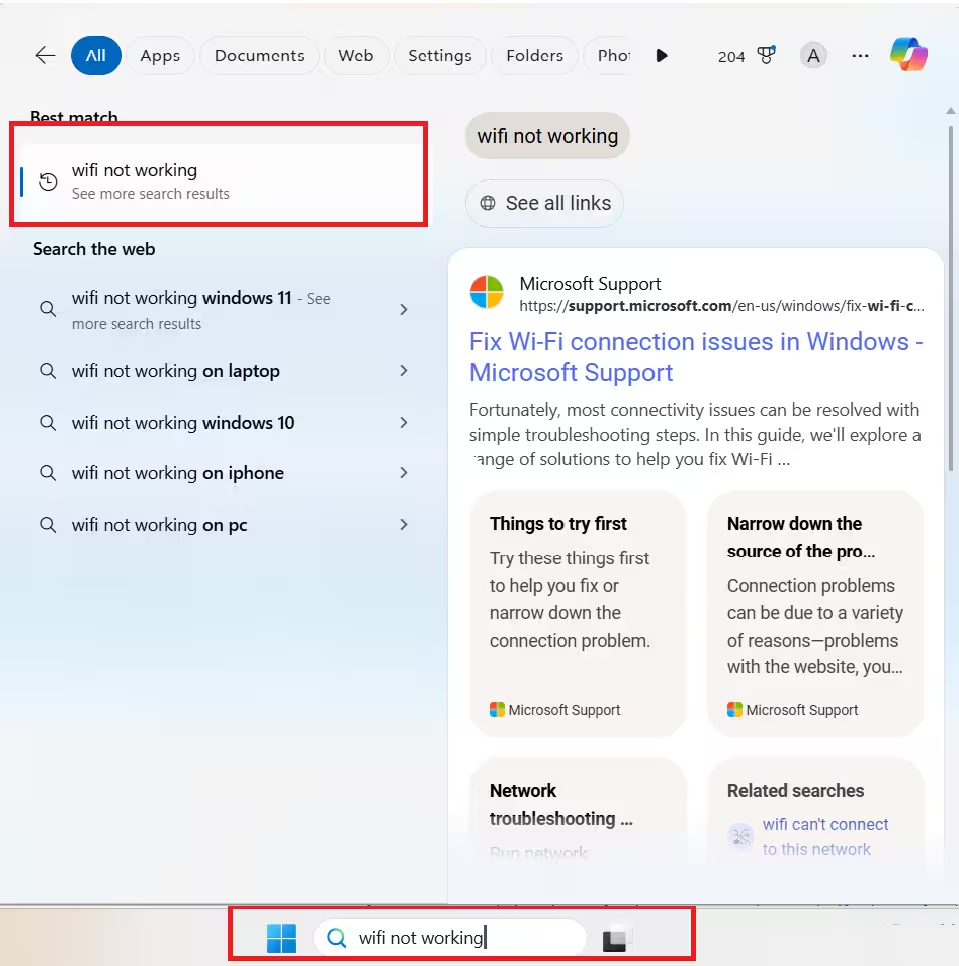
How to use it
- Click the Search icon on the taskbar
- Type your problem (example: Wi-Fi not working)
- Open the suggested settings or help result
Windows often shows:
- Direct settings shortcuts
- Recommended fixes
- Help articles
This method works best for simple settings changes.
6. Get Help Inside Windows Apps
Many Windows apps include built-in help options.
Common examples
- File Explorer → Three dots → Help
- Microsoft Edge → Settings → Help and feedback
- Microsoft Store → Help & support
Use these menus when you face app-specific problems.
7. Use the Get Help Command-Line Tool for Advanced Diagnostics
Microsoft retired the Support and Recovery Assistant (SaRA) with the March 2026 security update and replaced it with the Get Help command-line tool, GetHelpCmd.exe.
This tool is built for network administrators and power users who work with scripting and remote management. For most everyday users, the Get Help app covered above remains the better choice.
If you still want to try it, here is how to get started.
How to use GetHelpCmd.exe
- Download the Get Help command-line files from Microsoft
- Right click the downloaded ZIP file and select Extract All, then click Extract
- Open Start and search for Command Prompt
- Right click the top result and select Run as administrator
- Navigate to the extracted folder using
cd C:\Users\UserName\Downloads\GetHelpCmd - Run a scenario command. To scan Outlook for known issues and save a report:
GetHelpCmd.exe -S ExpertExperienceAdminTask -AcceptEula -LogFolder C:\temp - To uninstall all detected versions of Office:
GetHelpCmd.exe -S OfficeScrubScenario -AcceptEula
Each command returns an output code that confirms the result. For the Outlook scan, code 01 means an offline scan ran because Outlook was closed or already running as administrator, and code 02 means a full scan completed. Microsoft documents these codes on its Outlook scan support page.
For the Office uninstall scenario, code 00 confirms a successful uninstall, and code 68 means the tool found no Office installation. Full details are on the Office uninstall support page.
Microsoft rebuilds this tool regularly, and each build stops working 90 days after its creation date. Redownload the tool periodically to keep it working.
8. Contact Microsoft Support When Needed
Some issues require direct support from Microsoft.
When to contact support
- Windows activation fails
- Account or license problems appear
- Updates break system features
- Hardware drivers cause crashes
How to contact support
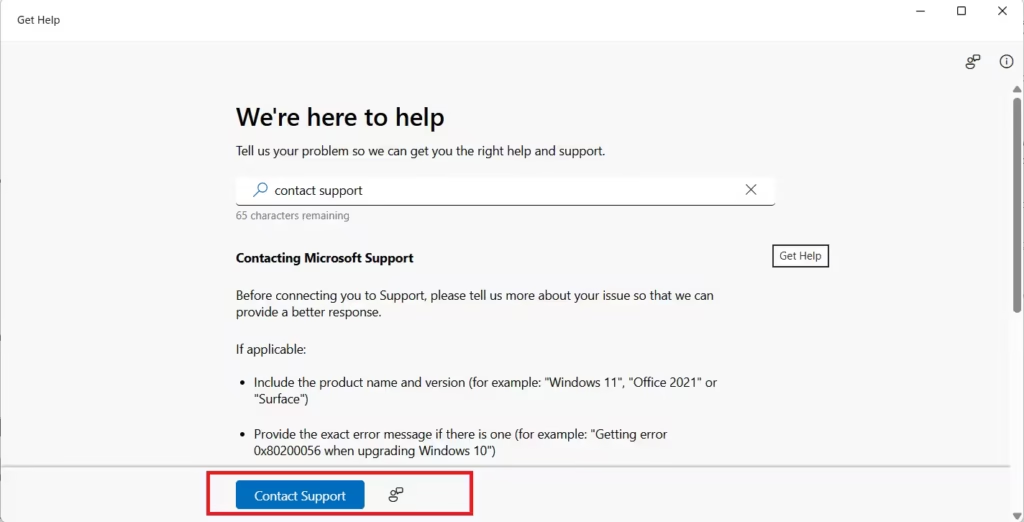
- Open the Get Help app
- Choose Contact Support
- Follow the prompts to chat or schedule help
Availability depends on your region and issue type.
Which Windows 11 Help Option Should You Use?
| Problem Type | Best Method |
|---|---|
| General Windows issues | Get Help app |
| Remote help from a trusted person | Quick Assist |
| Internet, audio, updates | Settings → Troubleshoot |
| Learning Windows features | F1 key |
| Quick fixes | Windows Search |
| App-specific problems | Built-in app help menus |
| Advanced or admin diagnostics | GetHelpCmd.exe |
| Activation or account issues | Contact Microsoft Support |
Always start with the Get Help app. It connects you to Microsoft’s official tools and avoids unsafe fixes. If Windows cannot solve the problem automatically, use troubleshooting, Quick Assist, or contact support directly.
Frequently Asked Questions
What is the Get Help command-line tool on Windows 11?
It is a diagnostic utility called GetHelpCmd.exe that replaced the Support and Recovery Assistant. It handles automation, scripting, and enterprise level troubleshooting for Windows 11 and Microsoft 365 apps.
Should I use the Get Help app or GetHelpCmd.exe?
Use the graphical Get Help app if you want guided, user-friendly troubleshooting. Use GetHelpCmd.exe only if you are a network administrator or power user who needs scripting and remote management capabilities.
Why does GetHelpCmd.exe stop working after a few months?
Microsoft sets each build to expire 90 days after its creation date to keep users on the latest version with current fixes and security updates. Download a fresh copy from Microsoft when this happens.
Do I need a Microsoft account to use Quick Assist?
You do not need one to receive help, but the person helping you does need a Microsoft account to start the session.
Related Guides
- How to Enter Safe Mode in Windows 11 (5 Easy Methods)
- How to Allow an App Through Windows 11 Firewall (Security, Settings, PowerShell)
- How to Use Disk Management in Windows 11: Create, Delete, Format Partitions
Windows Error Fixes

