Sound issues in Windows 11 usually appear after system updates, driver changes, or incorrect audio settings. The good news is that most audio problems have simple fixes if you follow the steps in the right order. This guide walks you through every reliable method to fix sound problems in Windows 11, using clear, practical steps.
Step 1: Check Volume and Physical Connections
Start with the basics before changing system settings.

- Click the speaker icon on the taskbar and make sure audio is not muted
- Increase the volume using the slider
- Plug in headphones or speakers securely
- Try a different USB port or audio jack if available
- If you use Bluetooth audio, confirm the device is connected
Many sound issues stop here, especially after restarts or sleep mode.
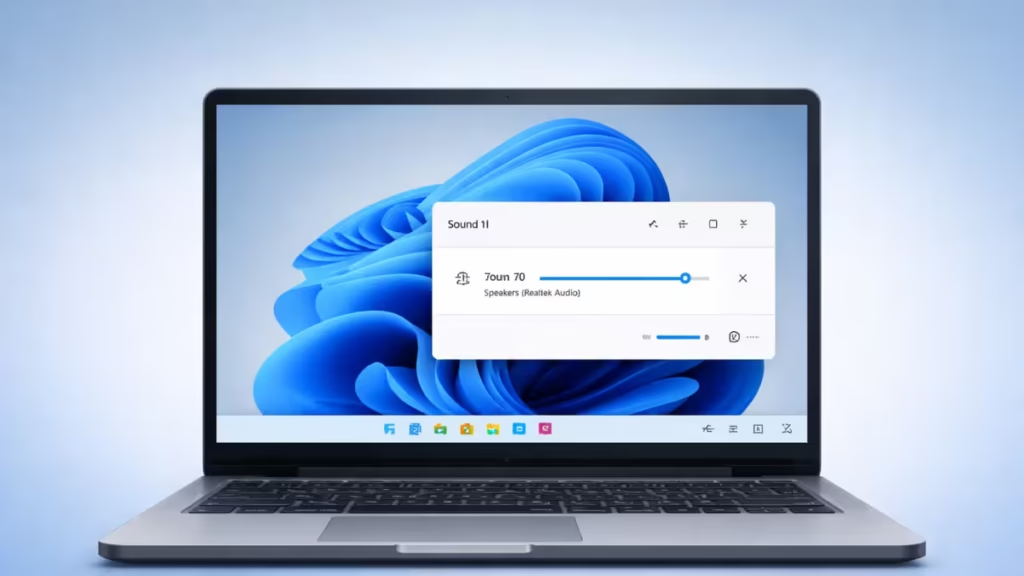
Step 2: Choose the Correct Audio Output Device
Windows 11 can switch output devices automatically without warning.
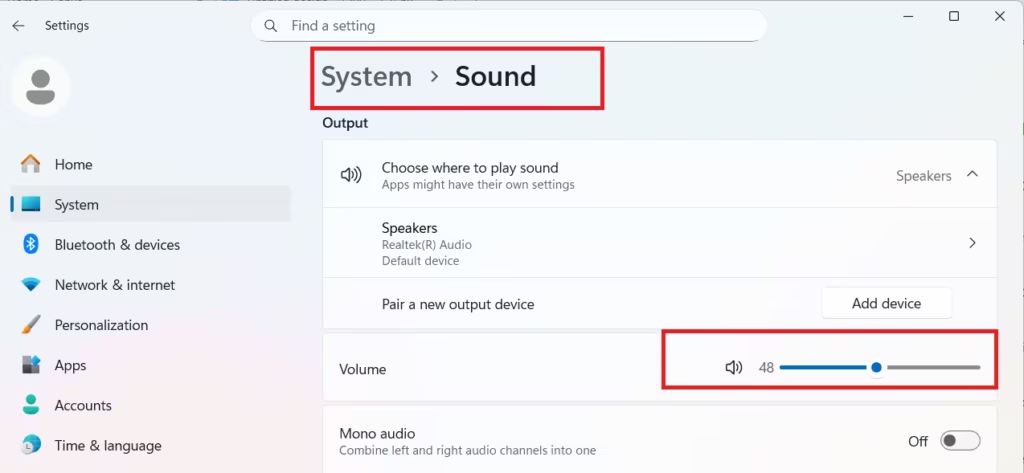
- Right-click the speaker icon on the taskbar
- Click Sound settings
- Under Output, select the correct device (Speakers, Headphones, HDMI, or Bluetooth)
- Move the volume slider left and right
If you hear sound while adjusting the slider, the selected output device is working correctly.
If you do not hear any sound while moving the slider, continue to the next steps in this guide.
Step 3: Run the Built-In Audio Troubleshooter
Windows includes a built-in tool that fixes common audio problems automatically.
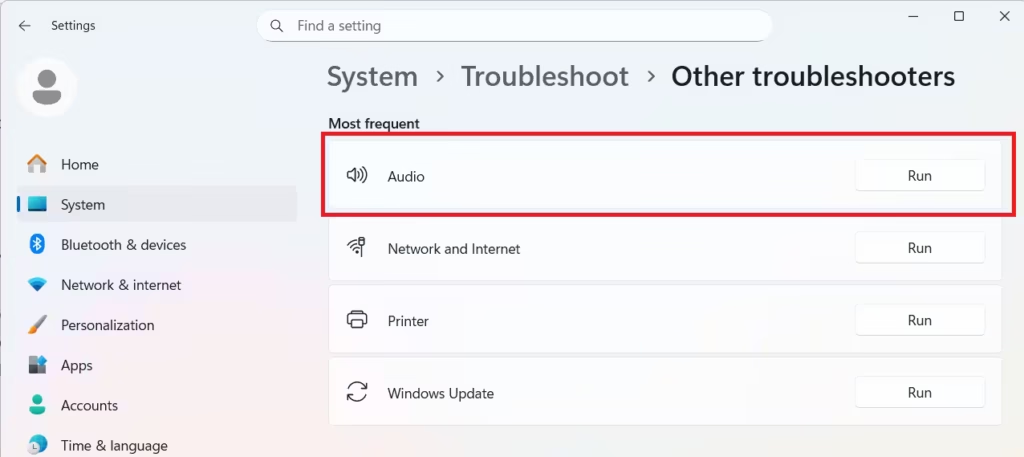
- Open Settings → System → Troubleshoot → Other troubleshooters
- Click Run next to Playing Audio
- Follow the on-screen instructions and apply the suggested fix
Step 4: Restart Windows Audio Services
If sound suddenly stops, audio services may be frozen or disabled.
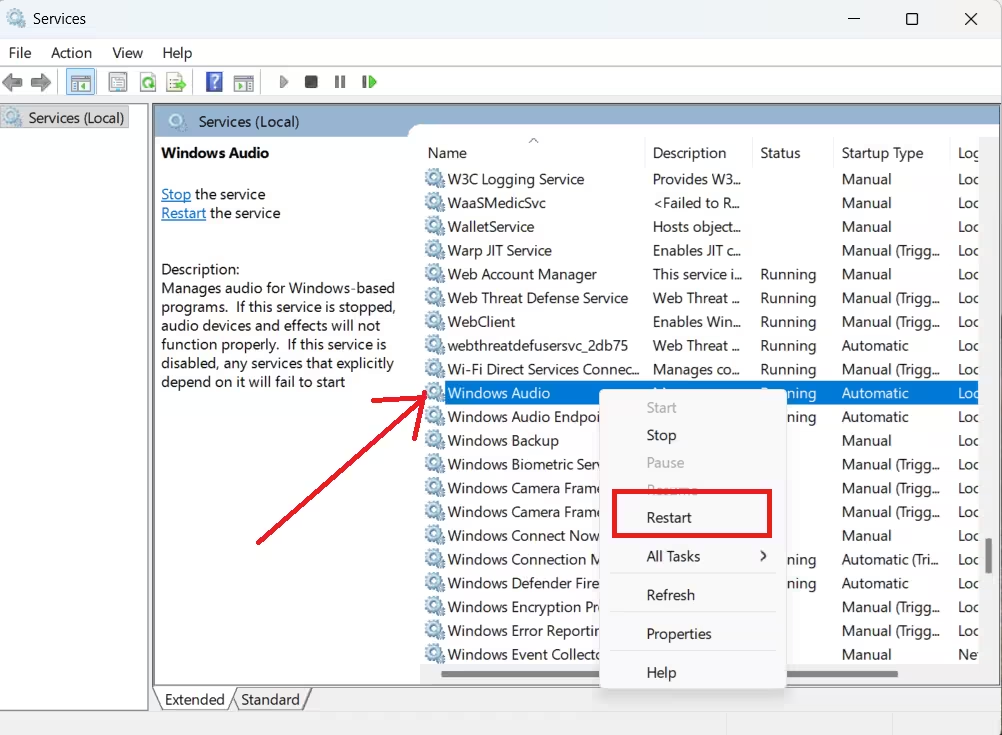
- Press Win + R, type
services.msc, and press Enter - Find Windows Audio
- Right-click → Restart
- Do the same for Windows Audio Endpoint Builder
Step 5: Update or Reinstall Audio Drivers
Audio drivers often break after Windows updates.
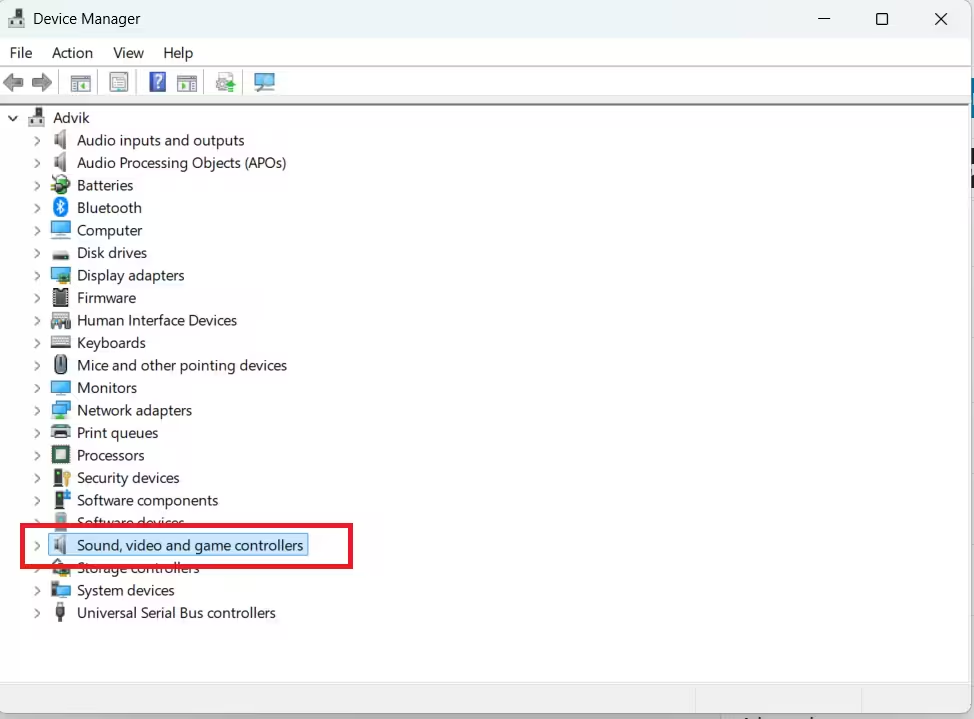
Update the driver
- Right-click Start → Device Manager
- Expand Sound, video and game controllers
- Right-click your audio device → Update driver
Reinstall the driver (recommended if update fails)
- Right-click the audio device → Uninstall device
- Restart your PC
- Windows automatically installs a fresh driver
Step 6: Disable Audio Enhancements
Audio enhancements sometimes block sound completely.
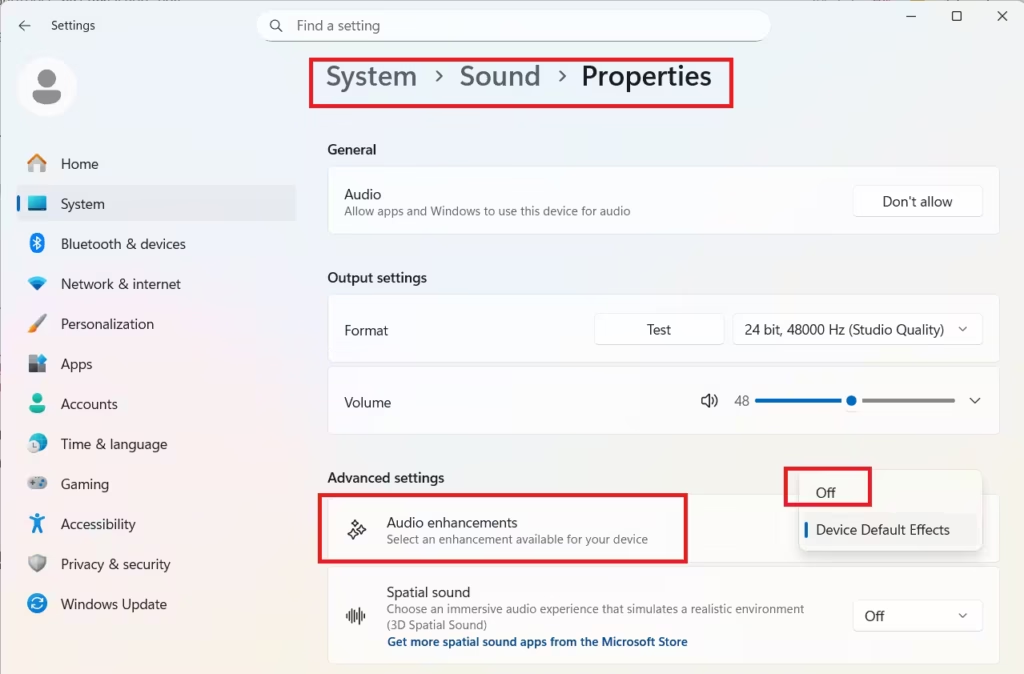
- Open Sound settings
- Click your output device
- Open Audio enhancements
- Turn enhancements Off
- Restart your PC
Step 7: Set a Safe Default Audio Format
An unsupported audio format can cause silence.
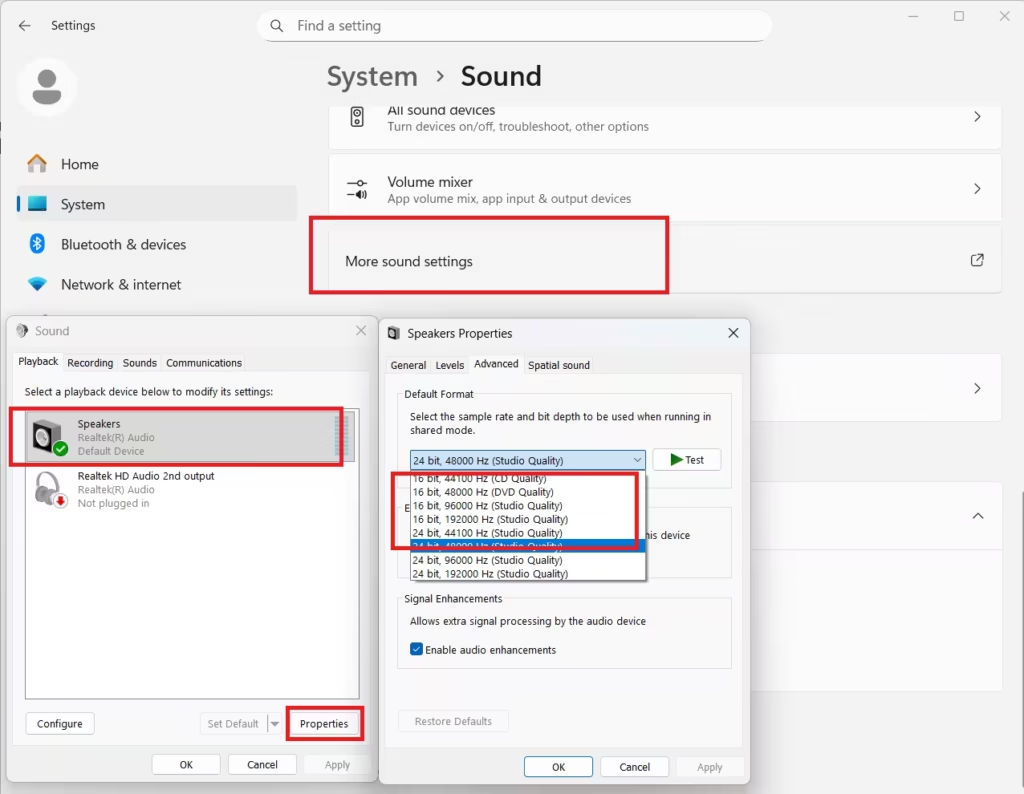
- Open Sound settings → More sound settings
- Select your speaker → Properties
- Go to the Advanced tab
- Choose 16 bit, 44100 Hz (CD Quality)
- Click Apply
Step 8: Check App-Specific Volume Settings
Windows allows apps to control their own volume.
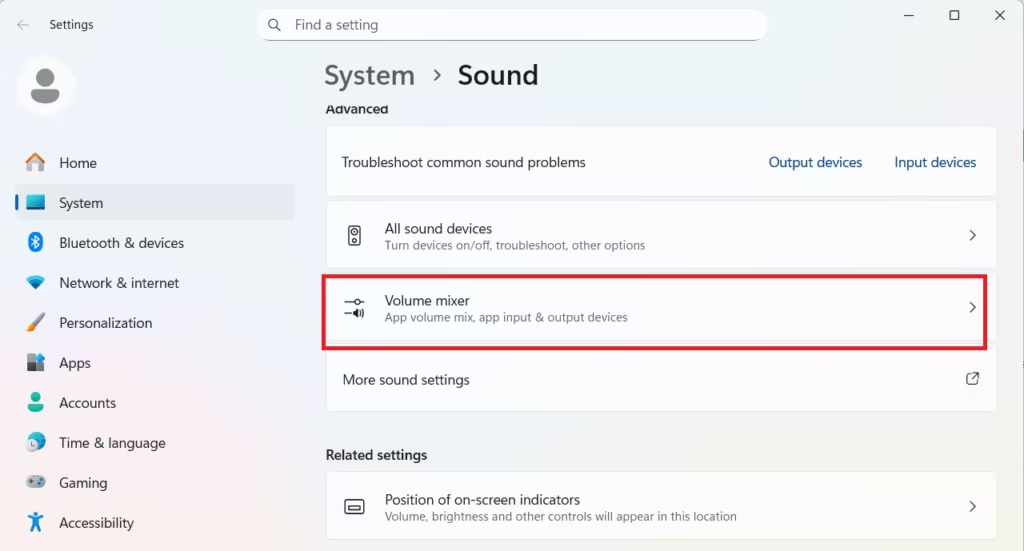
- Open Sound settings → Volume mixer
- Confirm the affected app is not muted
- Increase its volume level
This step fixes cases where system sound works but one app stays silent.
Step 9: Install Optional Driver Updates
Microsoft often ships audio fixes under optional updates.
- Open Settings → Windows Update → Advanced options
- Click Optional updates
- Install any available audio or driver updates
Step 10: Test with Another Audio Device
This step helps confirm whether the issue is hardware-related.
- Connect USB headphones or Bluetooth speakers
- Try HDMI audio through a monitor or TV
- If external audio works, the internal speaker or jack may be faulty
Quick Fix Order (Recommended)
If you want the fastest results, follow this order:
- Select the correct output device
- Run the audio troubleshooter
- Restart Windows Audio services
- Reinstall the audio driver
Most Windows 11 sound problems come from driver conflicts or incorrect output selection. Reinstalling the audio driver and restarting audio services fixes the issue for most users.
If sound still doesn’t work, the problem may involve hardware failure or BIOS-level audio settings.

