If your M.2 SSD is not showing in Windows 11, the drive is likely uninitialized, using the wrong driver, or seated in an incompatible slot. This guide covers every confirmed fix, from Disk Management initialization to BIOS updates.
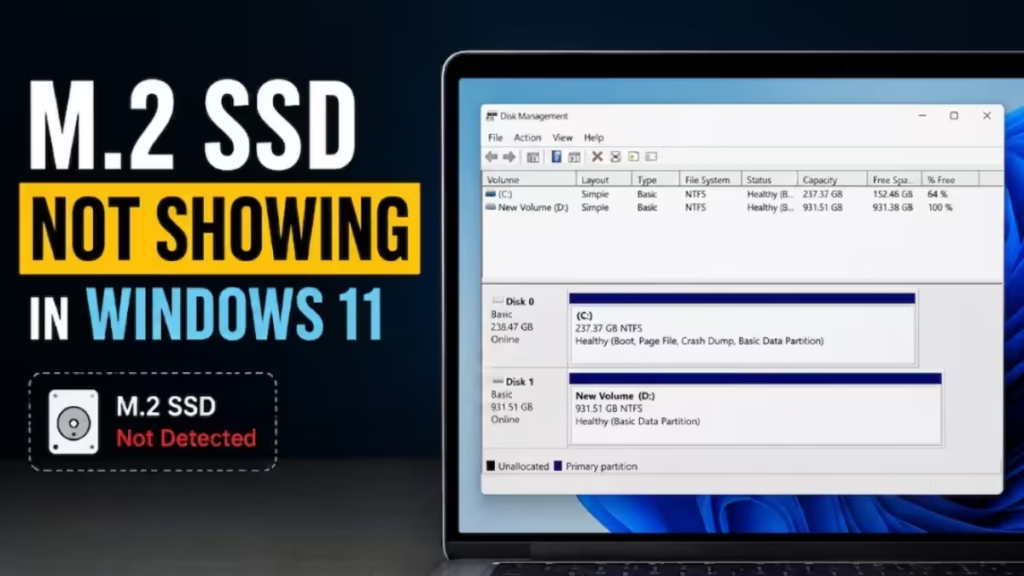
Why Is Your M.2 SSD Not Showing in Windows 11?
These are the most common reasons the SSD goes missing in Windows 11:
- The SSD has no partition or drive letter assigned
- Windows is using a RAID driver instead of the NVMe controller driver
- The M.2 slot shares PCIe lanes with SATA ports, causing a conflict
- The SSD firmware is missing or outdated
- The SSD has been added to a Storage Pool, hiding it from File Explorer
- BIOS is outdated and does not recognize the newer SSD
Fix 1: Check If the SSD Appears in BIOS
Before touching Windows, verify the SSD is physically detected.
- Restart your PC and press F2, Del, or your motherboard's BIOS key during boot.
- Navigate to the Storage or Boot section.
- Check whether the M.2 SSD appears in the list.
If the SSD shows in BIOS but not in Windows, the problem is a software or driver issue. If it does not show in BIOS either, the drive may be incorrectly seated or faulty.
Fix 2: Initialize the SSD in Disk Management
A brand-new or freshly wiped M.2 SSD will not appear in File Explorer until you initialize it and create a volume.
- Press Win + X and select Disk Management.
- Scroll through the disk list at the bottom. Look for a disk labeled Not Initialized or Unknown.
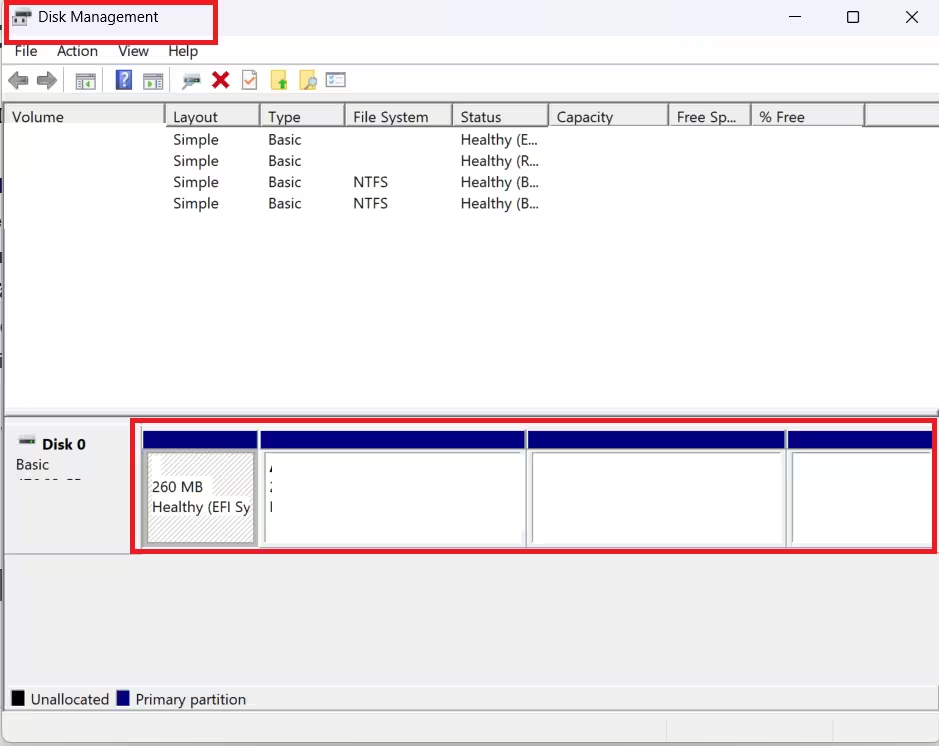
- Right-click that disk and select Initialize Disk.
- Choose GPT (GUID Partition Table) and click OK.
- Right-click the unallocated space on that disk and select New Simple Volume.
- Follow the wizard to assign a drive letter and format the volume as NTFS.
After completing the wizard, the SSD will appear in File Explorer with the drive letter you assigned.
Note: If the disk shows as Offline, right-click it and select Online before initializing.
Fix 3: Assign a Drive Letter If the SSD Has No Letter
Sometimes the SSD shows in Disk Management but not in File Explorer because it has no drive letter.
- Open Disk Management (Win + X).
- Right-click the M.2 SSD partition and select Change Drive Letter and Paths.
- Click Add, choose a letter from the dropdown, and click OK.
The drive will now appear in File Explorer immediately.
Fix 4: Seat the SSD in the Correct Slot
M.2 slots are not all the same. Inserting an NVMe SSD into a SATA-only M.2 slot, or vice versa, will cause the drive to go undetected.
- Check your SSD packaging or manufacturer website to confirm whether it is NVMe or SATA.
- Check your motherboard manual to identify which M.2 slots support NVMe and which support SATA.
- Also note that some motherboards share PCIe lanes between M.2 slots and SATA ports. Installing a drive in a shared slot can disable certain SATA connectors, or the reverse. Refer to your motherboard manual for the exact lane-sharing layout.
Try reseating the SSD firmly into the correct slot, then boot back into Windows.
Fix 5: Install the Standard NVM Express Controller Driver
Windows sometimes applies a RAID driver to your NVMe SSD, which prevents it from showing up correctly. If you have not configured a RAID array, switch the driver to the standard NVMe controller.
- Press Win + X and open Device Manager.
- Expand Storage Controllers.
- Look for a RAID-related driver such as AMD-RAID Bottom Device or similar.
- Right-click it and select Update Driver.
- Click Browse my computer for drivers.
- Click Let me pick from a list of available drivers on my computer.
- Check Show compatible hardware.
- Select Standard NVM Express Controller and click Next.
- Complete the installation, then restart your PC.
Fix 6: Update Storage Controller Drivers
Outdated storage controller drivers can cause detection failures, especially with newer NVMe drives.
- Open Device Manager (Win + X).
- Expand Storage Controllers.
- Right-click each controller and select Update Driver.
- Select Search automatically for drivers and let Windows find the latest version.
- Restart the PC after updating.
Alternatively, visit your motherboard manufacturer's support page and download the latest chipset or storage controller drivers directly.
Fix 7: Update the SSD Firmware
Some M.2 SSDs require firmware installation before Windows can detect them. This is common with Samsung, WD, and Crucial drives.
- Visit the official website for your SSD brand (Samsung, WD, Kingston, Crucial, etc.).
- Search for your exact SSD model number.
- Download the firmware update tool or .iso file.
- Run the tool or boot from the .iso and follow the on-screen steps.
After applying the firmware, restart your PC and check Device Manager.
Fix 8: Check and Remove a Storage Pool
If the M.2 SSD was previously used as part of a Windows Storage Pool, Windows will hide it from File Explorer until you remove it from the pool.
- Open Settings and go to System > Storage.
- Scroll down and click Advanced storage settings, then Storage Spaces.
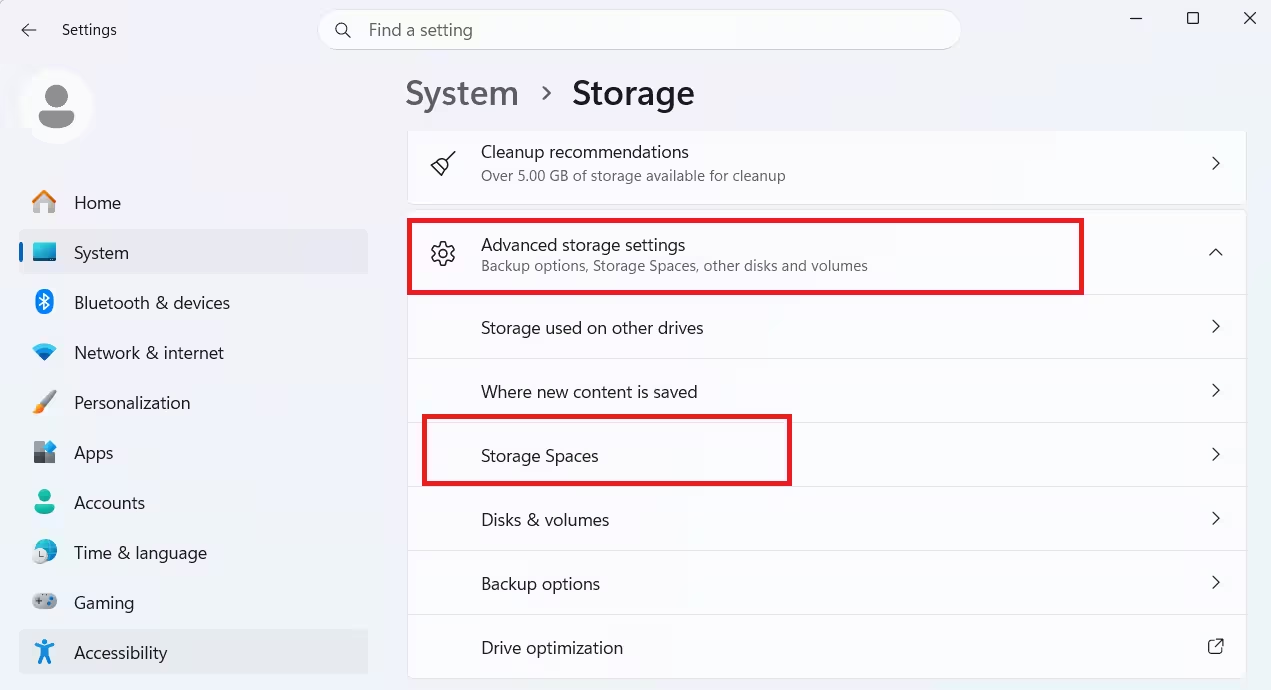
- If a storage pool exists, expand it and check whether your M.2 drive is listed as a member.
- Remove the SSD from the pool or delete the storage space entirely.
You can also check this via Control Panel > Storage Spaces on older Windows configurations.
Fix 9: Update Your BIOS
An outdated BIOS may not recognize newer M.2 NVMe drives, particularly on older motherboards paired with recent SSDs.
- Press Win + R, type
msinfo32, and press Enter. - Note the BIOS Version/Date listed in System Information.
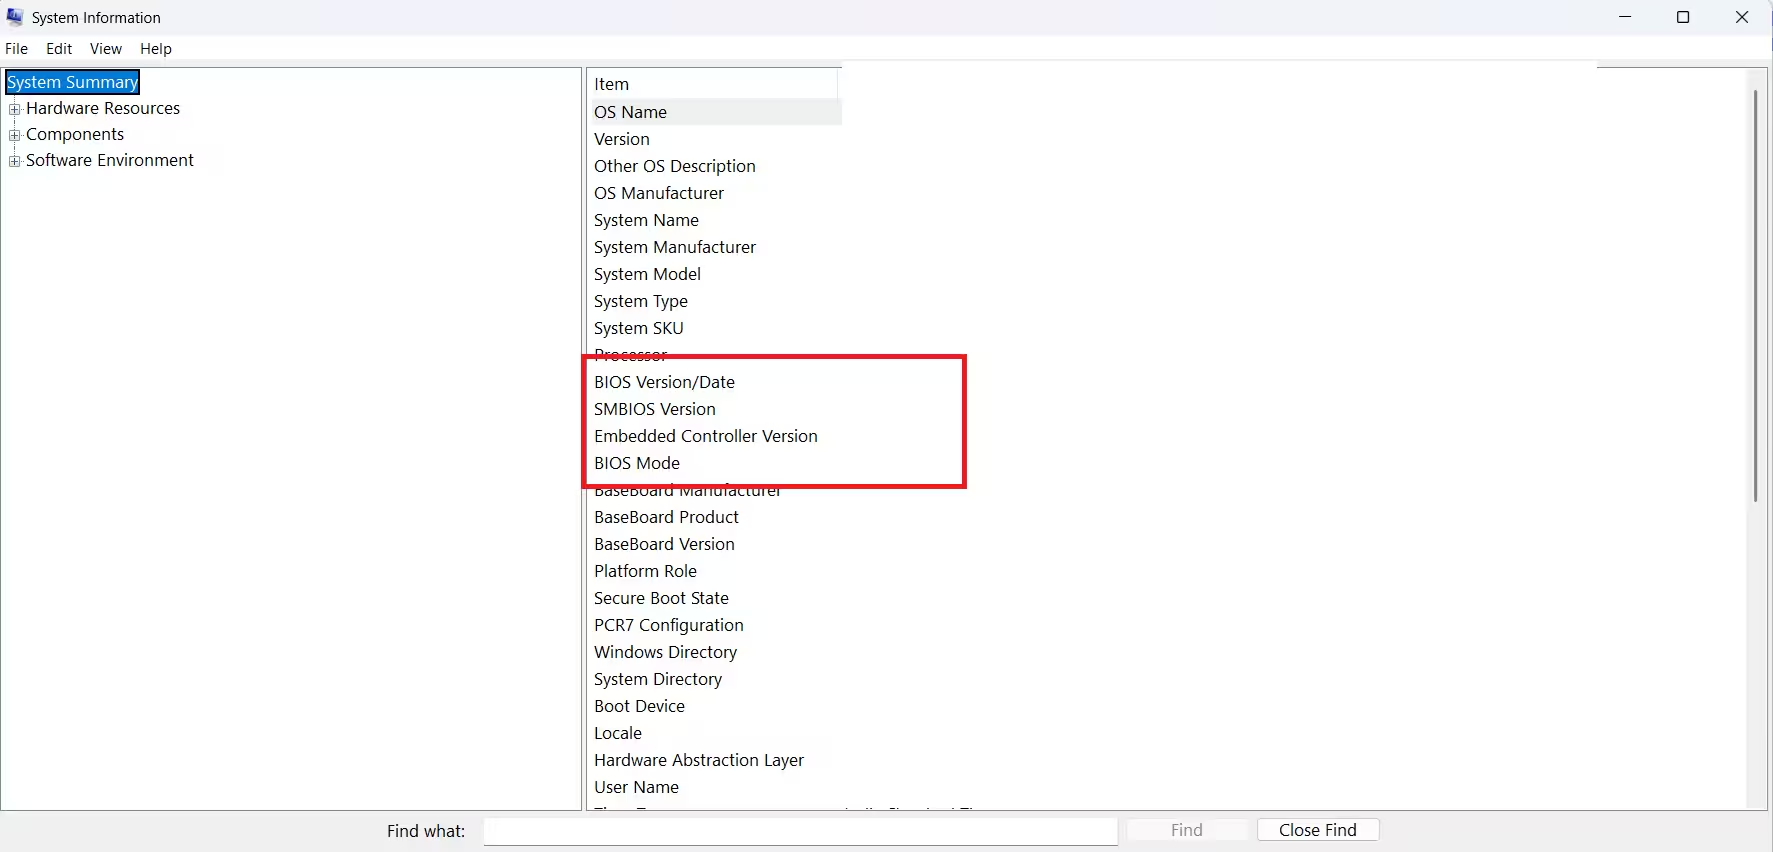
- Visit your motherboard manufacturer's support page and search for your board model.
- Download the latest BIOS version if it is newer than your current one.
- Follow the manufacturer's flashing instructions carefully.
Warning: Do not interrupt power during a BIOS update. A failed flash can damage your motherboard. Use a UPS or ensure your laptop is plugged in before proceeding.
After the update, enter BIOS and verify the M.2 SSD now appears in the storage list before booting into Windows.
Format the SSD to NTFS Using DiskPart (If File System Is Unrecognized)
If the SSD appears in Disk Management but Windows cannot read its file system, format it to NTFS using DiskPart.
- Press Win + S, search for cmd, right-click it, and select Run as administrator.
- Type
diskpartand press Enter. - Run the following commands in order:
list disk
select disk N
clean
create partition primary
format fs=ntfs quick
assign
exit
Replace N with the disk number of your M.2 SSD from the list disk output. The clean command erases all data on the disk, so confirm you have selected the correct disk number before running it.
Frequently Asked Questions
Why does my M.2 SSD show in BIOS but not in Windows 11?
The SSD is physically detected but not yet configured for Windows. The most common reasons are an uninitialized disk, missing drive letter, or incorrect storage controller driver. Open Disk Management first and initialize the drive if it shows as Not Initialized.
How do I know if my M.2 SSD is failing?
Unlike HDDs, M.2 SSDs have no moving parts, so there is no clicking sound. Signs of a failing SSD include frequent file corruption, noticeably slower read and write speeds, unexpected blue screen errors, and failure to appear even in BIOS. Run a health check using CrystalDiskInfo or your SSD manufacturer's diagnostic tool.
Will initializing the SSD delete my data?
Yes. Initializing an SSD wipes its partition table. If the drive contains important data and is showing as Not Initialized, use a data recovery tool before proceeding.
![Windows Booting from D Drive Instead of C Drive [Fixed]](https://img.fdaytalk.com/wp-content/uploads/2026/06/Windows-Booting.avif)
![WiFi Disconnects When Laptop Is Locked on Windows 11/10 [Fixed]](https://img.fdaytalk.com/wp-content/uploads/2026/06/WiFi-Disconnects.avif)