When Windows 11 does not recognize your webcam, the device either disappears from Device Manager entirely, shows up as an unknown device with an error flag, or simply never appears in any app. This is different from a camera that opens but fails to show a preview. Here, Windows has no awareness the webcam exists at all.
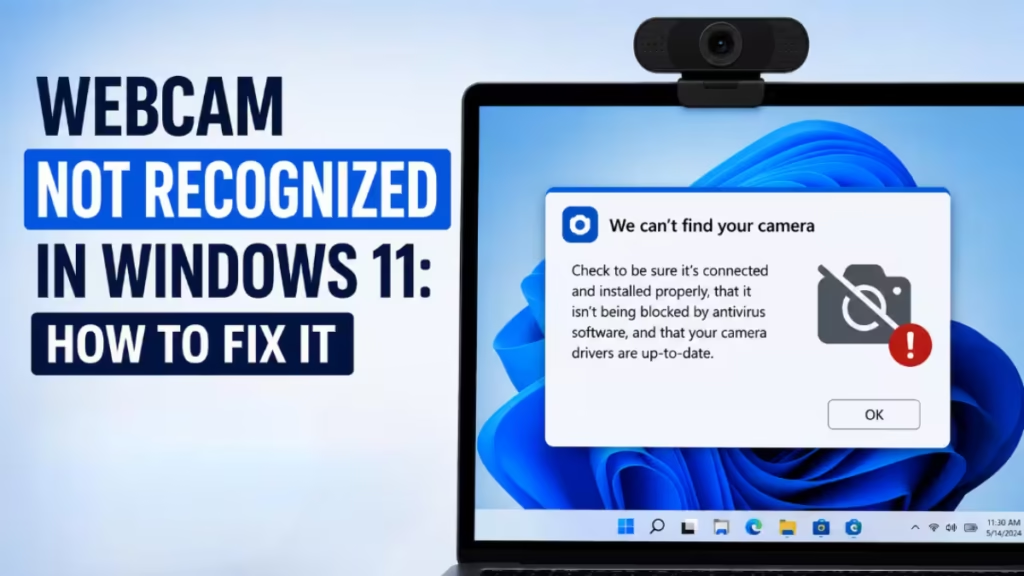
The cause is almost always one of four things: a USB connection problem, a disabled or corrupt driver, a Windows update that broke detection, or USB power management cutting power to the port. This guide covers every fix in order from simplest to deepest.
Why Windows 11 Is Not Recognizing Your Webcam
These are the most common reasons:
- USB cable loose, damaged, or plugged into a powered-off hub
- Webcam disabled in Device Manager
- Driver missing, corrupted, or incompatible after a Windows update
- USB selective suspend cutting power to the port
- Wrong or outdated manufacturer driver installed
- Windows Hello or privacy policy blocking device initialization
- Faulty webcam hardware
Fix 1: Check the USB Connection
Start with the physical connection before touching any software setting.
- Unplug the webcam USB cable completely.
- Wait 10 seconds, then plug it back in firmly.
- Try a different USB port on the device, preferably a USB 3.0 port directly on the machine.
- Avoid USB hubs. Plug the webcam directly into the PC or laptop.
- Try the webcam on a different computer to confirm the hardware works.
If the webcam shows up on a different computer but not on your Windows 11 machine, the problem is software or port-level, not hardware.
Fix 2: Check Device Manager for a Disabled or Flagged Webcam
Windows can disable a webcam silently after an update or driver conflict.
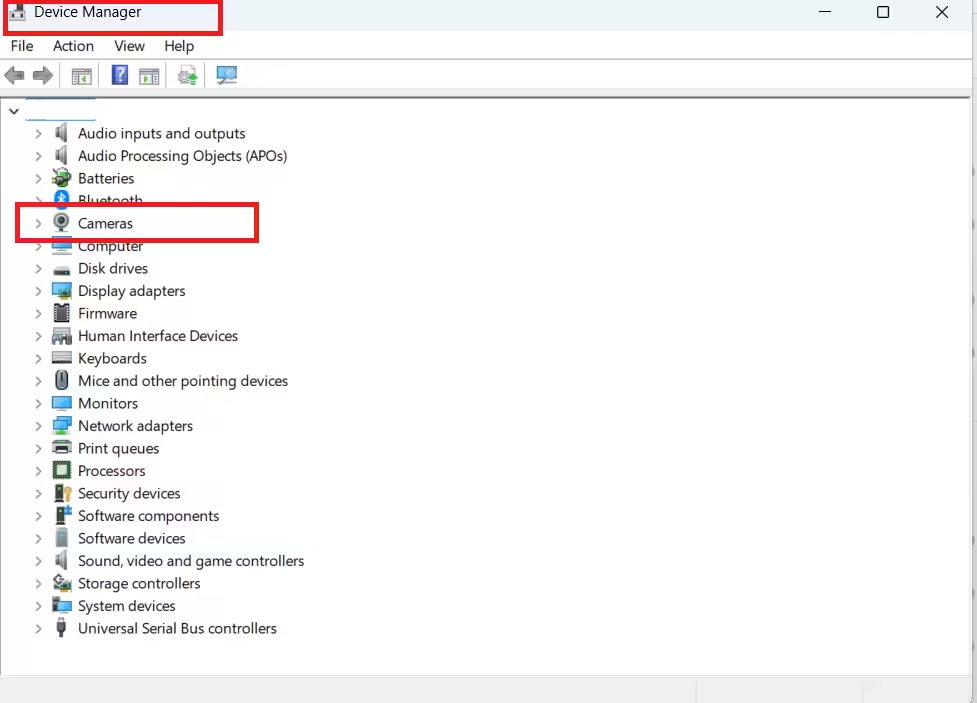
- Right-click Start and select Device Manager.
- Expand Cameras, Imaging devices, or Sound, video and game controllers.
- Look for your webcam in the list.
If you see it with a down arrow icon, the device is disabled:
- Right-click it and select Enable device.
- Restart the PC and test.
If you see it with a yellow warning triangle, the driver has an error. Continue to Fix 5.
If the webcam does not appear in any category at all, move to Fix 3.
Fix 3: Scan for Hardware Changes
When Windows misses a device during startup, a manual scan forces re-detection.
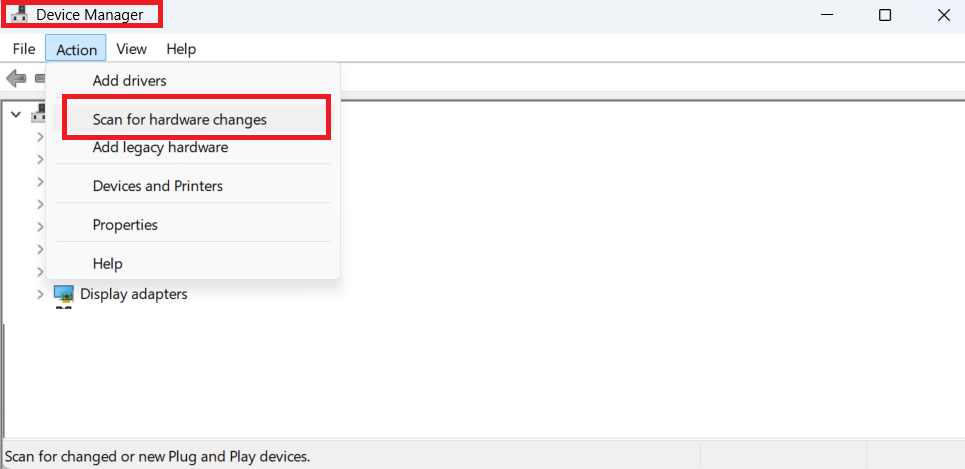
- Open Device Manager.
- Click the Action menu at the top.
- Select Scan for hardware changes.
- Wait for the scan to finish.
- Check if the webcam now appears under Cameras or Imaging devices.
If it appears after the scan, right-click it and select Update driver > Search automatically for drivers, then restart the PC.
Fix 4: Disable USB Selective Suspend
Windows 11 uses USB selective suspend to cut power to idle USB ports and save battery. This sometimes prevents the webcam from initializing when you plug it in.
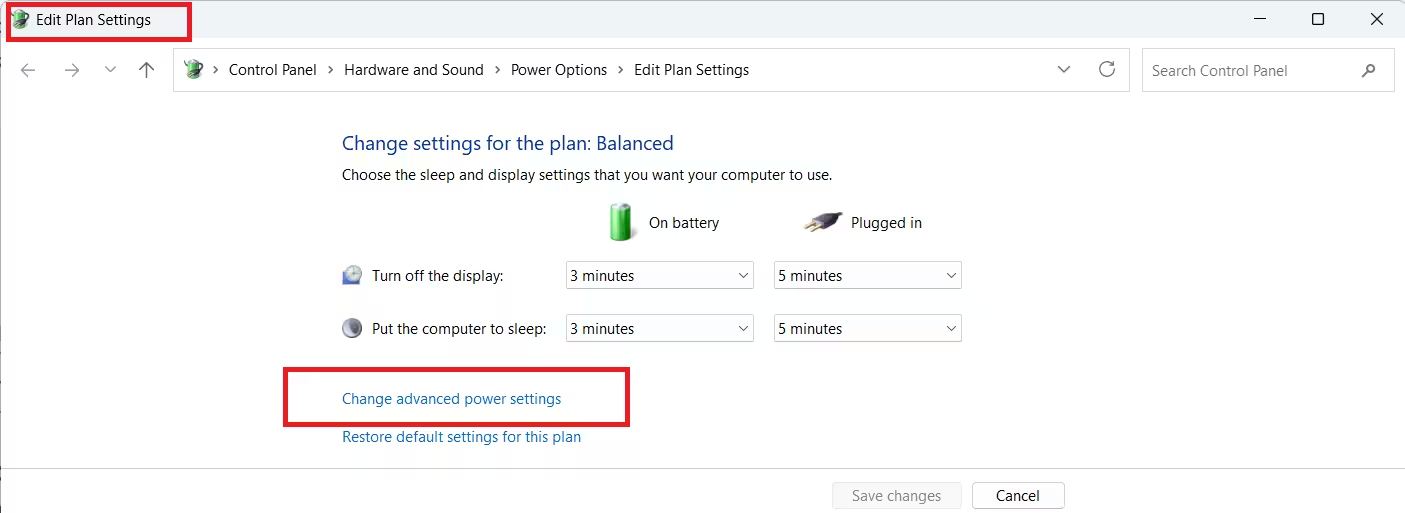
- Press Windows + S, type power plan, and select Edit power plan.
- Click Change advanced power settings.
- Expand USB settings > USB selective suspend setting.
- Set it to Disabled.
- Click Apply and OK.
- Unplug the webcam, wait 10 seconds, and plug it back in.
On laptops, set this for both On battery and Plugged in modes.
Fix 5: Update the Webcam Driver
An outdated or incompatible driver is one of the top reasons a webcam goes unrecognized after a Windows 11 update.
- Open Device Manager.
- Expand Cameras or Imaging devices.
- Right-click your webcam and select Update driver.
- Choose Search automatically for drivers.
- If Windows finds an update, install it and restart.
If Windows says the driver is already up to date but the webcam still fails, download the driver manually from your webcam manufacturer’s support page and install it directly.
Fix 6: Reinstall the Webcam Driver
If updating does not fix detection, uninstalling and reinstalling the driver clears any corrupted installation.
- In Device Manager, right-click your webcam and select Uninstall device.
- Check Attempt to remove the driver for this device and confirm.
- Unplug the webcam.
- Restart the PC.
- Plug the webcam back in. Windows reinstalls the driver automatically.
If Windows does not reinstall the driver on its own, go to Device Manager > Action > Scan for hardware changes after plugging the webcam back in.
Fix 7: Roll Back the Driver (If Webcam Stopped Working After an Update)
If your webcam was working before a recent Windows update and stopped after, rolling back the driver restores the previous working version.
- In Device Manager, right-click your webcam and select Properties.
- Go to the Driver tab.
- Click Roll Back Driver and confirm.
- Restart the PC and test.
If the Roll Back Driver button is greyed out, no previous driver version is saved. In that case, download an older driver version directly from the manufacturer’s website.
Some Windows updates have introduced camera detection failures on specific hardware. The Windows 11 KB5074105 camera issue is a documented example where webcams stopped working entirely on affected systems after installation.
Fix 8: Switch to the Built-In UVC Driver
Most USB webcams support the USB Video Class (UVC) standard. Windows 11 includes a built-in UVC driver that works with nearly all compliant webcams. If the manufacturer’s driver causes detection failure, switching to the UVC driver often resolves it.
- In Device Manager, right-click your webcam and select Update driver.
- Choose Browse my computer for drivers.
- Select Let me pick from a list of available drivers on my computer.
- Select USB Video Device from the list and click Next.
- Restart the PC.
Note: The built-in UVC driver may not support all manufacturer features. Windows Hello face recognition may stop working if it relied on the manufacturer’s custom driver.
Fix 9: Check Privacy Settings
In rare cases, a group policy or admin restriction prevents Windows from even initializing the camera hardware. If the device never appears in Device Manager at all, this is less likely to be the cause, but worth checking on managed or enterprise devices.
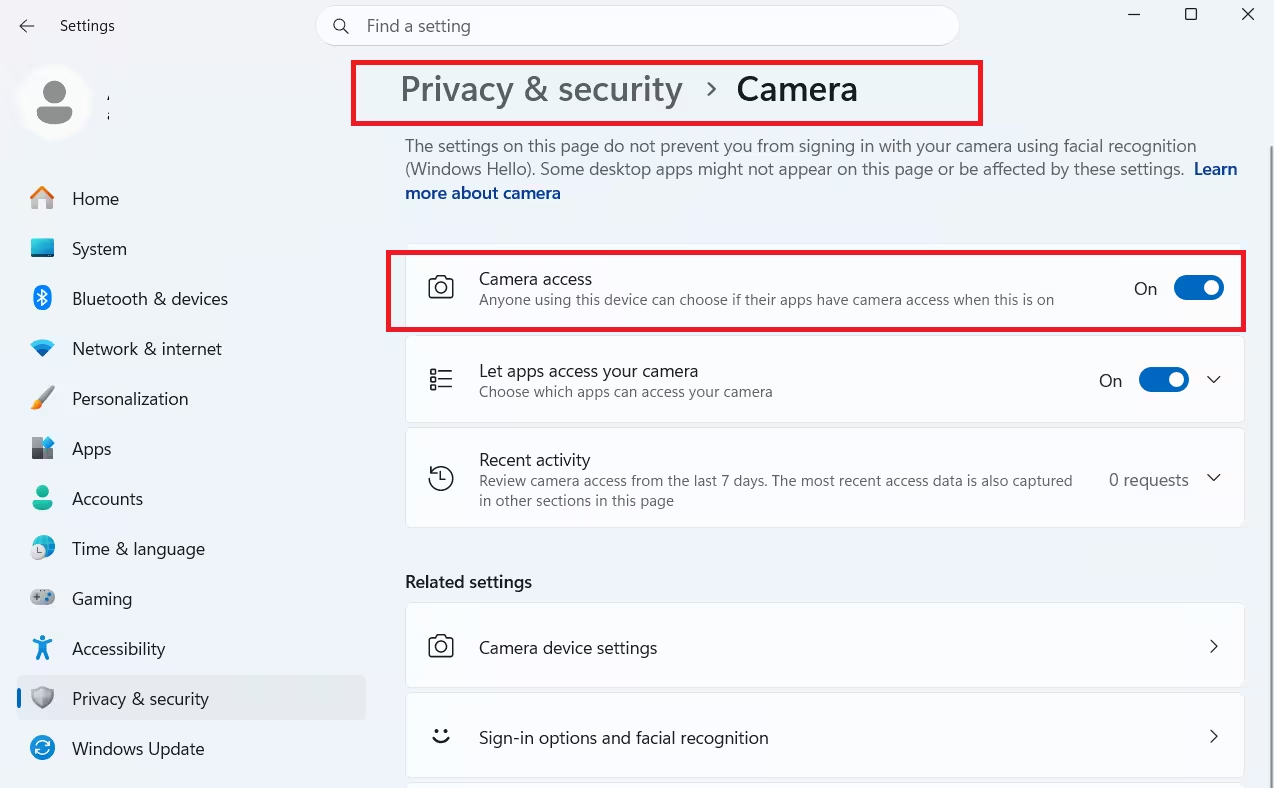
- Press Windows + I and go to Privacy & security > Camera.
- Confirm Camera access is turned on.
- If the toggle is greyed out, an administrator has disabled camera access at the device level.
On managed enterprise devices, contact your IT administrator to check the group policy controlling camera access. On Surface devices with admin-level camera restrictions, the guide on how to enable camera on Surface Pro as an administrator explains how to restore access at the administrator level.
Fix 10: Install OEM Drivers and Utilities
For branded laptops (HP, Dell, Lenovo, Asus), the built-in camera often requires a manufacturer-specific driver or utility that Windows Update does not install automatically. After a clean Windows 11 install or a major update, these OEM components sometimes go missing.
- Visit your laptop manufacturer’s official support page.
- Enter your exact laptop model.
- Download the latest camera driver or imaging utility for Windows 11.
- Install it and restart the laptop.
Check for a separate firmware package alongside the driver. Some OEM cameras require both the driver and a firmware file to initialize correctly under Windows 11.
Fix 11: Logitech Webcam Not Recognized in Windows 11
Logitech webcams have additional software dependencies that can interfere with device recognition. If you use a Logitech webcam and Windows 11 does not detect it, try these steps after the general fixes above.
Uninstall conflicting Logitech software:
Logi Options+, Logi Tune, and G Hub can each conflict with webcam detection, especially after Windows updates. Open Settings > Apps > Installed apps, uninstall all Logitech software, restart the PC, then plug in the webcam. Windows should detect it using the UVC driver.
Reinstall Logi Tune or Options+ fresh:
After the webcam is detected with the UVC driver, reinstall only the Logitech app you actually use from support.logi.com. Do not reinstall G Hub unless you use a Logitech G series gaming peripheral, as it can grab control of camera devices.
Check the Logi Bolt receiver:
If your webcam connects wirelessly through a Logi Bolt USB receiver rather than a direct cable, try these steps:
- Unplug the Bolt receiver and plug it into a different USB port.
- Open Logi Bolt software and check if the webcam appears as paired.
- If not, re-pair the webcam by putting it in pairing mode and scanning in the Logi Bolt app.
Use Logitech Firmware Update Tool:
Download the Logitech Firmware Update Tool from the Logitech support site for your webcam model. Outdated webcam firmware causes recognition failures on Windows 11, particularly after major OS updates.
Fix 12: Check for Windows Updates
Microsoft releases cumulative updates that fix device detection bugs, including webcam recognition failures. If your webcam stopped being recognized after a specific update, a subsequent patch may already fix it.
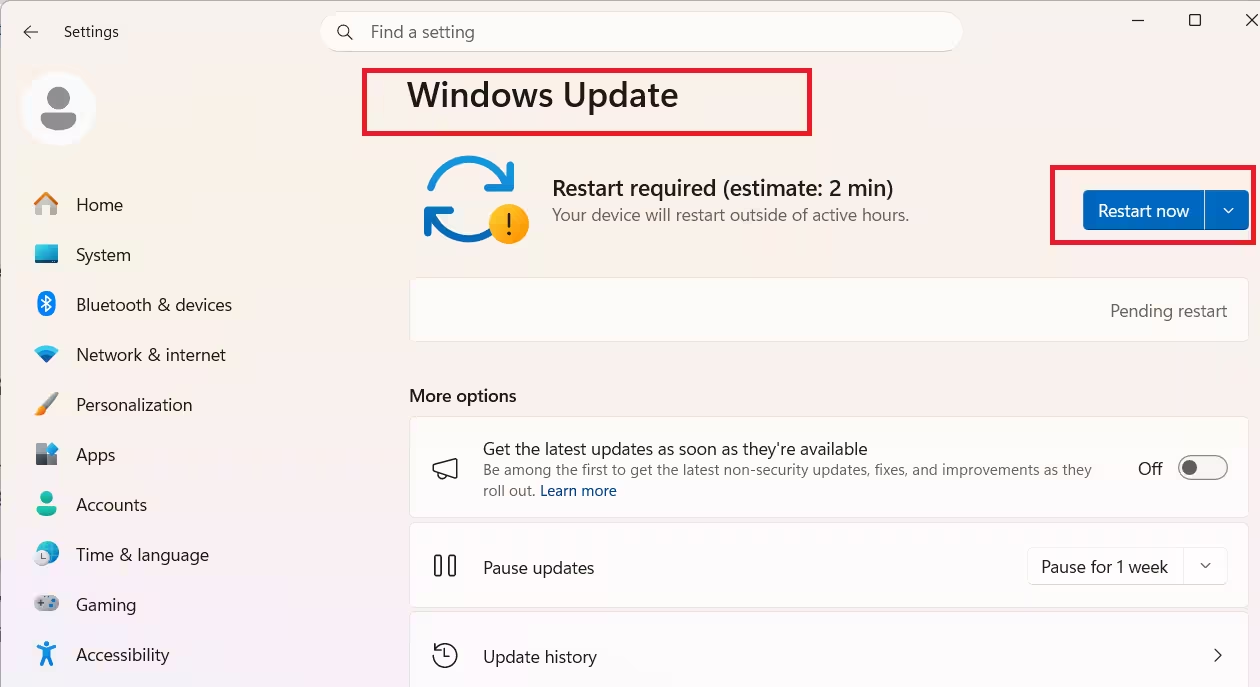
- Press Windows + I and go to Windows Update > Check for updates.
- Install all available updates.
- After restarting, go to Advanced options > Optional updates and check for driver updates there as well.
- Restart the PC and test the webcam.
Webcam Still Not Recognized After All Fixes?
If the webcam does not appear in Device Manager on any USB port, does not appear on a different computer either, or shows a hardware error that no driver update clears, the webcam itself has failed. USB webcams do not have user-serviceable components. Replacing the unit is the only remaining option.
For laptop built-in cameras that are not recognized, the failure is sometimes at the ribbon cable connecting the camera module to the motherboard. A repair center can diagnose and replace the module.
If your issue is specifically that the camera is detected but apps cannot use it or it fails to show a preview rather than being fully unrecognized, the laptop camera not working in Windows 11 guide covers that scenario with its own dedicated fix set.

