When your camera stops working in Windows 11 or Windows 10, it breaks video calls, online meetings, and any other task that depends on a webcam. The problem can come from a disconnected cable, a blocked privacy setting, a corrupt driver, a conflicting app, or antivirus software locking camera access.
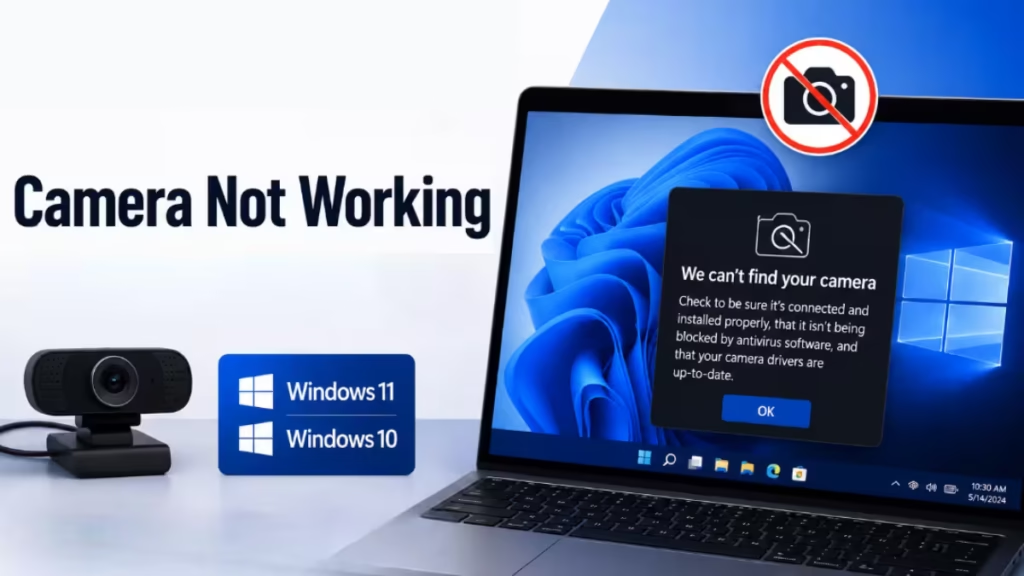
This guide walks through every practical fix in order, from the simplest hardware check to driver-level repairs and error code solutions.
Step 1: Check the Physical Camera Switch or Button
Some laptops include a physical switch or button that cuts power to the camera entirely. When this switch is off, Windows may not detect the camera at all, or it displays a camera icon with a slash through it.
Check these locations on your device:
- A camera key in the top row of the keyboard, activated with the Fn key
- A dedicated camera button on the keyboard
- A sliding switch on the side of the laptop
- A built-in shutter slider located directly over the camera lens at the top of the screen
Make sure the switch or key is in the On position before moving to any software fix.
Step 2: Check the Camera Connection
For external webcams:
- Unplug the USB cable and plug it back in firmly.
- Try a different USB port on the device.
- Disconnect any USB devices you are not actively using, such as external drives or printers, to rule out interference.
- Test the webcam on a different computer to confirm the hardware itself works.
For built-in laptop cameras, skip the USB steps and continue from Step 3.
Step 3: Allow Apps to Access the Camera
Windows 11 requires explicit permission before apps can use the camera. After a system update, these permissions sometimes reset without warning.
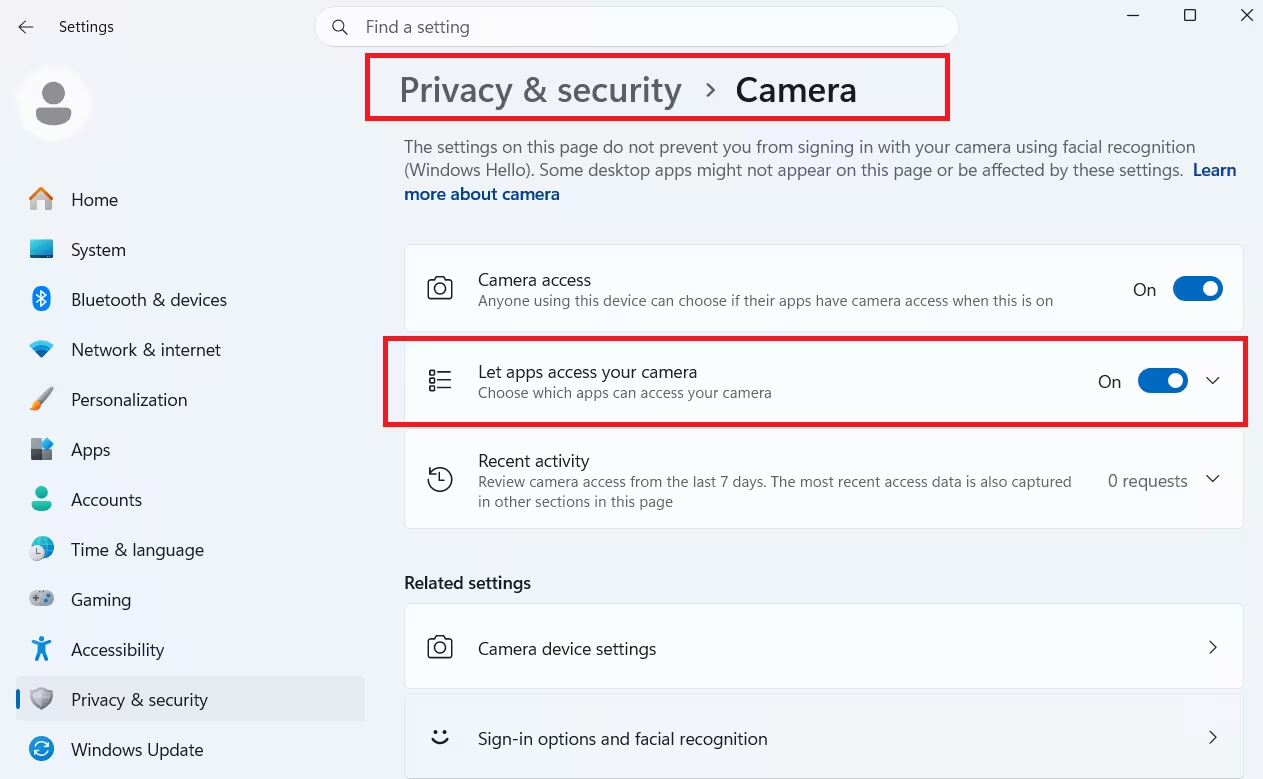
- Press Windows + I to open Settings.
- Go to Privacy & security > Camera.
- Turn on Camera access.
- Turn on Let apps access your camera.
- Scroll down and enable each app that needs camera access.
Note: If the Camera access toggle is greyed out, an administrator has restricted access at the device level. Standard users cannot re-enable it without admin credentials. If you are on a Surface device with this restriction, the guide on how to enable camera on Surface Pro as an administrator walks through the exact steps to restore access.
For desktop apps such as Microsoft Teams, Microsoft Edge, or Zoom, turn on Let desktop apps access your camera. You cannot control access for individual desktop apps from this menu; the toggle applies to all of them.
Step 4: Test the Camera in a Different App
Open Start > Camera and check whether the live preview appears.
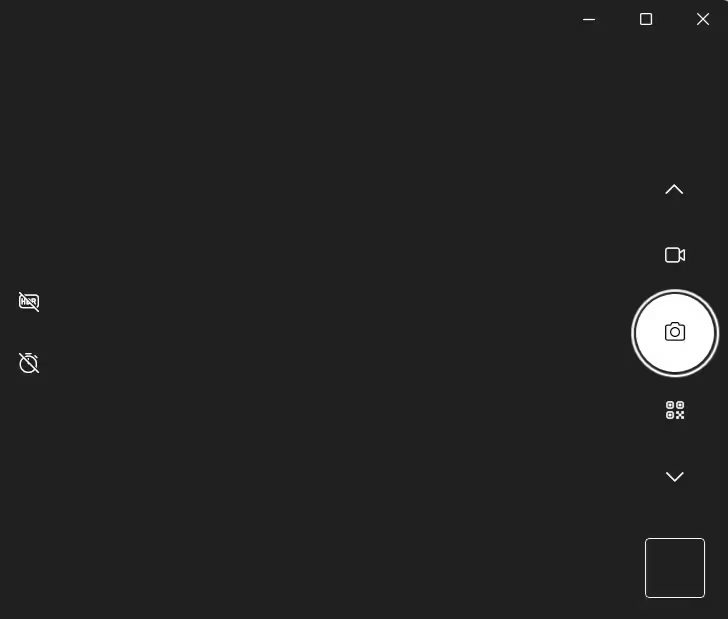
- If the camera works in the Camera app but fails in another app, the problem is specific to that app’s settings, not the camera itself. Check the app’s permissions or reinstall it.
- If the camera fails in the Camera app and every other app, the issue is system-level and the remaining steps apply.
Step 5: Check for Windows Updates
Missing system files or outdated driver packages break camera functionality after major Windows updates.
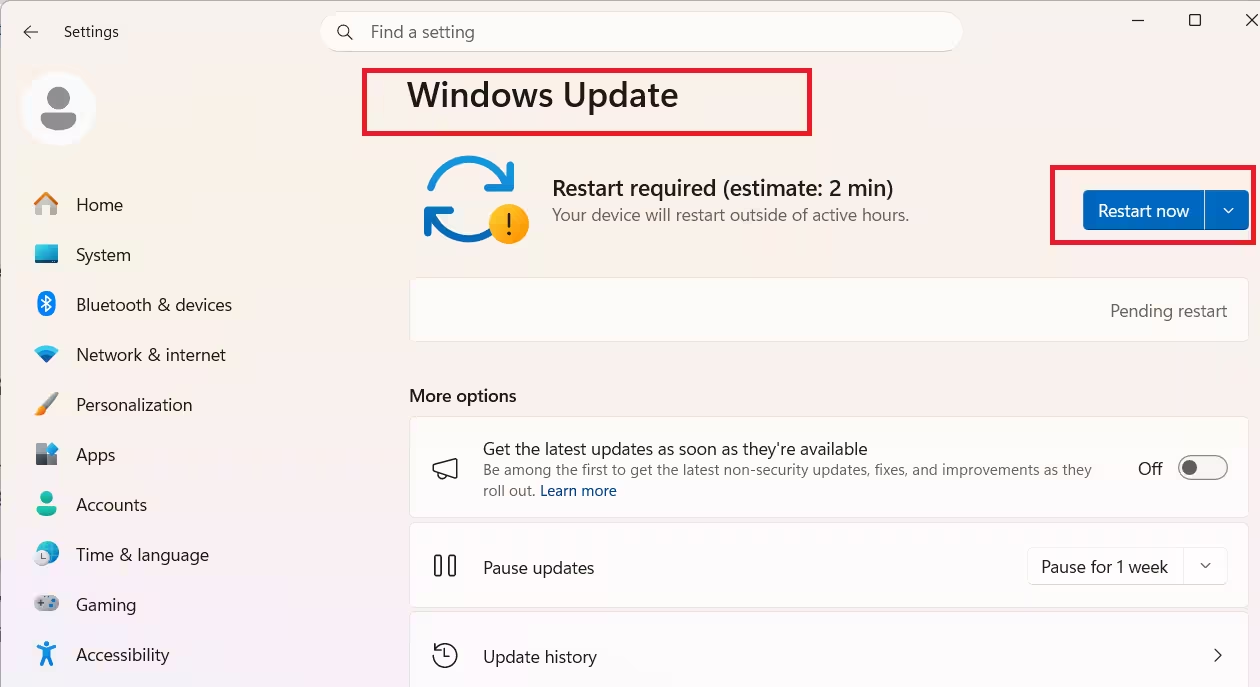
- Press Windows + I and go to Windows Update > Check for updates.
- Install all available updates and restart the PC.
- After restarting, go to Advanced options > Optional updates and check for any camera-related driver updates there.
Important: Some Windows updates introduce camera regressions on specific hardware. If your camera stopped working right after installing a recent update, confirm whether the update itself is the cause. The Windows 11 KB5074105 camera issue caused webcam failures and lock screen problems on affected systems shortly after release, and uninstalling the update restored functionality.
Step 6: Run the Camera Troubleshooter
Windows includes a built-in troubleshooter that detects and fixes common camera problems automatically.
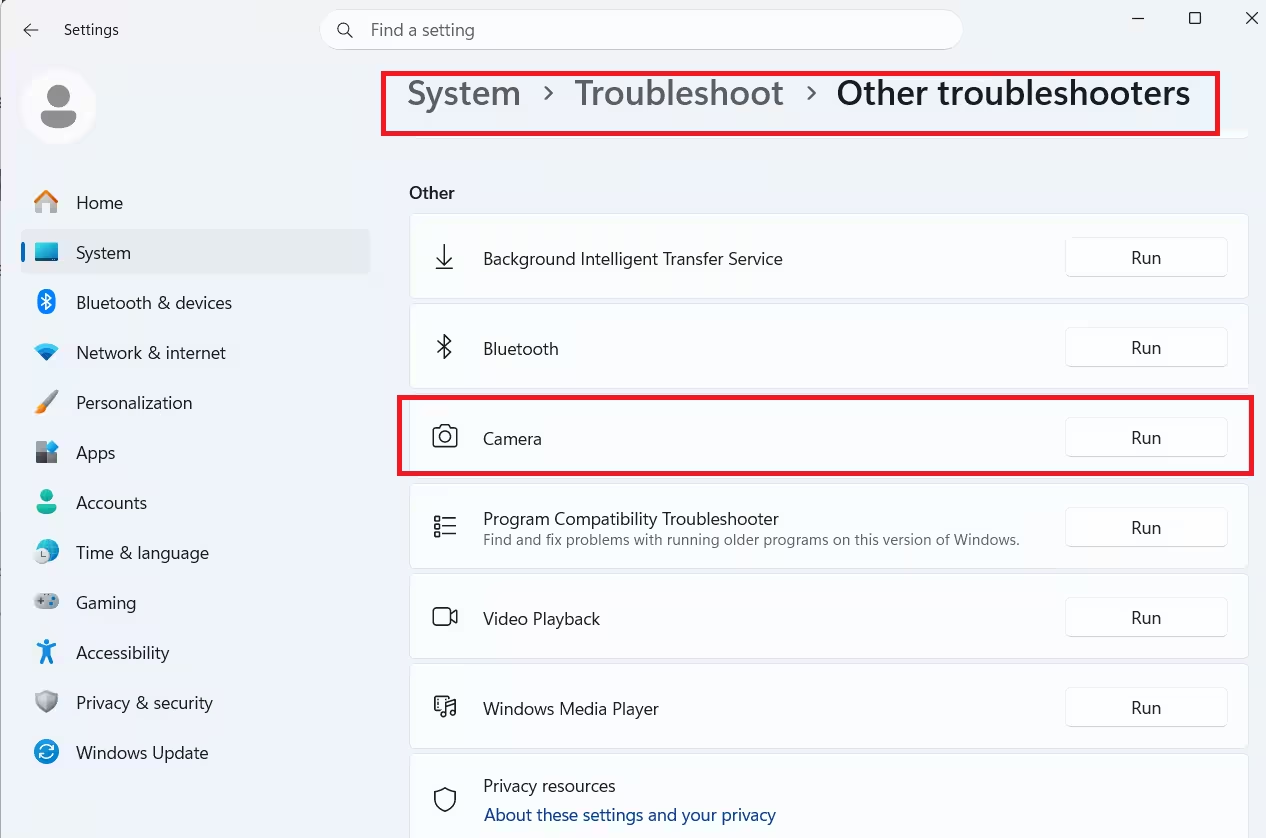
- Press Windows + I and go to System > Troubleshoot.
- Select Other troubleshooters.
- Find Camera in the list and click Run.
- Follow the on-screen prompts to apply any recommended fixes.
On Windows 11, the Get Help app includes a guided camera troubleshooter that runs additional automated diagnostics. Open Get Help, search for “camera troubleshooter,” and follow the steps there if the Settings-based troubleshooter does not resolve the problem.
Step 7: Update, Roll Back, or Reinstall the Camera Driver
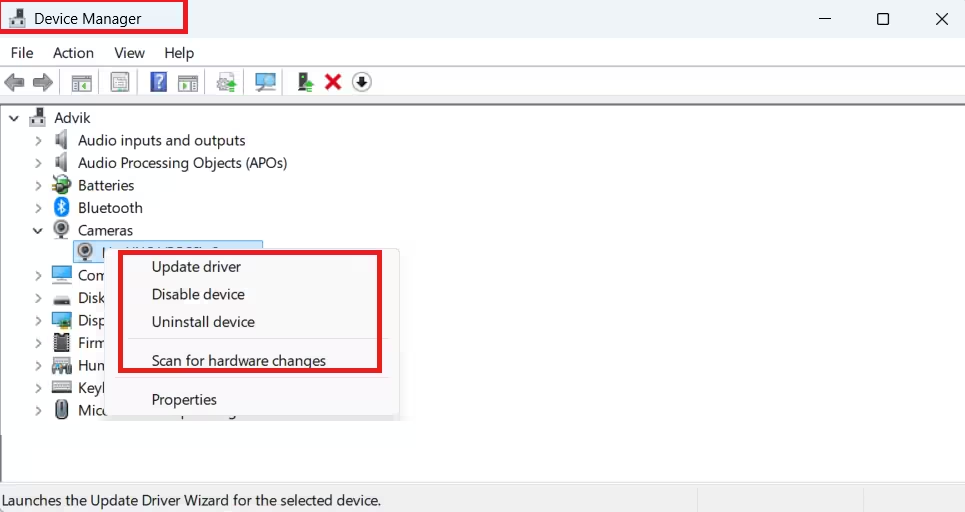
Update the driver
- Press Windows + S, type device manager, and open it.
- Expand Cameras, Imaging devices, or Sound, video and game controllers.
- Right-click your camera and select Update driver > Search automatically for drivers.
- Restart the PC after any driver installs.
If Windows cannot find your camera under any of those categories:
- Click the Action menu in Device Manager.
- Select Scan for hardware changes.
- Wait for Windows to detect and reinstall drivers, then restart.
Roll back the driver
Use this if the camera broke after a recent Windows update:
- Right-click your camera in Device Manager and select Properties.
- Go to the Driver tab and click Roll Back Driver.
- Confirm and restart the PC.
If Roll Back Driver is greyed out, the option is unavailable for that driver version.
Uninstall and reinstall the driver
- Right-click your camera in Device Manager and select Properties > Driver tab > Uninstall Device.
- Check Attempt to remove the driver for this device and confirm.
- Click Action > Scan for hardware changes to reinstall the driver automatically.
- Restart and test the camera.
Switch to the built-in UVC driver (external USB webcams only)
Most USB webcams support the standard USB Video Class (UVC) protocol. If the manufacturer’s driver causes issues, switching to Windows’ built-in UVC driver often fixes them:
- In Device Manager, right-click the webcam and select Update driver.
- Choose Browse my computer for drivers > Let me pick from a list of available drivers.
- Select USB Video Device and click Next.
Note: The UVC driver may not support all camera features, including Windows Hello face recognition.
Step 8: Repair or Reset the Camera App
If the built-in Camera app fails to detect the webcam, repairing it clears corrupted data without losing settings.
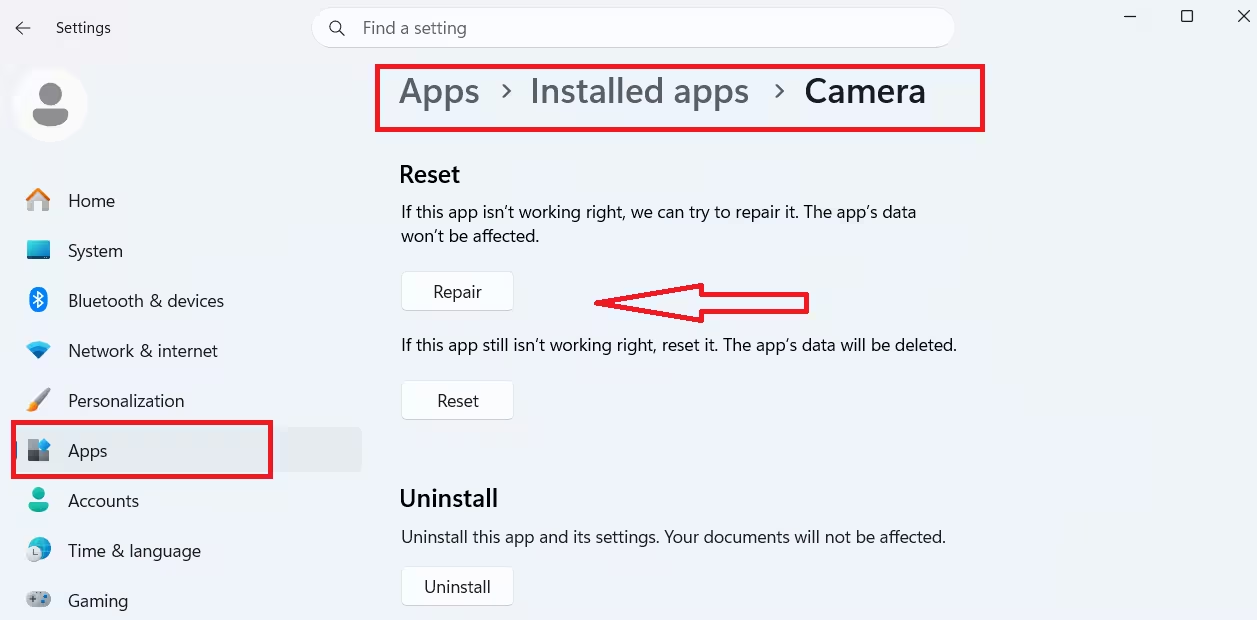
- Press Windows + I and go to Apps > Installed apps.
- Find Camera, click the three-dot menu, and select Advanced options.
- Click Repair first and test the camera.
- If the camera still fails, click Reset to return the app to its default state.
Resetting removes all saved data for the app and starts fresh.
Step 9: Check Antivirus or Security Software
Some antivirus programs include a webcam protection feature that blocks all apps from accessing the camera. To check if this is the cause:
- Open Windows Security from the taskbar search.
- Go to Virus & threat protection > Manage settings.
- Temporarily turn off Real-time protection.
- Test the camera.
If the camera works after disabling real-time protection, open your antivirus settings and look for a Webcam Protection or Camera Shield option. Configure it to allow the apps you need.
For third-party antivirus software, open the program directly and check its privacy protection or camera control settings. Re-enable all protection immediately after testing.
Step 10: Disable the Camera You Are Not Using
If your device has both a built-in and an external webcam, Windows can activate the wrong one. Some apps also do not let you choose between two installed cameras.
- Open Device Manager and expand Cameras.
- Right-click the camera you are not using and select Disable device.
- Test the remaining camera in your preferred app.
If you only have one camera installed but it still fails, disable it through Device Manager and then enable it again. This forces Windows to reinitialize the device and can clear stuck states.
Common Camera Error Codes
If Windows shows a specific error code when the camera fails to open, use this table to identify the cause and jump to the right fix.
| Error Code | Cause | Fix |
|---|---|---|
| 0xA00F4244 | Windows cannot detect the camera | Steps 1, 2, 7 |
| 0xA00F4243 / 0xA00F4289 | Another app is already using the camera | Close background apps; check Task Manager |
| 0x80070005 | Camera access denied | Step 3 |
| 0xA00F4292 | Camera access restricted by group policy | Contact IT admin; check privacy settings |
| 0x800705AA | Insufficient system resources | Close unnecessary apps; restart; update driver |
| 0xA00F4246 | Camera locked by security software | Step 9 |
| 0x80070490 | Device detection error from registry or hardware | Step 7 (uninstall and scan for hardware changes) |
| 0xA00F4294 | Video start failed | Steps 7 and 8 |
| 0x80004005 | General hardware or driver failure | Steps 7 and 8 |
Error 0xA00F4243 or 0x80070005: Camera in use by another app
- Right-click the taskbar and open Task Manager.
- Look through the running apps list for any app that could be using the camera.
- Right-click it and select End Task.
- Try opening the Camera app again.
Background processes from video conferencing apps, browser extensions, and security software often hold the camera open after you close the main window.
Error 0xA00F4292: Camera restricted by policy
This error appears on managed enterprise devices. A group policy set by your IT administrator blocks camera access. Standard users cannot override this setting. Contact your IT department to check the policy configuration or request an exemption.
Error 0x800705AA: Not enough system resources
- Close all apps running in the background.
- Restart the PC.
- Open Device Manager and update the camera driver (Step 7).
If the error persists after restarting, the camera driver may have a memory leak or compatibility issue with the current Windows version.
Laptop-Specific Camera Problems
Laptop cameras sometimes involve manufacturer-specific drivers, BIOS-level controls, or hardware keys that behave differently from standard desktop webcams. If the fixes above have not resolved the issue and you are on a laptop, the dedicated guide on laptop camera not working in Windows 11 covers laptop-specific fixes including keyboard shortcuts, manufacturer utility apps, and BIOS camera settings.

