Windows 11 accumulates temporary files, cached data, old update leftovers, and Recycle Bin clutter over time. These files eat into your drive space and can slow things down. The built-in Disk Cleanup utility removes them safely in just a few clicks, and Windows 11 gives you several ways to open it.

This guide covers 9 methods to run Disk Cleanup on Windows 11, plus three additional built-in tools that go further: Storage Sense, Cleanup Recommendations, and manual temp file deletion.
What Does Disk Cleanup Remove?
Before you run it, here is what Disk Cleanup targets:
- Temporary Internet Files: Cached pages from your browser
- Temporary Files: Leftover files from apps and system processes
- Recycle Bin: Files you deleted but never permanently removed
- Thumbnails: Cached image previews
- Delivery Optimization Files: Windows Update download leftovers
- DirectX Shader Cache: GPU rendering cache
- Windows Error Reporting Files: Crash logs
- Windows Update Cleanup: Old update packages (available under Clean up system files)
- Previous Windows Installations: Leftover files from an OS upgrade
Most of these are safe to delete. Avoid removing Windows ESD installation files unless you are certain you will not need to reset Windows. Skip Previous Windows installations if you plan to roll back.
Method 1: Use the Windows Search Bar
The search bar is the fastest route to Disk Cleanup.
- Press the Windows key to open the Start menu.
- Type Disk Cleanup in the search bar.
- Click Disk Cleanup under Best match.
- Select your drive (usually C:) and click OK.
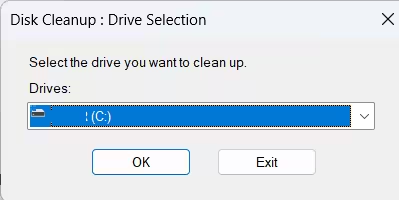
- Wait for the scan to finish, then check the file types you want to remove.
- Click OK, then click Delete Files to confirm.
Method 2: Use the Run Dialog
The Run dialog lets you launch Disk Cleanup with a single command.
- Press Windows + R to open the Run dialog.
- Type
cleanmgrand press Enter.
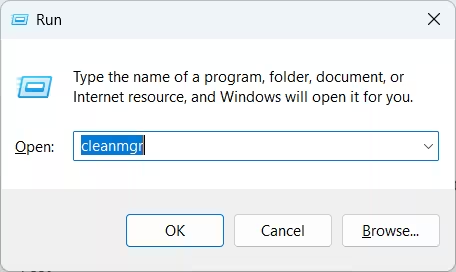
- Select the drive you want to clean and click OK.
- Choose the file types to remove and click OK.
Tip: You can also type
cleanmgr /VERYLOWDISKto run a more aggressive cleanup without a prompt, orcleanmgr /sageset:1to open the settings dialog and choose exactly which file categories to include each time.
Method 3: Open Disk Cleanup from Control Panel
Control Panel houses most core Windows maintenance tools, including Disk Cleanup.
- Press the Windows key, type Control Panel, and click to open it.
- Set View by to Category.
- Click System and Security.
- Under Windows Tools, click Free up disk space.
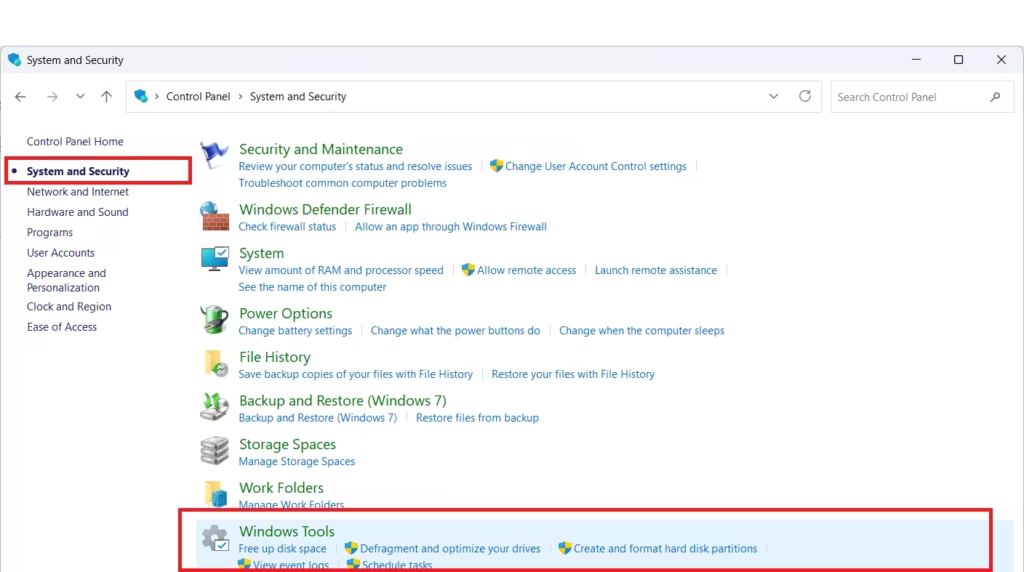
Disk Cleanup opens and prompts you to select a drive.
Method 4: Launch Disk Cleanup from File Explorer
The Disk Cleanup executable sits inside the SysWOW64 folder on your system drive.
- Press Windows + E to open File Explorer.
- Click the address bar and paste the following path:
C:\Windows\SysWOW64\cleanmgr.exe- Press Enter.
Disk Cleanup launches immediately without any additional steps.
Method 5: Run Disk Cleanup from Task Manager
Task Manager can launch new processes directly, including Disk Cleanup.
- Press Ctrl + Shift + Esc to open Task Manager.
- Select Processes from the left sidebar.
- Click Run new task at the top.
- Type
cleanmgr.exein the input box and press Enter.
Disk Cleanup opens on the drive selection screen.
Method 6: Open Disk Cleanup from Windows Tools
Windows Tools is a dedicated folder of built-in system utilities. You can open Disk Cleanup from there directly.
- Press the Windows key, type Windows Tools, and click to open it.
- Scroll through the list to locate Disk Cleanup.
- Right-click the Disk Cleanup icon and select Open.
Method 7: Launch Disk Cleanup via Drive Properties
You can access Disk Cleanup directly from the properties of any drive in File Explorer.
- Press Windows + E to open File Explorer.
- Click This PC in the left panel.
- Right-click your C: drive and select Properties.
- On the General tab, click Disk Cleanup.
This method starts Disk Cleanup pre-targeted at the drive you right-clicked, skipping the drive selection prompt.
Method 8: Run Disk Cleanup from Command Prompt
Command Prompt gives you more control over how Disk Cleanup runs, including automation options.
Basic Launch
- Press the Windows key, type CMD, and select Run as administrator.
- Type the following command and press Enter:
cleanmgrRun Aggressive Cleanup Without Prompts
cleanmgr /VERYLOWDISKThis runs a pre-configured cleanup targeting the most common junk file categories without showing a dialog.
Configure Cleanup Settings Manually
cleanmgr /sageset:1This opens a settings dialog where you choose which categories to include. After saving, run the configured cleanup with:
cleanmgr /sagerun:1For the full list of available switches, see the cleanmgr command reference on Microsoft Docs.
PowerShell Alternative
If you prefer PowerShell, these two commands clear temp files and empty the Recycle Bin:
Get-ChildItem "C:\Windows\Temp" | Remove-Item -Recurse -Force
Clear-RecycleBin -Force
Use these carefully. Review the contents of the Temp folder before running a force-delete.
Method 9: Create a Desktop Shortcut for Disk Cleanup
If you run Disk Cleanup regularly, a desktop shortcut saves time.
- Right-click an empty area on your desktop and select New > Shortcut.
- In the location box, paste the following path:
C:\WINDOWS\system32\cleanmgr.exe- Click Next.
- Name the shortcut Disk Cleanup and click Finish.
Double-click the shortcut any time to open Disk Cleanup without searching for it.
How to Use Storage Sense for Automatic Cleanup
Storage Sense is Windows 11’s automated disk maintenance feature. Once you enable it, Windows cleans temporary files on a schedule without any manual effort.
- Press Windows + I to open Settings.
- Go to System > Storage.
- Toggle Storage Sense to On.
- Click Storage Sense to configure it.
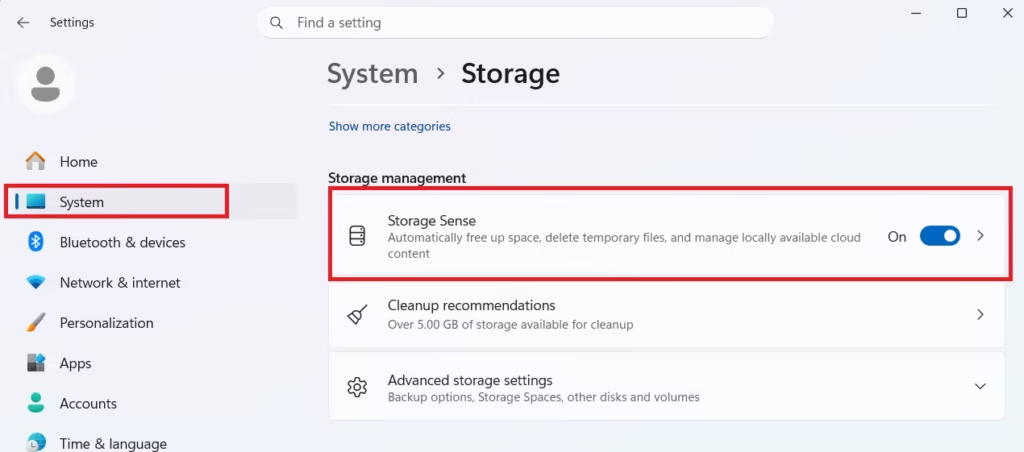
Inside the Storage Sense settings, you can:
- Set it to run Daily, Weekly, or Monthly
- Automatically delete files in the Recycle Bin after a set number of days
- Remove files in the Downloads folder that have not been opened after a set period
- Automatically free up space when disk space runs low
To run Storage Sense immediately, scroll to the bottom of the settings page and click Run Storage Sense now.
Storage Sense and Disk Cleanup serve the same goal but work differently. Disk Cleanup is a manual tool you run on demand. Storage Sense runs in the background automatically. Use both together for the best results.
How to Use Cleanup Recommendations
Cleanup Recommendations is a newer Windows 11 feature that analyzes your storage and suggests what to remove, including cloud-synced files and unused apps.
- Open Settings and go to System > Storage.
- Click Cleanup recommendations (located below Storage Sense).
- Expand each tab: Temporary files, Large or unused files, Files synced to the cloud, and Unused apps.
- Check the items you want to remove.
- Click Clean up for each tab separately.
This tool is especially useful if you use OneDrive and want to identify large files already backed up to the cloud.
How to Delete Temp Files Manually
The Temp folder stores short-lived files created by Windows and installed apps. These files do not always get cleared automatically, so periodic manual deletion frees up space quickly.
- Press Windows + R to open the Run dialog.
- Type
%temp%and press Enter. - File Explorer opens the Temp folder.
- Press Ctrl + A to select all files.
- Press the Delete key.
- Skip any files that show a “currently in use” warning by clicking Skip.
For system-level temp files:
- Open the Run dialog again and type
temp(without the percent signs). - Delete the contents of this folder as well.
After deleting, empty your Recycle Bin so the space is actually freed.
Clean Up System Files (Extended Disk Cleanup)
The standard Disk Cleanup scan skips some large categories like old Windows Update packages. To access them:
- Run Disk Cleanup using any method above.
- After the scan results appear, click Clean up system files at the bottom of the dialog.
- Select your drive and wait for the rescan.
- You will now see additional categories:
- Windows Update Cleanup
- Previous Windows installation(s)
- Device driver packages
Removing Windows Update Cleanup and Previous Windows installations frees the most space but removes your ability to roll back to an earlier version of Windows.
Is It Safe to Run Disk Cleanup?
Yes. Running Disk Cleanup is safe for most file categories. Follow these guidelines:
- Safe to delete: Temporary files, thumbnails, Recycle Bin, Delivery Optimization Files, Windows Error Reporting files, DirectX Shader Cache
- Safe to delete if you do not need rollback: Windows Update Cleanup, Previous Windows installations
- Do not delete: Windows ESD installation files (required for OS reset)
Disk Cleanup does not touch your personal documents, photos, downloads, or installed programs. It only removes system-generated junk files.
FAQs
How often should I run Disk Cleanup on Windows 11?
Once a month is enough for most users. Run it sooner if you notice low disk space warnings or performance slowdowns.
What is the difference between Disk Cleanup and Storage Sense?
Disk Cleanup is a manual tool you open and run yourself. Storage Sense runs automatically on a schedule and handles the same types of files without requiring any input from you.
Does Disk Cleanup delete personal files?
No. It only removes temporary files, cached data, and system-generated junk. Your documents, photos, and downloads remain untouched.
Why is Disk Cleanup not removing much space?
If the scan shows very little to clean, try clicking Clean up system files inside Disk Cleanup for an extended scan that includes Windows Update leftovers. Alternatively, use Storage Sense or manually delete files in the Temp folder.
Can Disk Cleanup cause problems?
Rarely. Deleting standard categories carries no risk. The only category to be cautious about is Previous Windows installations, as removing it ends your ability to roll back after a major Windows update.
What if Disk Cleanup does not open?
Try launching it from Command Prompt using cleanmgr as administrator, or access it through Drive Properties by right-clicking the C: drive in File Explorer.
Third-Party Cleanup Tools
If the built-in tools leave you wanting more depth, two free third-party apps are worth considering:
- WizTree scans your drive at high speed and displays a visual breakdown of what consumes the most space. Sort folders and files by size to pinpoint large items quickly and decide what to remove.
- BleachBit targets application-level junk that Disk Cleanup misses, including browser caches, app logs, and leftover files from uninstalled programs. It is open-source and free.
Only download these from their official sites. Avoid bundled installers from third-party download aggregators.

