Your C drive is losing gigabytes of free space even though you are not actively installing anything. This is one of the more frustrating Windows 11 problems because the cause is rarely obvious. Windows 11 silently accumulates several types of data in the background, and most users never realize how fast it adds up.
Use TreeSize to Find What Is Eating Your Space
Before applying any fix, you need to know exactly where the space is going. Guessing wastes time.
Download TreeSize Free from the Microsoft Store. After it installs, right-click the TreeSize icon and select Run as administrator. Without admin rights, it cannot scan protected folders like WinSxS or System Volume Information, and you will get an incomplete picture.
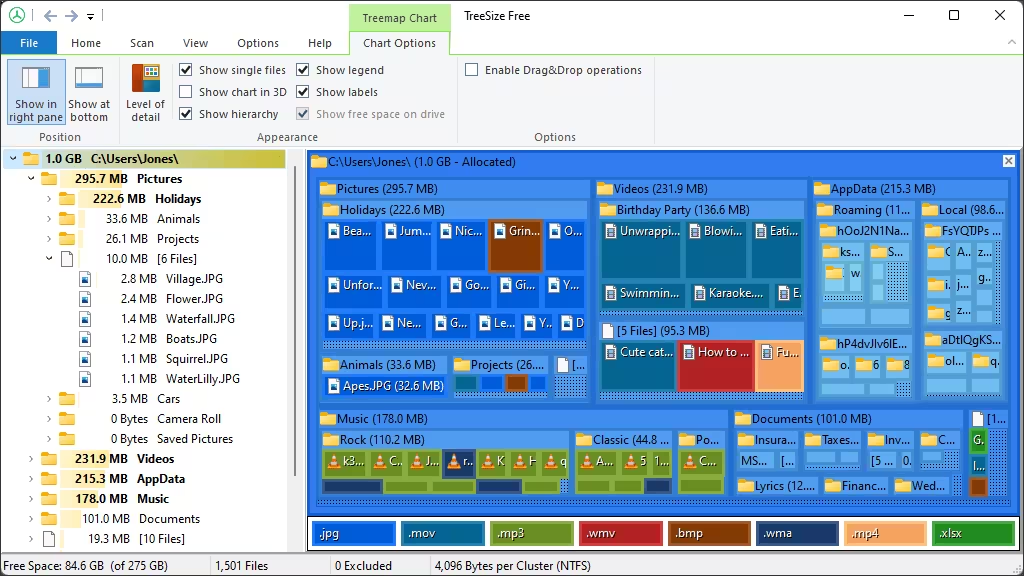
Let it scan your C drive. Sort by size. The largest folders at the top reveal the actual culprit. Common offenders include:
C:\Windows\SoftwareDistribution\DownloadC:\Windows\WinSxSC:\Users\[YourName]\AppData\Local\TempC:\System Volume InformationC:\hiberfil.sysC:\pagefile.sys
Identify the biggest folder before continuing. The sections below cover each one.
Fix 1: Run Disk Cleanup Including System Files
Windows Disk Cleanup removes several categories of junk that build up after updates and normal use.
- Press Windows + S, type Disk Cleanup, and open it.
- Select drive C: and click OK.
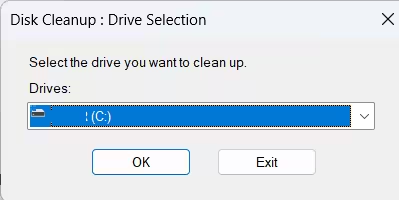
- Wait for the scan to finish, then click Clean up system files.
- Select drive C: again and click OK.
- Check every box in the list, including Windows Update Cleanup, Temporary Internet Files, Delivery Optimization Files, and Recycle Bin.
- Click OK and confirm.
The Windows Update Cleanup entry alone can reclaim 5 to 20 GB on a system that has received several major updates. This is the single most effective step on most Windows 11 machines.
Fix 2: Delete Windows Update Cache Manually
If Disk Cleanup does not show a large Windows Update Cleanup entry, the update cache folder may be locked. You can clear it manually.
- Press Windows + R, type
services.msc, and press Enter. - Scroll to Windows Update, right-click it, and select Stop.
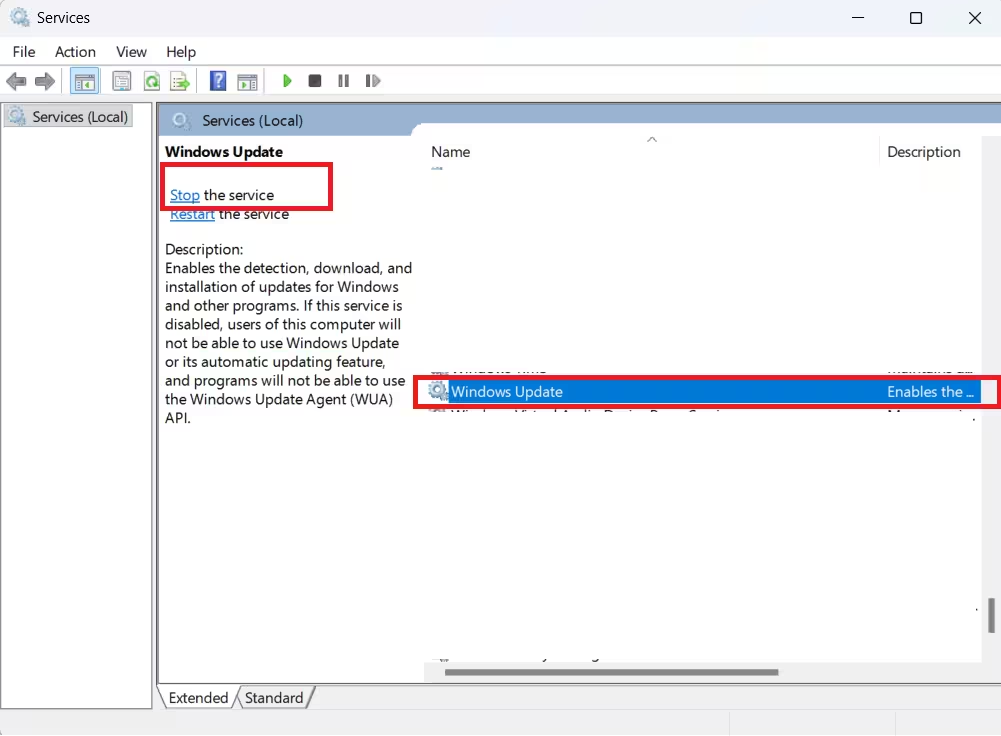
- Open File Explorer and navigate to
C:\Windows\SoftwareDistribution\Download. - Select all files inside and delete them.
- Go back to Services, right-click Windows Update, and select Start.
Windows re-downloads only what it needs the next time it checks for updates. This folder can grow to 10 GB or more on heavily updated systems.
Fix 3: Clean Up the WinSxS Folder With DISM
The C:\Windows\WinSxS folder stores component backups that Windows needs to service itself, install updates, and roll back changes. It grows with every update and is one of the largest hidden consumers on Windows 11.
You cannot safely delete files from WinSxS manually, but DISM can reduce it significantly.
Open Terminal (Admin) or Command Prompt (Admin) and run:
dism /online /cleanup-image /startcomponentcleanupWait for it to finish. On a system with several months of updates, this command typically frees 3 to 8 GB from WinSxS without touching anything Windows still needs.
For a deeper cleanup, run this second command immediately after the first:
dism /online /cleanup-image /startcomponentcleanup /resetbaseThe /resetbase flag removes all superseded component versions. This is safe on a stable system but means you can no longer uninstall the updates that DISM removes. Only run it if your system is working correctly.
Fix 4: Disable or Reduce Hibernation
The hibernation file (hiberfil.sys) reserves space equal to roughly 75% of your installed RAM. On a machine with 16 GB of RAM, that is about 12 GB sitting permanently on your C drive.
If you do not use Sleep or Hibernate mode, you can safely disable it.
- Right-click the Start button and select Terminal (Admin) or Command Prompt (Admin).
- Run this command:
powercfg /h offThe hiberfil.sys file disappears immediately and that space returns to free storage. If you later need hibernation back, run powercfg /h on.
Fix 5: Clean Up System Restore Points
Windows 11 creates System Restore points automatically before updates and driver installs. Each restore point consumes several gigabytes, and the total allocation can reach 10 to 15% of your drive capacity.
To manage restore point storage:
- Press Windows + S and search for Create a restore point.
- Click Configure next to your C drive.
- Move the Max Usage slider down to 3 to 5%. On a 256 GB drive, that still gives you several restore points while capping waste.
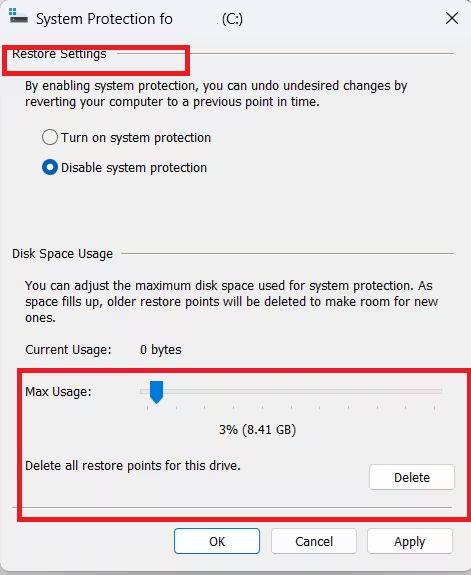
- To delete all existing restore points and start fresh, click Delete.
After deleting old restore points, create one fresh restore point immediately using the Create button. This gives you a clean safety net without carrying 15 GB of old snapshots.
Fix 6: Clear the Temporary Files Folder
Windows and installed apps write temporary files to C:\Users\[YourName]\AppData\Local\Temp. Most apps clean this up poorly, so the folder expands steadily over months.
- Press Windows + R, type
%temp%, and press Enter. - Select all files with Ctrl + A.
- Delete everything. Skip any files that show an “in use” error.
Also run the system-level temp folder:
- Press Windows + R, type
temp, and press Enter. - Select all and delete. Skip locked files.
On a system used for several months, these folders can hold 3 to 8 GB of recoverable space.
Fix 7: Fix or Resize the Page File
The Windows page file (pagefile.sys) acts as virtual RAM. By default, Windows manages its size automatically, but on low-space drives it can grow unexpectedly.
- Press Windows + R, type
sysdm.cpl, and press Enter. - Go to the Advanced tab and click Settings under Performance.
- Click the Advanced tab again, then click Change under Virtual Memory.
- Uncheck Automatically manage paging file size for all drives.
- Select drive C:, choose Custom size, and set both Initial and Maximum to a fixed value such as 4096 MB (4 GB).
- Click Set, then OK, and restart.
If you have 16 GB or more of RAM, setting a fixed, smaller page file prevents Windows from letting it balloon unchecked.
Fix 8: Remove Delivery Optimization Files
Windows 11 uses Delivery Optimization to download and store update files that it can share with other devices on your network. These cached files can occupy several gigabytes.
- Open Settings and go to System > Storage.
- Click Temporary files.
- Check Delivery Optimization Files and click Remove files.
You can also limit how much space Delivery Optimization uses going forward:
- Go to Settings > Windows Update > Advanced Options > Delivery Optimization.
- Click Advanced options and set an absolute limit for both download and upload caching.
Fix 9: Remove the Windows.old Folder
After a Windows reset or upgrade, Windows keeps a backup of the previous installation in C:\Windows.old. This folder can consume 15 to 25 GB.
To remove it safely:
- Open Disk Cleanup as described in Fix 1.
- Click Clean up system files.
- Check Previous Windows installation(s) if it appears in the list.
- Click OK and confirm.
Windows.old is only necessary if you plan to roll back to the previous installation. After 10 days post-reset, Windows normally deletes it automatically, but the automatic cleanup sometimes fails.
Since you performed a reset recently, this folder is very likely present on your system and could account for a significant portion of the missing space.
Fix 10: Configure Storage Sense to Run on a Schedule
Storage Sense is Windows 11’s built-in automatic cleanup tool. When configured correctly, it removes temporary files and empties the Recycle Bin on a schedule. Many users either have it disabled entirely or have it set to never run.
- Open Settings and go to System > Storage.
- Turn on Storage Sense.
- Click Storage Sense to open its settings.
- Set it to run Every week.
- Under Temporary Files, set it to delete files in the Recycle Bin after 14 days and files in your Downloads folder after 60 days.
With Storage Sense running weekly, temporary file buildup slows significantly over time.
Fix 11: Scan for Malware Causing Abnormal Disk Activity
Rapid, unexplained storage consumption can indicate malware writing data to your drive. Ransomware in pre-encryption phases, cryptocurrency miners storing data, and certain spyware types generate large volumes of files.
Run a full offline scan:
- Open Windows Security from the Start menu.
- Go to Virus and threat protection.
- Click Scan options and select Microsoft Defender Offline scan.
- Click Scan now. Your PC restarts and scans before Windows loads.
If you installed a third-party antivirus, run its boot-time or offline scan mode alongside Defender. After the scan finishes, run TreeSize again to check whether any abnormal folders appeared in your user profile or temp directories. Malware-generated folders often appear under C:\Users\[YourName]\AppData\Roaming or C:\ProgramData with random-looking names.
Why C Drive Space Shrinks After a Fresh Windows 11 Install
After a clean install or reset, losing 40 to 60 GB within the first two weeks is normal. Here is what consumes that space:
| Source | Typical Size |
|---|---|
| Windows cumulative updates | 5 to 15 GB |
| Update cache (SoftwareDistribution) | 5 to 20 GB |
| WinSxS component store growth | 3 to 8 GB |
| System Restore points | 5 to 15 GB |
| Hibernation file | 8 to 12 GB on 16 GB RAM systems |
| Page file growth | 2 to 8 GB |
| Windows.old folder | 15 to 25 GB after a reset |
| Temp files and logs | 1 to 5 GB |
A fresh Windows 11 installation on a 256 GB drive can realistically drop from 200 GB free to 130 GB free within 10 days purely from this background activity. Understanding this pattern helps you decide which fixes give back the most space fastest.
Related Guides
- How to Remove Trojan:Win32/WinLNK.HGD!MTB on Windows 11
- How to Remove Fake TotalAV Pop-Up Virus Alerts on Windows 11
- Windows 11 Low Latency Profile: What It Does and How It Works
Start with TreeSize to identify your largest folders, then work through the fixes that match what you find. Disk Cleanup with system files enabled, running DISM to shrink WinSxS, removing Windows.old, and disabling hibernation together typically recover 30 to 50 GB on most systems. Enable Storage Sense on a weekly schedule to prevent the problem from recurring. If the space loss continues after all these steps, run an offline malware scan before concluding the drive has a hardware fault.

