Your Event Viewer logs an Event ID 10 from source ACPI with this message:
ACPI: ACPI BIOS is attempting to write to an illegal PCI Operation Region (0x10). Please contact your system vendor for technical assistance.
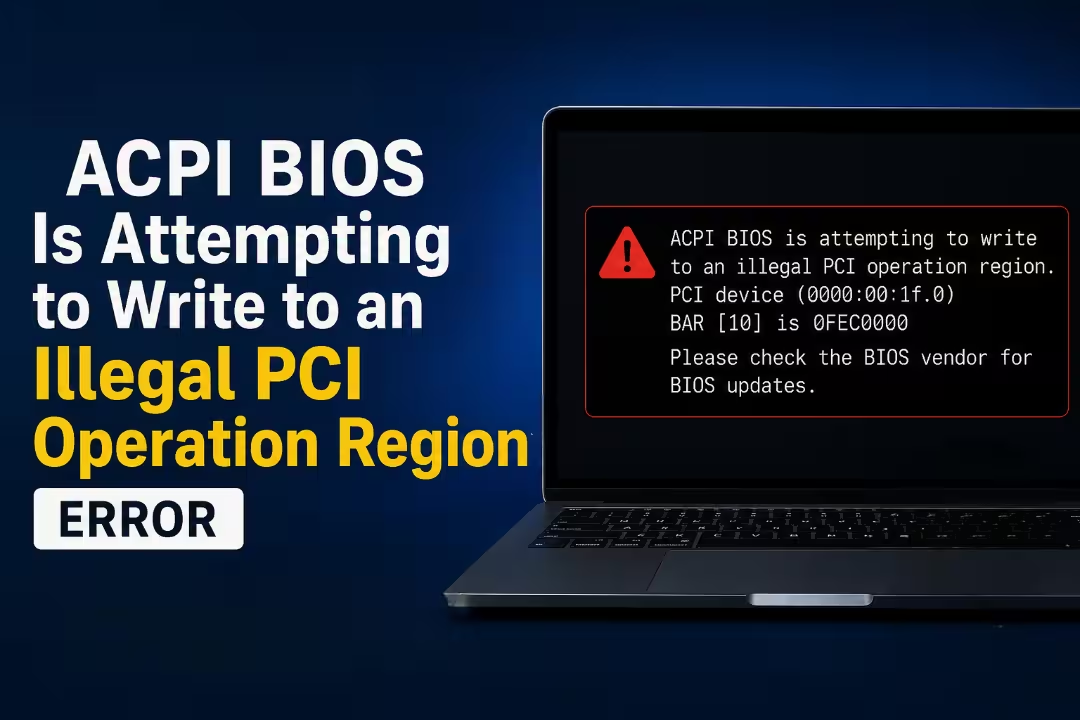
This error means your motherboard firmware is trying to write data into a PCI memory address that Windows does not allow. The system blocks the write and records it as an event. Event ID 10 does not always cause a crash, but it points to a firmware or driver flaw that can damage power management stability over time. On Windows 11 hardware that runs an outdated BIOS, this error is especially common after a Windows update or a new driver installation.
What Does ACPI Mean in BIOS?
ACPI stands for Advanced Configuration and Power Interface. It is an open standard that the BIOS uses to pass power management information to the operating system. ACPI controls tasks like putting devices to sleep, waking the system from hibernate, managing CPU power states, and regulating thermal zones.
The BIOS stores ACPI tables that Windows reads at boot. Windows then uses those tables to control hardware power without relying on device-specific OS drivers. When the ACPI tables contain incorrect PCI memory region definitions, Windows logs the illegal write attempt as Event ID 10.
Why Does ACPI BIOS Attempt to Write to an Illegal PCI Operation Region?
The firmware on your motherboard defines specific PCI memory regions for device communication. When the BIOS tries to write outside those allowed regions (such as address 0x10 or 0x4 in your event log), Windows rejects the operation.
This error appears for several reasons:
- An outdated or buggy BIOS with incorrect ACPI memory table definitions
- A Windows update that tightens PCI memory access enforcement
- An outdated chipset or PCI Express root port driver
- PCIe power-saving features (ASPM) sending illegal register writes
- Older hardware running Windows 11 without a compatible BIOS update
How to Fix ACPI BIOS Is Attempting to Write to an Illegal PCI Operation Region
Work through these fixes in order. Start with the BIOS update, since it resolves the root cause in most cases.
Fix 1: Update the BIOS/UEFI Firmware
A BIOS update from your motherboard vendor corrects the incorrect ACPI memory region definitions. This fix removes the illegal write attempt at the source.
- Press Win + R, type
msinfo32, and press Enter to open System Information. - Note the System Manufacturer and System Model values.
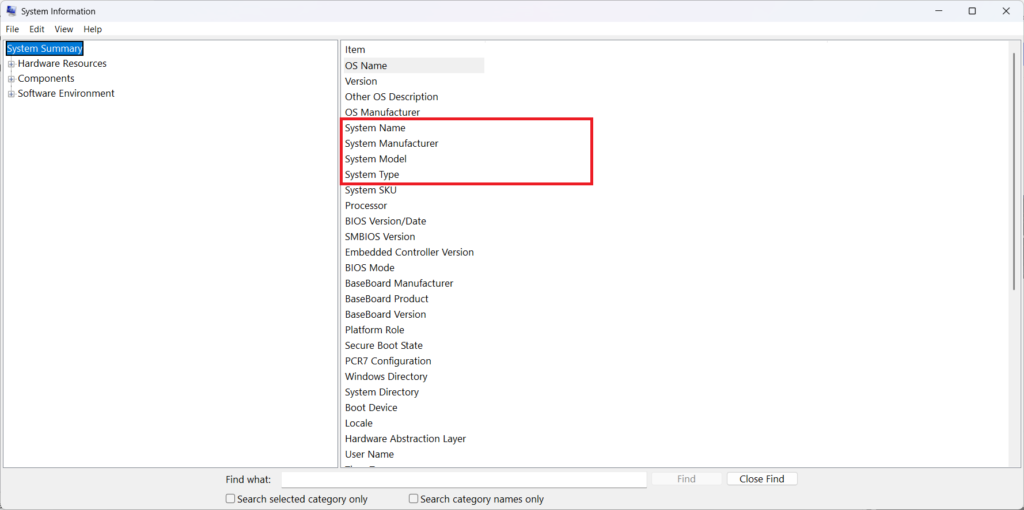
- Visit your manufacturer’s support website (ASUS, MSI, Gigabyte, Dell, HP, Lenovo, etc.) and search for your exact model.
- Download the latest BIOS version listed for your model.
- Follow the vendor’s BIOS flashing instructions. Most desktop boards let you flash from a USB drive inside the BIOS setup utility. Laptops often use a dedicated update application.
- After the flash completes, reboot and open Event Viewer to check whether Event ID 10 still appears.
Warning: Never interrupt a BIOS flash. Keep your laptop plugged in or your desktop connected to a UPS during the update.
Fix 2: Update the Chipset and PCI Express Drivers
An outdated chipset driver or PCI Express root port driver misinterprets ACPI commands. Fresh drivers correct the communication layer between the OS and hardware.
Method A: Update from the manufacturer website
- Open System Information and note your CPU platform (Intel or AMD).
- Visit the Intel Download Center or AMD Driver Support page.
- Search for the chipset driver for your platform and download the latest version.
- Run the installer and restart when prompted.
Method B: Update via Windows Update
- Open Settings and go to Windows Update.
- Scroll down and click Advanced options.
- Select Optional updates (or Driver and optional updates on Windows 10).
- Install any chipset or PCI Express driver updates listed there.
- Restart your PC and check Event Viewer again.
Method C: Update via Device Manager
- Right-click the Start menu and select Device Manager.
- Expand System devices and look for PCI Express Root Port entries.
- Right-click each one and select Update driver.
- Choose Search automatically for drivers.
- Repeat for any other flagged devices, then restart.
Fix 3: Disable PCI Express Native Power Management (ASPM) in BIOS
The ACPI error often links directly to PCIe Active State Power Management (ASPM). Disabling native power management in BIOS stops the firmware from sending those illegal register writes.
- Restart your PC and press the BIOS key during boot (Del, F2, or F10 depending on your board).
- Navigate to the Advanced or Power section of your BIOS.
- Look for an option named PCI Express Power Management, ASPM, or Native ASPM.
- Set it to Disabled.
- Press F10 to save and exit.
- After Windows boots, open Event Viewer and check if Event ID 10 is gone.
BIOS menus vary by manufacturer. Refer to your motherboard manual if you cannot locate the ASPM setting.
Fix 4: Turn Off PCIe Link State Power Management in Windows
Windows has its own PCIe Link State Power Management setting inside the power plan. This setting can trigger the buggy ACPI code path. Disabling it prevents the problematic power transitions entirely.
- Open Control Panel and go to Hardware and Sound.
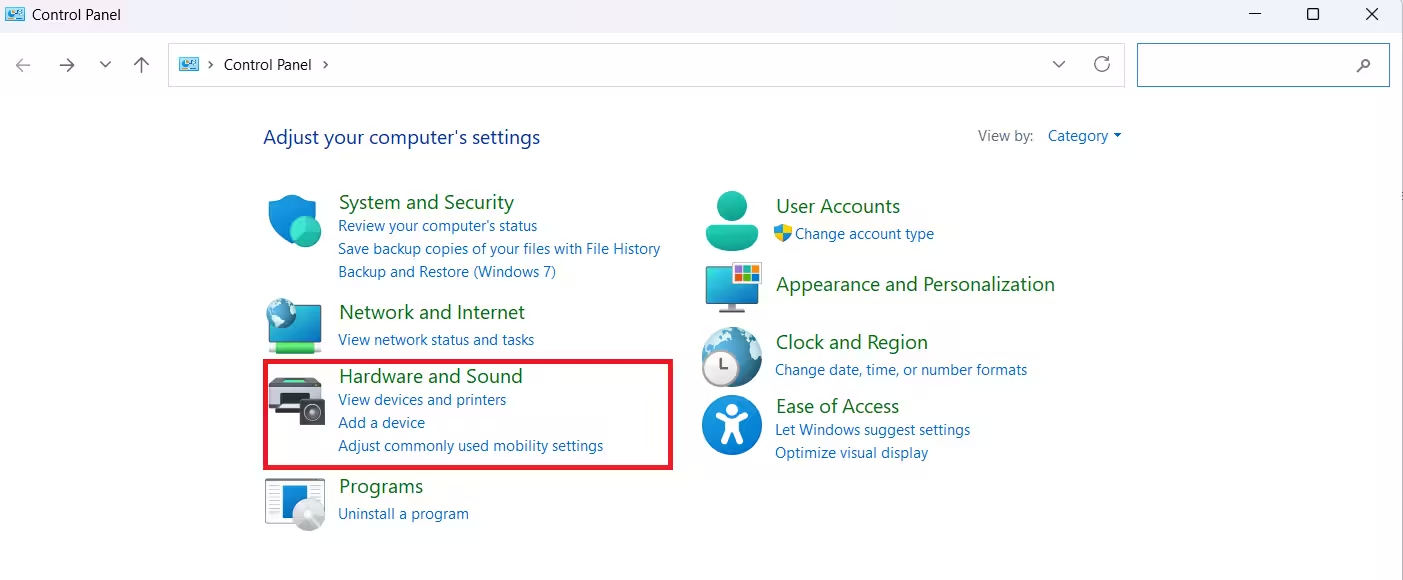
- Click Power Options.
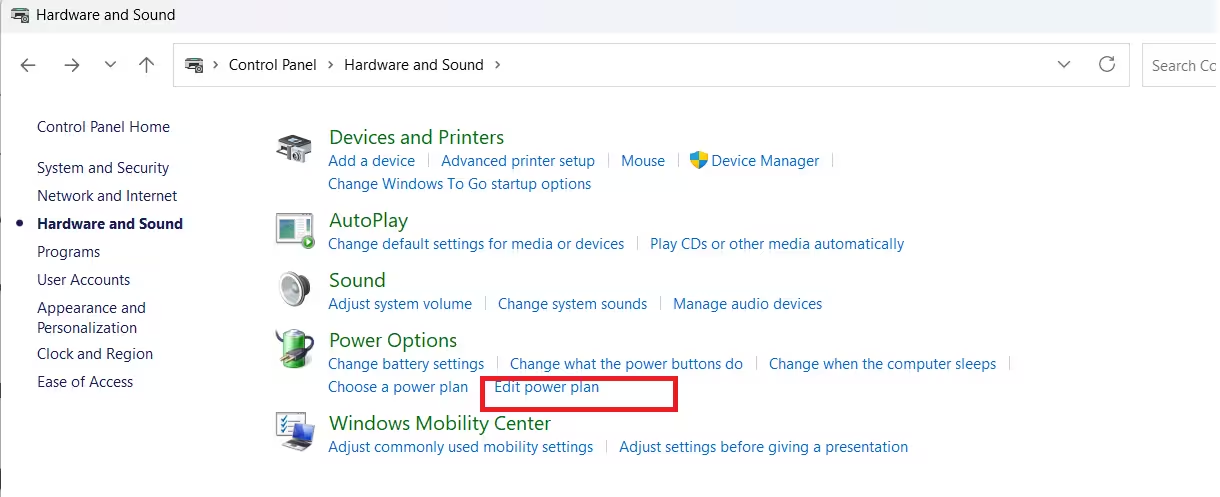
- Click Change plan settings next to your active power plan.
- Click Change advanced power settings.
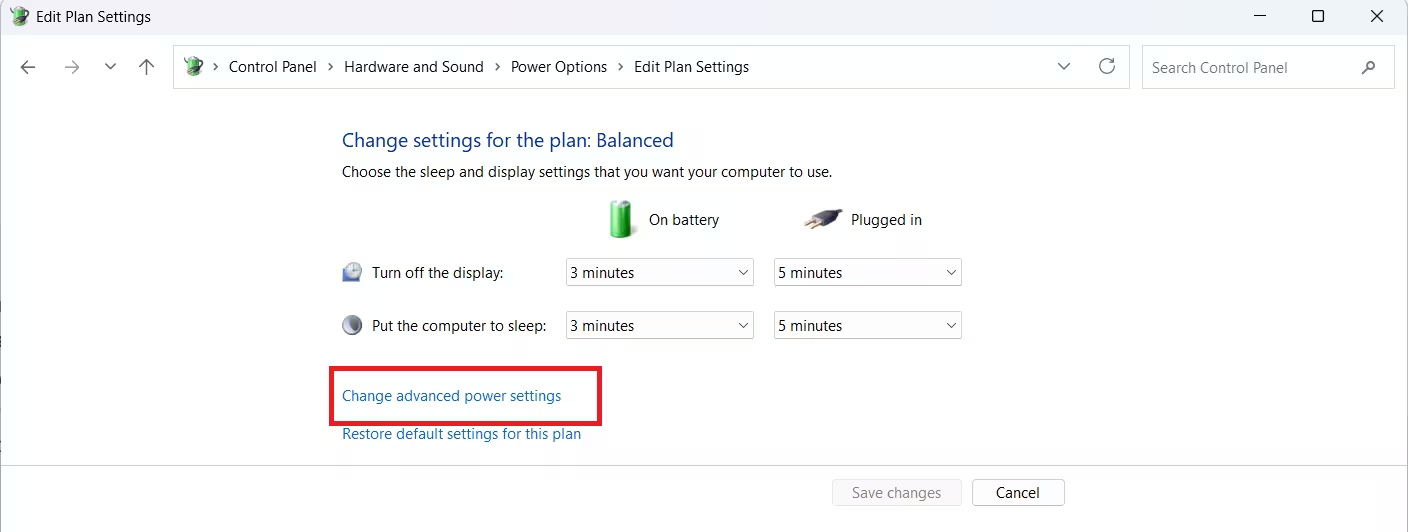
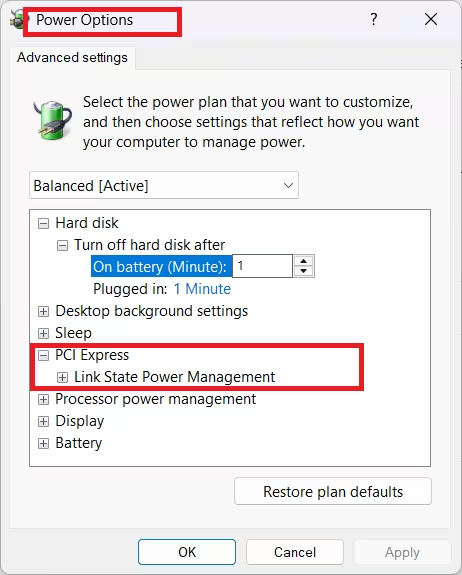
- Expand PCI Express and then Link State Power Management.
- Set both On battery and Plugged in to Off.
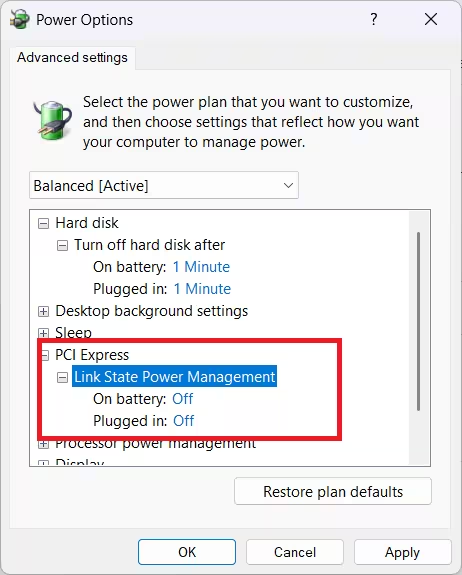
- Click Apply, then OK.
- Restart your PC and check Event Viewer for the error.
What If None of These Fixes Work?
If all four fixes fail, check whether the error causes any real-world symptoms. If your PC runs stably with no blue screens, no unexpected shutdowns, and no freezes, you can safely ignore Event ID 10. It will remain in your log but will not affect day-to-day use.
If you experience BSODs or shutdown issues alongside the error, contact your system or motherboard vendor. Provide the full error text from Event Viewer, including the PCI address value (0x10, 0x4, or whatever your log shows). Vendors can issue a targeted BIOS patch for confirmed hardware bugs.
Frequently Asked Questions
What is Event ID 10 ACPI?
Event ID 10 from the ACPI source means the motherboard firmware tried to write data to a PCI memory address that Windows considers illegal. Windows blocks the write and logs it. The fix usually involves updating your BIOS firmware or disabling PCIe power management.
Is the ACPI BIOS error dangerous?
Not always. If the error appears in Event Viewer but your PC runs normally, it is a firmware quirk rather than a critical failure. However, if it accompanies blue screens or shutdown problems, treat it as urgent and apply the fixes above.
Which BIOS version do I have?
Press Win + R, type msinfo32, and press Enter. Look for BIOS Version/Date in the System Summary. Compare it with the latest version on your manufacturer’s support page.
Can a Windows update cause this error?
Yes. Some Windows updates tighten enforcement of PCI memory region boundaries. An older BIOS with incorrect ACPI tables that worked before an update may start producing Event ID 10 after the update. A BIOS update from your vendor resolves this.

