The Beachcombing event in ARC Raiders turns the abandoned shoreline of Riven Tides into a proper treasure hunt. Buried caches hide under the sand, invisible without the right tool, and the Dockmaster’s Detector is the only way to find them. Get the signals wrong and you waste the entire map condition window. Get them right and you walk out with Ship Models, weapon cases, and crafting materials that make the run worth every exposed second on the coast.
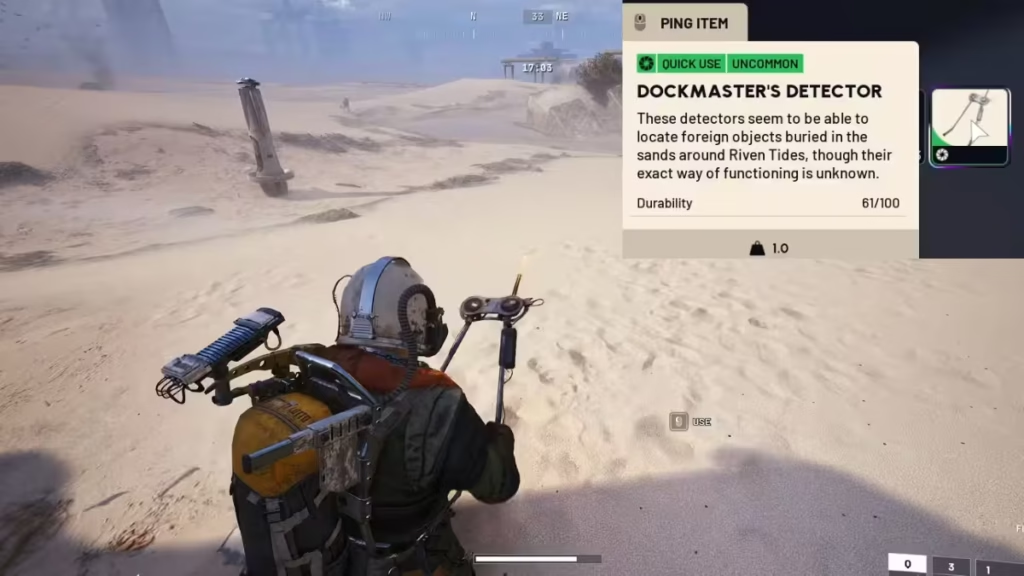
This guide covers how to get the Dockmaster’s Detector, how to read its signals step by step, where the best cache locations sit on the Riven Tides map, and what risks to watch for while you dig.
Table of Contents
What Is the Beachcombing Event in ARC Raiders?
Beachcombing is a minor map condition exclusive to the Riven Tides map. It sits in the same category as Lush Blooms and Bird City. Unlike major conditions such as Night Raid, Hurricane, or Electromagnetic Storm, Beachcombing does not raise ARC aggression, strip Return Points, or cut visibility. Instead, it layers a loot-focused digging activity on top of the existing map.
Three things change on Riven Tides when Beachcombing goes active:
- Valuables become buried in the sand across the coastal areas and require a detector to locate.
- Containers around the map, especially at the Stacking Yard, have a higher chance of containing a Dockmaster’s Detector.
- Bird activity along the shoreline increases, which can attract ARC machines and hostile Raiders to your position.
The condition is Riven Tides-only. It will not appear on Dam Battlegrounds, Spaceport, Buried City, Blue Gate, or Stella Montis.
How to Get the Dockmaster’s Detector in ARC Raiders
You cannot interact with any buried loot without the Dockmaster’s Detector in your inventory. Three routes lead to one.
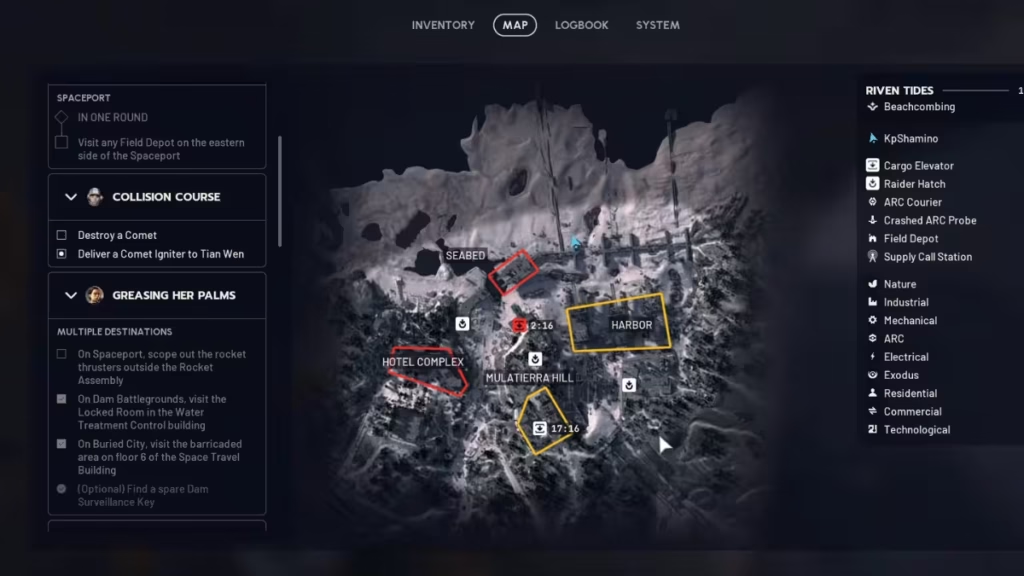
Avian Alarm Raider Project (Most Reliable) This is the cleanest unlock. Open the Projects menu, start the Avian Alarm project, and complete Stage 1 (Initial Flock Intake). Load into Riven Tides, head to the Seabed area, find the buoy objective, and place the bird trap. Return to the Projects menu to claim the detector. Finishing all five project stages also rewards Gel Patches, the Bird House backpack attachment, the Fist In Air emote, and 250 Raider Tokens.
Shoring Up Defenses Quest (Apollo) Accept the Shoring Up Defenses quest from Apollo. The quest tasks you with boarding up defenses at the Panorama Azzurro hotel by eliminating ARC enemies and reinforcing structures. Completing it drops a Dockmaster’s Detector directly into your inventory.
Container Loot During Active Beachcombing When the Beachcombing condition is live, containers at the Stacking Yard carry a noticeably higher drop rate for the detector. This is the least reliable method but works if you are already on the map and missed a detector in your loadout.
Important: The Dockmaster’s Detector occupies a weapon slot when equipped. You will sweep the beach with one fewer gun ready to fire, so plan your loadout accordingly before you drop in.
How to Use the Dockmaster’s Detector in ARC Raiders
The Beachcombing condition must be active on Riven Tides before the detector does anything useful. Once you confirm the condition is live, follow these steps.
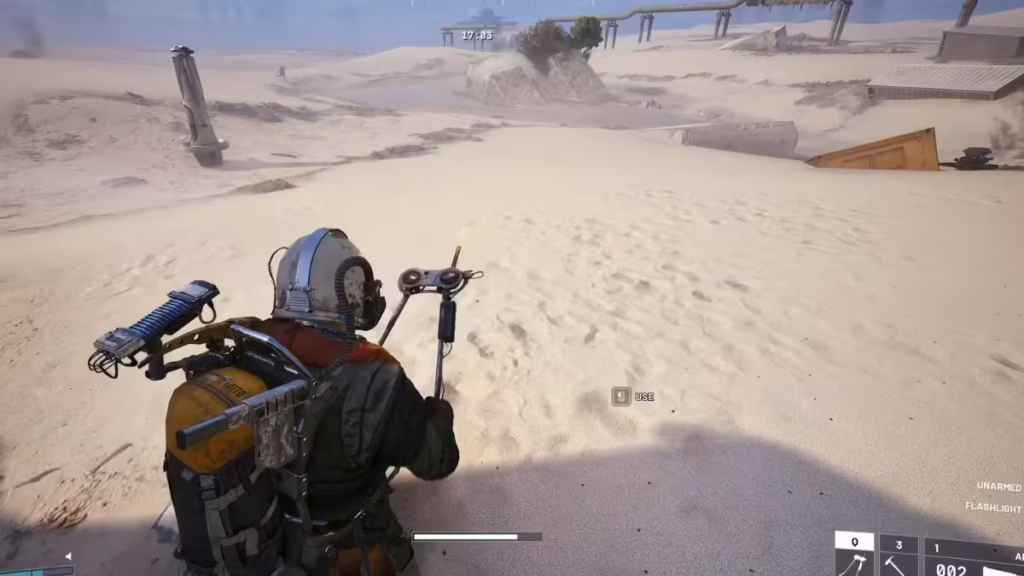
Step 1: Load into a Riven Tides session with the Dockmaster’s Detector in your loadout. If you did not bring one in, search containers at the Stacking Yard first before heading to the beach.
Step 2: Move to the open sandy areas in the northern section of the map. The richest hunting grounds are exposed coastal stretches. Azzurro Beach, Seabed, Wavebreaker, and Wreckage are strong starting zones. Avoid hugging the Panorama Azzurro hotel or dockyard interiors since most buried caches sit on open sand.
Step 3: Equip the detector and walk slowly across the beach while sweeping it over the ground. Listen to its beeps and watch the indicator light. The four signal states work like this:
| Signal | What It Means |
|---|---|
| No response | You are nowhere near buried treasure. Relocate and try a different stretch of beach. |
| Orange beeps | A buried cache is nearby. Move in a direction where the beep frequency increases. |
| Orange and green beeps | You are very close. Make small, precise movements to close in on the spot. |
| Solid green beep | You are standing directly on top of a buried cache. Dig it up. |
Step 4: Interact with the sand mound to dig. Press the prompt and be ready for what comes up. Most digs produce cash, consumables, crafting materials, weapon cases, or suitcases. Some digs surface a mine or a Tick ready to attack. If the dig prompt looks wrong or something seems off, back off immediately and reposition.
Step 5: After looting, continue sweeping toward the Seabed or Azzurro Beach and repeat the process. Plan your extract route early. The Beachcombing condition runs on a timer like every other map condition, so do not let the window close while you are still mid-sweep.
Best Beachcombing Cache Locations on Riven Tides
Cache spawns concentrate across the northern sandy zones of Riven Tides. These four areas consistently produce buried loot during active Beachcombing windows.
- Beach North of Port Authority Building The single strongest cache zone on the map. Start here, sweep the open sand with the detector, and follow any signal that turns orange before moving north or east.
- Northern Sandy Beach Areas A strong general sweep zone that runs parallel to the coastline. Move slowly and scan wide patches rather than hugging any single structure or wall.
- Seabed Area Useful if you already plan to run the Avian Alarm objective route. The open sand and exposed beach sections around Seabed carry consistent buried cache signals during Beachcombing.
- Azzurro Beach The beach strip near the Panorama Azzurro side of the map. Sweep the sand here instead of checking hotel interiors and move slowly along the shoreline to catch signals the detector picks up.
Best Beachcombing Farming Route
The most efficient loop starts near Port Authority and pushes north before crossing toward the Seabed. This keeps you in the densest known cache area while giving you room to follow detector signals without running into walls or structures.
- Load into Riven Tides during active Beachcombing with the detector already in your loadout.
- Move toward the Port Authority Building and start sweeping the beach directly north of it.
- Follow any orange signal, close in until it turns green, then dig and loot quickly.
- Continue northeast toward the Seabed and sweep the open sand sections there.
- If time allows, push toward Azzurro Beach for a secondary sweep run.
- Extract through the nearest elevator or hatch. Do not wait for the condition timer to flip before you commit to an exit.
Beachcombing Risks to Know Before You Dig
Beachcombing pulls you into some of the worst terrain for a firefight on Riven Tides. The best dig sites are wide, flat, and almost completely open, which creates specific hazards you need to plan around.
The ARC Turbine The Riven Tides update introduced this floating ARC machine, which patrols the open skies above the coast. It can drift directly over the beach while you stand exposed mid-dig. Scan the horizon before you commit to a dig and know your nearest cover. Check all ARC enemy weak points if you need a quick reference on how to take it down fast.
Snipers and Long-Range Raiders Open beaches are ideal ground for long-range blueprints like the Osprey or Jupiter. A Raider focused entirely on their detector signal is an easy target from any ridgeline. Commit to sweeps in short bursts and scan the surrounding area between each dig.
Birds Attracting Attention Beachcombing increases bird activity along the shoreline, and birds pull both ARC machines and hostile Raiders toward your position. This is a similar dynamic to what the Bird City map condition introduced with the Headwinds update. Stay aware of nearby flocks and expect increased traffic in the dig zones.
Tunnel Vision The detector demands constant attention to its audio and visual cues, and that focus makes it easy to miss approaching footsteps or distant gunfire. Consider using the White Flag deployable if you want to signal non-aggression to other Raiders rather than engaging while exposed. If you run into a bounty hunter anyway, know that the Speranza Bounty system makes some Raiders actively hunt others for rewards, so do not assume a nearby player is disinterested.
Explosive Digs Not every sand mound holds a payday. Some produce a mine or a Tick. Be prepared to break off immediately if a dig surfaces a hazard instead of loot.
Beachcombing and the Last Resort Event
Beachcombing ties directly into the Last Resort live event, which runs through May 25. Rare Ship Models can surface from digs across Riven Tides, and each model carries a Merit value based on its rarity. Pulling these from buried caches makes the northern beach one of the more efficient farming spots for the event.
Miniature Ship Models also appear as hidden collectibles across all maps, not just Riven Tides, but Beachcombing digs give you an active way to generate them on a single run rather than hunting fixed spawn locations across multiple maps.
Stacking enough Merits from Last Resort unlocks three full reward pages, including the Junior Outfit, the Hydrologist backpack, the Hose attachment, the Brass Faucet charm, new emotes, and 250 Raider Tokens.
If you want to maximize a Beachcombing session, finish the Avian Alarm Stage 1 first for a guaranteed detector, queue into Riven Tides when Beachcombing is the active condition, sweep the northern beaches for buried caches and Ship Models, and extract before the timer resets. Play Now!

