The Queen Bismuth Oreback Crab is one of Crimson Desert’s toughest Elite Bosses, and most players hit a wall the moment they try to fight her from the ground. Her Defense stat sits at 700, making ground-level attacks nearly pointless. To actually damage this boss, you need to climb onto her back, break through the bismuth crystal armor, and pierce the weak points hiding underneath.
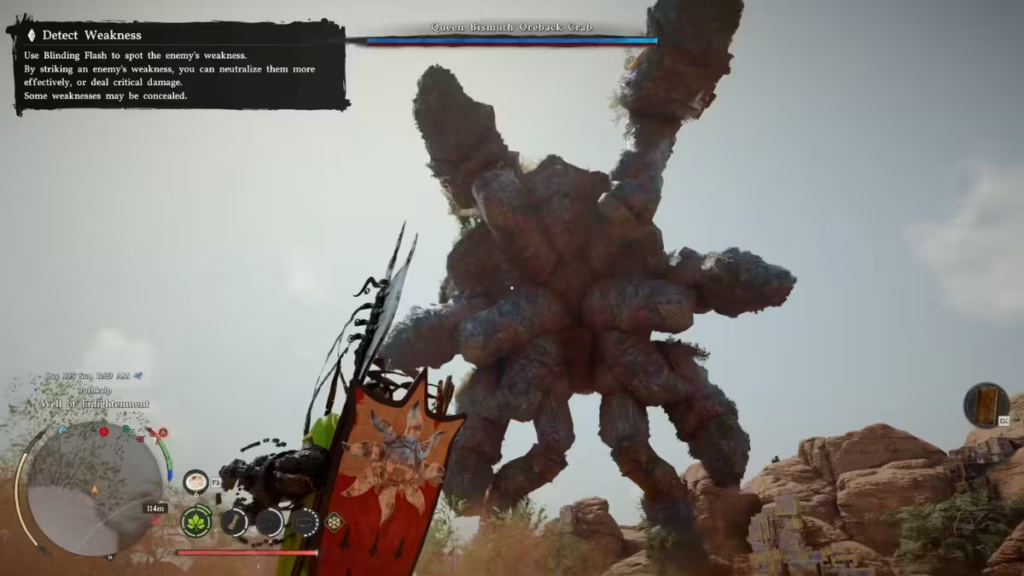
This guide covers how to unlock the encounter, where to find the boss, and how to work through all three phases of the fight.
How to Unlock the Queen Bismuth Oreback Crab
The Queen Bismuth Oreback Crab is locked behind faction quest progress. You must complete enough quests under the Sage of the Desert tab, including the goblin mission “War Song of the Dusk.” Finishing that quest unlocks the faction quest “The Oreback Crab in the Desert,” which directs you to the boss location in the Valley of Grief.
Do not head to the Valley of Grief before completing these prerequisites. The boss will not spawn until the questline unlocks the encounter.
Where to Find the Queen Bismuth Oreback Crab
The Queen Bismuth Oreback Crab sits in the Valley of Grief, south of the “F” in “Forebearer’s Barrens” on the map. She disguises herself as a bismuth-encrusted rock formation on the desert floor and stays dormant until you get close. Once you approach, she rises and the encounter begins.
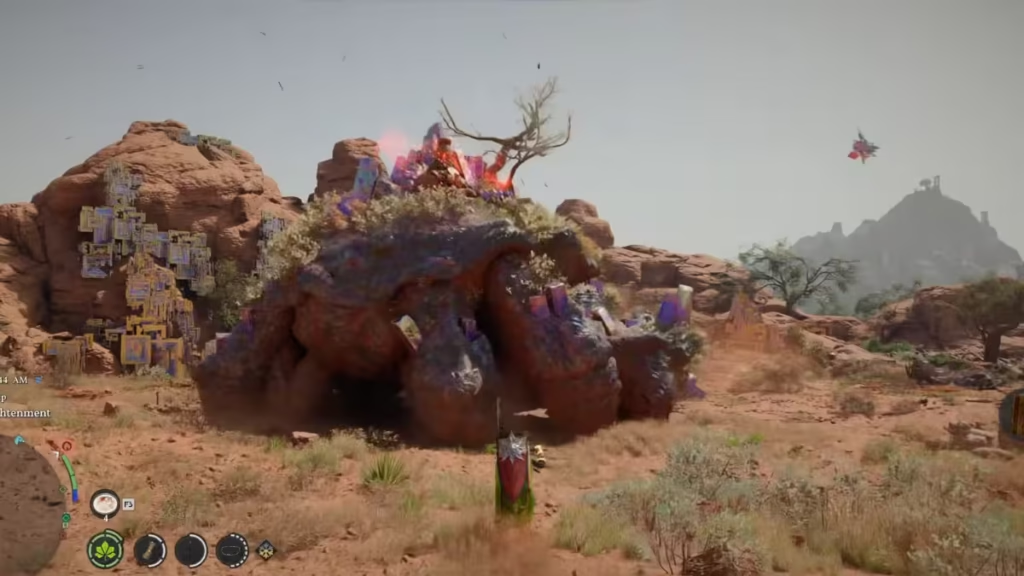
Bring healing food items before entering. Bismuth chip damage and her launch attacks will drain your health steadily throughout the fight.
Queen Bismuth Oreback Crab Stats
| Attribute | Value |
|---|---|
| Health | 2,500 HP |
| Attack | 160 |
| Defense | 700 |
| Stamina | 100 |
| Knockout Threshold | 500 |
| Scale | 7.5x (very large) |
| Type | Elite Boss, Creature |
Her Min HP Percent 5 passive is worth knowing before you start. Her health cannot drop below 5% through ordinary damage. You must complete the pot-smashing finishing sequence to deliver the killing blow, or she will stay alive no matter how much damage you deal.
How to Beat the Queen Bismuth Oreback Crab in Crimson Desert
The fight has three phases: getting onto her back, destroying the bismuth armor and piercing weak points, and triggering the finishing sequence. Each phase builds on the last, so rushing ahead without completing the previous step sends you back to square one.
Phase 1: Mount Her Back
Your first goal is to get on top of the Queen Bismuth Oreback Crab. There are two ways to do this:
- Jump and Triple Force Palm to climb up to her back directly.
- Attack her legs until she becomes temporarily immobilized, then use the stun window to mount.
Once you are on her back, use Turning Slash on the carapace. This creates a brief stun window, slows her bucking, and gives you a safe opening to start working on the bismuth formations.
Phase 2: Break the Bismuth Armor and Pierce the Weak Points
This is the core loop of the fight. Work through each bismuth formation on her back using this sequence:
- Use Turning Slash to open a stun window.
- Attack the bismuth crystal formation with standard weapon strikes to break it.
- A glowing crack will appear on the carapace beneath the destroyed formation.
- Press L3 (Cling) to grab onto the crack.
- Press R2 (Pierce) to drive your weapon into the weak point.
Each pierced weak point deals major damage to her health bar. After each successful pierce, she becomes more aggressive. Her jumping frequency increases, her bucking gets more intense, and her carapace spouts begin launching mounted players into the air.
If she launches you off, deploy your gliding ability immediately. Aim for her upper carapace rather than falling all the way to the ground. Remounting from ground level costs time and puts you back in range of her ground attacks.
Force Palm stun trick: If Turning Slash is on cooldown and her bucking is blocking your access to a formation, land six to eight Force Palm hits on her back legs. This triggers a collapse stun and gives you a longer damage window to work with.
Phase 3: Smash the Pots
After you destroy all bismuth formations and pierce all the weak points, a pile of pots on her back becomes the final target. Hit them a few times to break them. This triggers the kill sequence, and the Queen Bismuth Oreback Crab dies instantly.
Her Min HP Percent 5 passive makes this step mandatory. Even at 5% health, she survives until those pots break.
Attack Patterns and How to Counter Them
| Attack | What It Does | How to Counter |
|---|---|---|
| Ground Slam | Slams her claws into the ground, creating a wide shockwave that knocks back nearby players | Dash backward or press tight against her body to avoid the shockwave arc, then mount during the recovery window |
| Continuous Jumping | Launches her body upward and crashes back down, risking throwing mounted players off | Cling tightly right before she lifts off, release and re-cling after landing |
| Bucking and Thrashing | Shakes the carapace violently to throw off mounted players, heaviest during Phases 2 and 3 | Stop moving during heavy bucking cycles, then advance toward the next formation only during the brief pause between thrashes |
| Carapace Spout Burst | Fires jets from body spouts, launching mounted players into the air | Deploy your glide immediately and aim to land back on the upper carapace |
| Bismuth Hazard | Intact bismuth formations deal contact chip damage to players standing on or near them | Prioritize breaking each formation quickly after mounting, do not stand near unbroken formations while targeting others |
| Petrification Aura | Some players report a petrification hazard tied to this fight | Equip Abyss Gear with petrification immunity before the encounter if you have access to it |
Tips for Fighting the Queen Bismuth Oreback Crab
- Finish “War Song of the Dusk” under the Sage of the Desert tab before attempting this boss. The encounter will not unlock without it.
- Do not try to fight her from the ground. Her Defense of 700 makes those attacks a waste of time and stamina.
- Focus on one bismuth formation at a time. Splitting your attention between formations increases the time you spend taking chip damage.
- Use Force Palm on her back legs (six to eight hits) to trigger a collapse stun when Turning Slash is unavailable.
- Equip Abyss Gear with petrification immunity before the fight if you have it. Community reports suggest it removes one of her hazard effects.
- Stock healing food items. Bismuth chip damage, carapace launches, and the length of the encounter put steady pressure on your health from start to finish.
Rewards
Defeating the Queen Bismuth Oreback Crab drops a substantial amount of Bismuth Ore along with additional crafting materials. Collect everything before leaving the Valley of Grief. Play Now!
FAQs
Where is the Queen Bismuth Oreback Crab in Crimson Desert?
She spawns in the Valley of Grief, south of the “F” in “Forebearer’s Barrens” on the map. She only appears after you unlock the “Oreback Crab in the Desert” faction quest.
How do you unlock the Queen Bismuth Oreback Crab fight?
Complete faction quests under the Sage of the Desert tab, including the “War Song of the Dusk” goblin mission. Finishing that quest makes “The Oreback Crab in the Desert” available.
How do you damage the Queen Bismuth Oreback Crab?
Ground attacks deal almost no damage due to her 700 Defense. Climb onto her back, break the bismuth formations with weapon attacks, press L3 to Cling to the exposed crack, then press R2 to Pierce the weak point.
Why won’t the Queen Bismuth Oreback Crab die at low health?
Her Min HP Percent 5 passive prevents her health from dropping below 5% through ordinary damage. You must smash the pots on her back to trigger the kill sequence.
What does the Queen Bismuth Oreback Crab drop?
She drops Bismuth Ore and additional crafting materials. Collect everything before leaving the Valley of Grief.

