Screen recording on a Mac is simple with built-in tools, but things get tricky when you want to capture sound. By default, macOS only lets you record your microphone, not the system audio (like music, in-game sounds, or streaming audio). This guide walks you through all the methods—whether you want to record your own voice, system sound, or both.
How to Screen Record on Mac with Sound Using Microphone
macOS has a Screenshot Toolbar that makes screen recording easy.
Steps:
- Press Shift + Command + 5 on your keyboard.
- In the toolbar, choose Record Entire Screen or Record Selected Portion.
- Click Options, where you can:
- Select a Microphone (built-in or external).
- Choose a Save To location (Desktop by default).
- Set a Recording Timer (5 or 10 seconds).
- Enable Show Mouse Clicks for a black circle effect when you click.
- Click Record to start.
- To stop, click the Stop button in the menu bar or press Command + Control + Esc.
- A thumbnail of your recording will appear—click it to quickly edit or trim.
Best for: Tutorials, voice-over guides, or meetings where you need to record your voice.
Limitation: This does not record system audio like music or in-game sounds.
How to Screen Record on Mac with System Audio
Apple doesn’t provide a direct way to record system sound. To capture internal audio, you’ll need third-party tools. Here are the most reliable options:
Option A: BlackHole (Free)
BlackHole is a virtual audio driver that routes system sound into your recordings.
Setup:
- Download BlackHole and install it.
- Open Audio MIDI Setup (search in Spotlight).
- Create a Multi-Output Device that includes:
- Your Mac’s speakers (or headphones).
- BlackHole.
- In the recording tool (QuickTime or Screenshot Toolbar), set Microphone to BlackHole.
Now, your recording will capture system audio directly.
Option B: Loopback (Paid, Easy Setup)
Loopback by Rogue Amoeba is user-friendly software that routes audio from apps into your recordings with minimal setup.
- No need for Audio MIDI setup.
- Lets you choose specific apps (e.g., Safari, Spotify) to record audio from.
Best for professionals who want quick control.
Note: It is paid software, but easier than BlackHole.
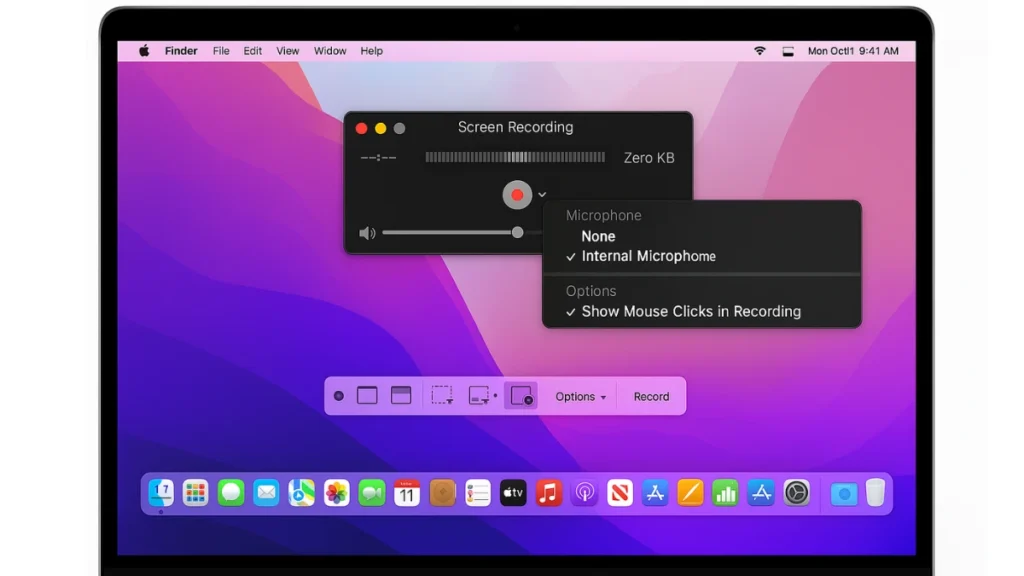
Screen Record on Mac with Sound Using QuickTime Player
QuickTime Player is another built-in way to record, though it also requires BlackHole or Loopback for system audio.
Steps:
- Open QuickTime Player.
- Go to File > New Screen Recording.
- Next to the record button, click the arrow menu, where you can:
- Select a Microphone (Built-in, BlackHole, or Loopback).
- Enable Show Mouse Clicks.
- Adjust input volume.
- Click Record, then either:
- Click anywhere for full screen.
- Or drag to select a specific area.
- Stop recording by clicking Stop in the menu bar or pressing Command + Control + Esc.
- The recording opens automatically for preview, trimming, and sharing.
Best Apps to Screen Record on Mac with Sound
If you don’t want to bother with drivers or setup, third-party screen recorders handle both mic and system sound with extra features.
- OBS Studio (Free, open-source, highly customizable).
- Snagit (Paid, simple with quick editing and annotations).
- ScreenFlow (Paid, professional editing tools included).
- Camtasia (Paid, advanced recording + editing for tutorials).
These tools often include:
- Built-in editors for trimming and effects.
- Webcam overlays.
- Cursor highlighting and click animations.
- Direct export to YouTube, Vimeo, or local storage.
Best choice if you want both recording and editing in one place.
Pro Tips for Better Recordings
Before you start recording on your Mac, here are some practical tips to make the process smoother:
- Always test your sound settings before recording.
- Use headphones when recording system audio with BlackHole to avoid echo.
- Clean up your desktop and turn off notifications before a full-screen recording.
- If you plan to edit, tools like ScreenFlow, Snagit, or Camtasia save time.
With these tips in mind, recording your Mac screen with sound is easy once you know the right method. For quick tasks, stick to the built-in Screenshot Toolbar. But if you need full system audio, BlackHole (free) or OBS Studio (free) are your best bets. And for professional editing, dedicated apps like ScreenFlow or Camtasia give you everything in one package.

