Error 0x80004005 is a generic “Unspecified Error” code that Windows throws across several different failure points. You can see it when a Windows update fails to install, when you try to open a shared folder on your network, when you extract a ZIP or RAR archive, or when a VirtualBox virtual machine refuses to start. Because the error code does not identify the actual cause, the fix depends entirely on where it appears.
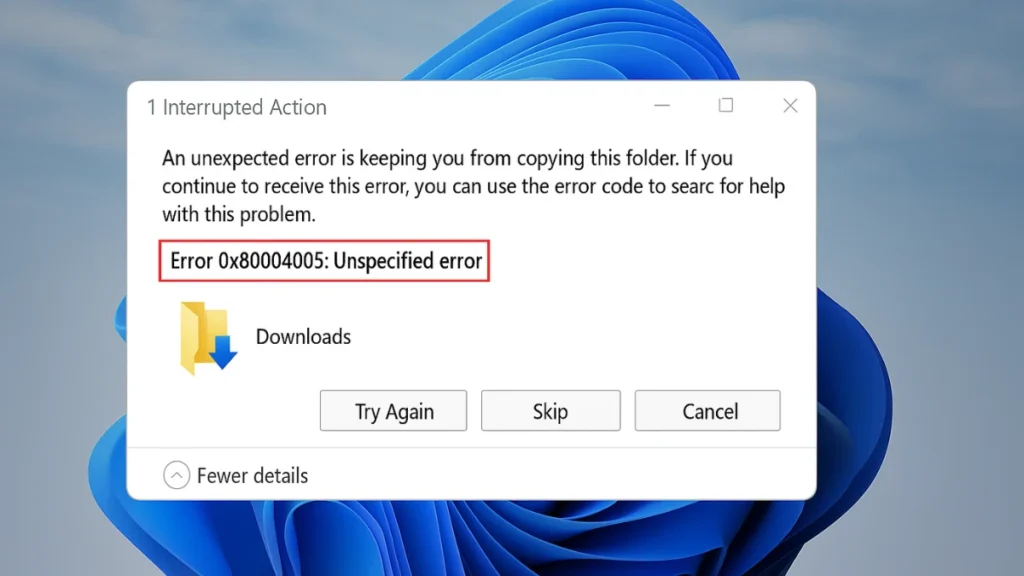
Fix Windows Update Error 0x80004005
When error 0x80004005 appears in Windows Update, the most reliable cause is a corrupted update cache sitting inside the SoftwareDistribution folder. Resetting the update components from an elevated Command Prompt clears it.
Reset Windows Update Components
- Press Win + S, type cmd, right-click Command Prompt, and select Run as administrator.
- Run these commands one at a time, pressing Enter after each:
net stop wuauserv
net stop cryptSvc
net stop bits
net stop msiserver- Delete the cached update files:
rd /s /q C:\Windows\SoftwareDistribution
rd /s /q C:\Windows\System32\catroot2- Restart the services:
net start wuauserv
net start cryptSvc
net start bits
net start msiserver- Close Command Prompt and run Windows Update again.
Run SFC and DISM
If resetting the components does not work, corrupted system files may block the update from installing. Run both scans in sequence.
- Open an elevated Command Prompt.
- Run the SFC scan:
sfc /scannow- After it finishes, run DISM to repair the Windows image:
DISM /Online /Cleanup-Image /RestoreHealth- Restart your PC, then check Windows Update again.
Download the Update Manually
If a specific cumulative update keeps failing, download it directly from the Microsoft Update Catalog.
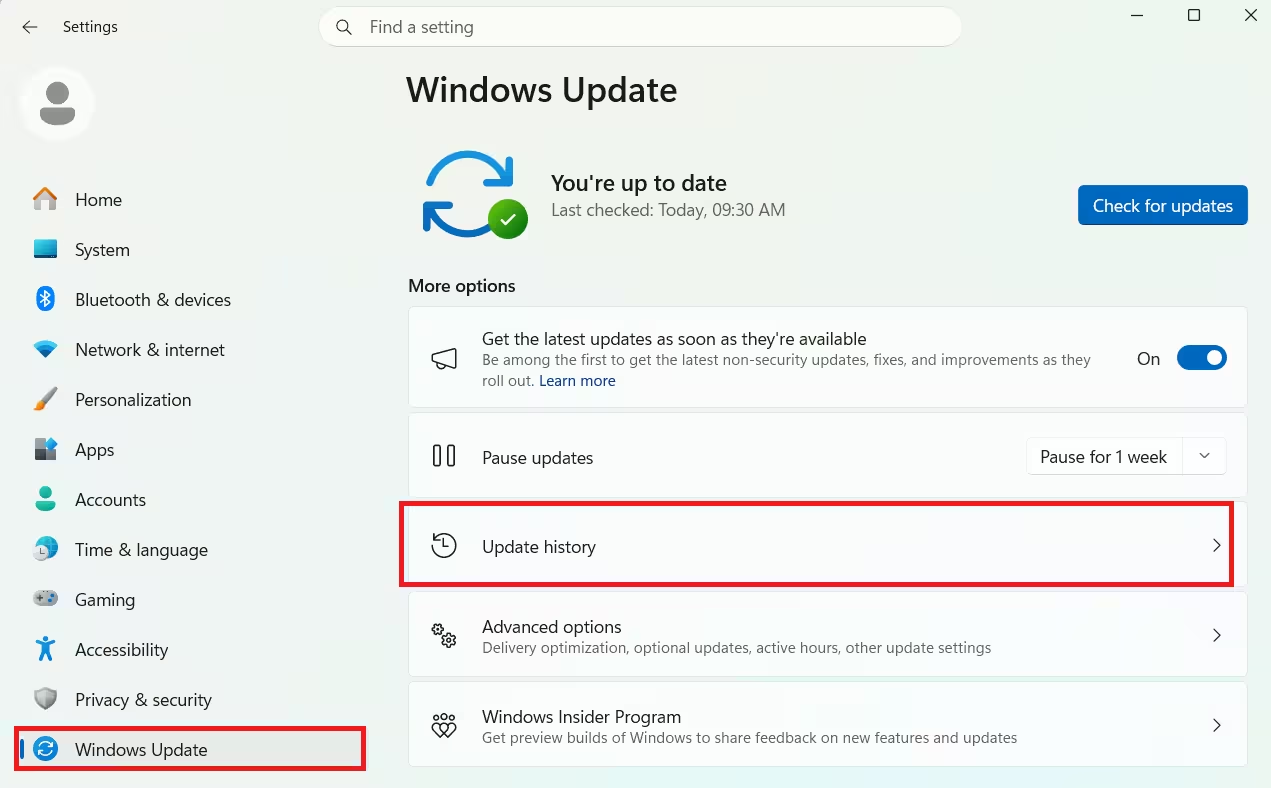
- Go to Settings > Windows Update > Update History.
- Note the KB number of the failed update (shown under Status: Failed).
- Open https://www.catalog.update.microsoft.com and search for that KB number.
- Download the version that matches your Windows edition and architecture (x64 or ARM64).
- Run the downloaded
.msufile as administrator.
If you are running into recurring install error 0x800f0991 on Windows 11 alongside this, the SFC and DISM steps above apply to both.
Fix Error 0x80004005 When Accessing a Shared Folder or Network Drive
When Windows displays “Windows cannot access \\[computer name]” with error 0x80004005, the most common cause is a missing or incorrect LocalAccountTokenFilterPolicy registry value. Windows blocks remote access to admin shares by default when this value is absent.
Set LocalAccountTokenFilterPolicy in the Registry
Warning: Back up the registry before editing it. Press Win + R, type
regedit, open File > Export, and save a backup.
- Press Win + R, type
regedit, and press Enter. - Navigate to:
HKEY_LOCAL_MACHINE\SOFTWARE\Microsoft\Windows\CurrentVersion\Policies\System- On the right panel, look for
LocalAccountTokenFilterPolicy. - If it exists, double-click it and set the Value data to
1. - If it does not exist, right-click the empty space and select New.
- On a 32-bit system: choose DWORD (32-bit) Value.
- On a 64-bit system: choose QWORD (64-bit) Value.
- Name it
LocalAccountTokenFilterPolicyand set its value to1.
- Click OK and restart your PC.
Enable Network Discovery and File Sharing
If the registry fix alone does not resolve the access error, network sharing settings may be turned off.
- Press Win + R, type
control.exe /name Microsoft.NetworkAndSharingCenter, and press Enter. - Click Change advanced sharing settings.
- Under Private, enable:
- Turn on network discovery
- Turn on automatic setup of network connected devices
- Turn on file and printer sharing
- Expand All Networks and set Password protected sharing to Turn off password protected sharing.
- Click Save changes.
Grant Full Permissions to the Shared Folder
If you can reach the machine but still get 0x80004005 when opening a specific shared folder, the NTFS permissions on that folder may block your account.
- Right-click the shared folder and select Properties.
- Go to the Sharing tab, click Advanced Sharing, and check Share this folder.
- Click Permissions, select Everyone, and check Full Control.
- Click Apply, then OK.
If Everyone does not appear in the list, click Add, type
Everyonein the object name box, click Check Names, then OK.
Uninstall Microsoft 6to4 Adapters
Stale Microsoft 6to4 virtual adapters can break network access to shared resources, especially on systems that previously had IPv6 tunneling configured.
- Press Win + R, type
devmgmt.msc, and press Enter. - Click View and select Show hidden devices.
- Expand Network adapters.
- Right-click each Microsoft 6to4 Adapter and select Uninstall device.
- Restart your PC.
Disable IPv6 on Your Network Adapter
On some configurations, enabling IPv6 conflicts with SMB-based file sharing and triggers 0x80004005.
- Press Win + R, type
ncpa.cpl, and press Enter. - Right-click your active network connection and select Properties.
- Uncheck Internet Protocol Version 6 (TCP/IPv6).
- Click OK and restart your PC.
If you are also experiencing DNS client errors on Windows 11 on the same machine, the IPv6 disable step resolves both in many cases.
Fix Error 0x80004005 When Extracting ZIP or RAR Files
When this error appears during extraction, Windows Defender or a third-party antivirus is usually scanning the decompressed files in real time and blocking the process mid-extraction.
Use 7-Zip Instead of Windows Explorer
Windows Explorer’s built-in ZIP extractor produces this error on certain archive types or when the archive contains nested compressed folders.
- Download and install 7-Zip.
- Right-click the archive and select 7-Zip > Extract Here or 7-Zip > Extract to [folder name].
7-Zip handles .zip, .rar, .7z, and most other formats. If the archive is password protected and you do not have the password, this error is expected regardless of the tool you use.
If the extraction failure is part of a game installer, the same underlying issue can also produce an Unarc.dll error on Windows, and disabling real-time protection below resolves both.
Disable Real-Time Protection Temporarily
- Open Windows Security from the Start menu.
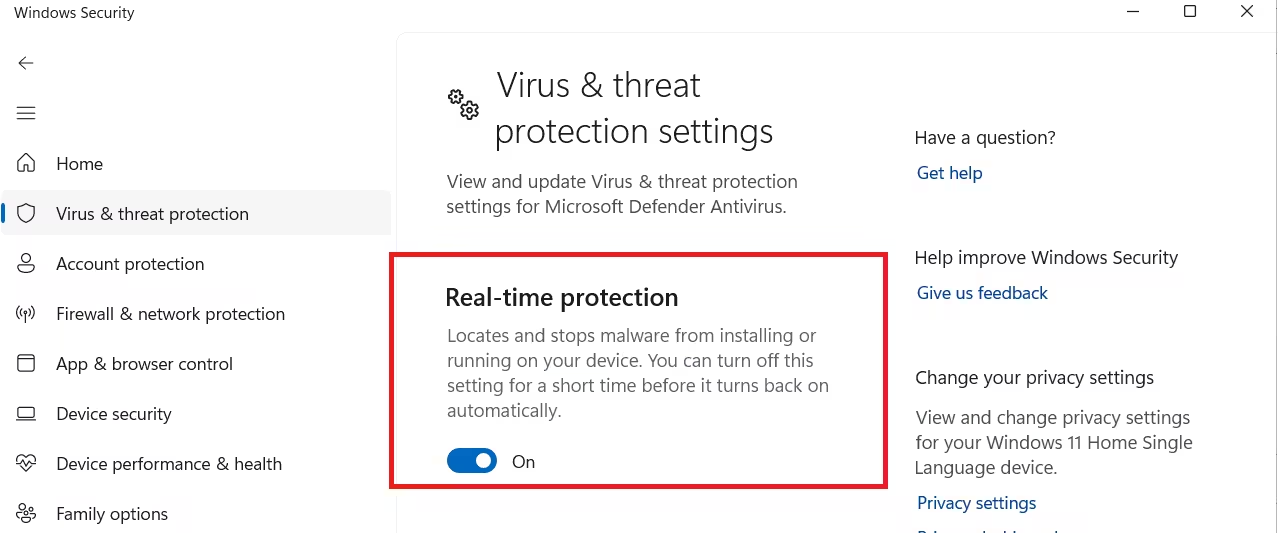
- Click Virus & threat protection.
- Under Virus & threat protection settings, click Manage settings.
- Toggle Real-time protection to Off.
- Extract the archive.
- Turn Real-time protection back on immediately after.
If a third-party antivirus is installed instead of Windows Defender, open its main interface and look for a real-time protection or active protection toggle. Disable it, extract, then re-enable it.
Re-Register jscript.dll and vbscript.dll
Some self-extracting archives and script-based installers fail with 0x80004005 when these DLL registrations are broken.
- Open an elevated Command Prompt.
- Run:
regsvr32 jscript.dll
regsvr32 vbscript.dll- Restart your PC and try the extraction again.
Fix Error 0x80004005 in VirtualBox
VirtualBox throws E_FAIL (0x80004005) most often due to a compatibility flag left in the registry or a disabled bridged networking driver.
Delete the AppCompatFlags Registry Key
A leftover DISABLEUSERCALLBACKEXCEPTION flag in the AppCompatFlags registry path causes VirtualBox to fail when creating or opening a session.
- Press Win + R, type
regedit, and press Enter. - Navigate to:
HKEY_LOCAL_MACHINE\SOFTWARE\Microsoft\Windows NT\CurrentVersion\AppCompatFlags\Layers- On the right panel, look for a key with the value
C:\Program Files\Oracle\VirtualBox\VirtualBox.exe. - Right-click it and select Delete.
- Click Yes to confirm.
- Close Registry Editor and try opening VirtualBox again.
Enable VirtualBox NDIS6 Bridged Networking Driver
If VirtualBox fails with “Failed to open/create the internal network,” the NDIS6 Bridged Networking Driver is likely disabled on your host network adapter.
- Press Win + R, type
ncpa.cpl, and press Enter. - Right-click your primary network adapter (Ethernet or Wi-Fi) and select Properties.
- In the list, check VirtualBox NDIS6 Bridged Networking Driver.
- Click OK.
- Repeat this for every other network adapter in the list.
- Restart VirtualBox.
For Hyper-V related virtualization failures on Windows, see how to fix Hypervisor Error on Windows 11 and Windows 10.

