DNS client errors on Windows 11 stop your browser from loading websites even when your internet connection is active. The DNS client is the system service that translates domain names like google.com into IP addresses. When it fails, you get errors such as “DNS server not responding,” “DNS_PROBE_FINISHED_NXDOMAIN,” or the browser shows can’t reach this page instead of the site you want.
This guide covers every fix in order from quickest to most thorough. Start at the top and work down until your DNS resolves correctly.
What Causes DNS Client Errors on Windows 11
Several things can break DNS resolution on Windows 11:
- The DNS Client service stopped or crashed
- A corrupted DNS cache pointing to outdated or wrong IP addresses
- A misconfigured or slow DNS server assigned by your router or ISP
- A corrupted TCP/IP stack or Winsock catalog
- An outdated or faulty network adapter driver
- A missing Windows security update that patched a DNS processing flaw
- IPv6 conflicts interfering with IPv4 DNS resolution
Understanding the cause helps you pick the right fix faster. If the error only appears in one browser, check browser-level settings first. If all apps and browsers fail to resolve domains, the issue sits at the system level.
Fix 1: Restart the DNS Client Service
The DNS Client service (Dnscache) caches DNS query results and handles name resolution for all apps. If it crashes or freezes, restart it manually.
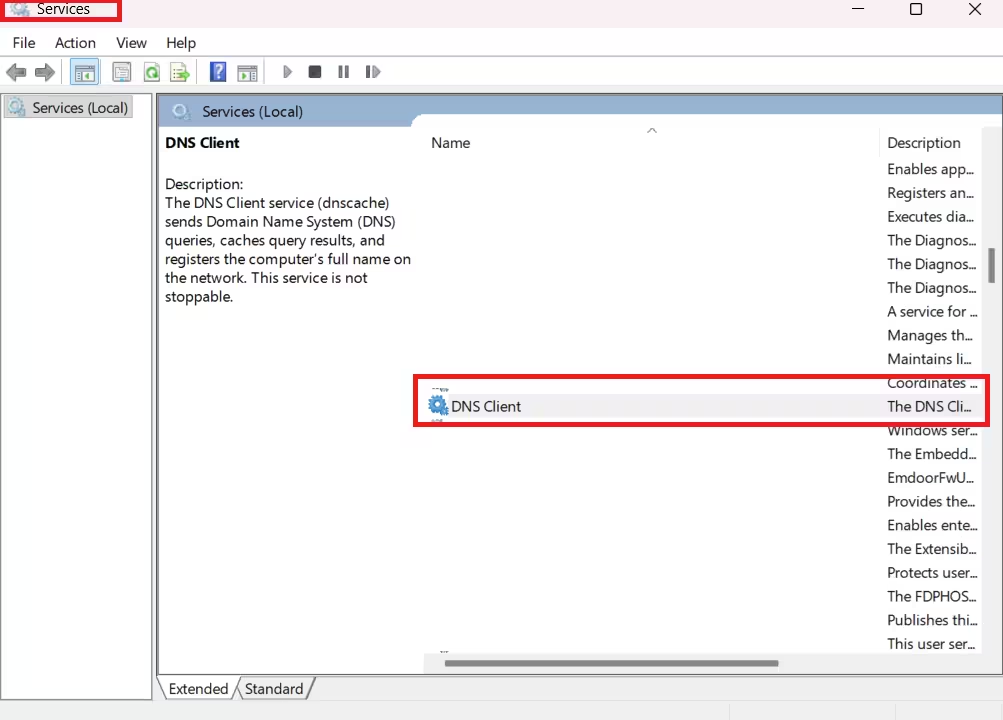
- Press Win + R, type
services.msc, and press Enter. - Scroll down and find DNS Client in the list.
- Right-click DNS Client and select Restart.
- If Restart is greyed out, open Task Manager, find the
svchost.exeprocess hosting Dnscache, end the task, then restart the service from Services.
After the restart, open your browser and try loading a website. If DNS resolves correctly, the service had stalled and a restart was all it needed.
Fix 2: Flush and Reset the DNS Cache
A corrupted DNS cache stores wrong IP addresses for sites, causing resolution failures even when the DNS service runs fine. Flushing it forces Windows to fetch fresh DNS records.
- Open Start, search for Command Prompt, right-click it, and select Run as administrator.
- Run the following commands one at a time, pressing Enter after each:
ipconfig /flushdns
ipconfig /registerdns
ipconfig /release
ipconfig /renew- Close the Command Prompt and test your connection.
The /flushdns command clears the resolver cache. The /registerdns command refreshes DHCP leases and re-registers DNS names. The /release and /renew commands drop and renew your IP address from the router.
Fix 3: Reset the TCP/IP Stack and Winsock
A corrupted TCP/IP stack or Winsock catalog causes all kinds of network errors, including DNS failures and upstream connect errors. Resetting both brings them back to their default state.
- Open Command Prompt as administrator.
- Run each command below, pressing Enter after each:
netsh int ip reset
netsh winsock reset
netsh advfirewall reset- Restart your PC after all three commands finish.
After the reboot, test DNS resolution. The TCP/IP reset clears any stack-level corruption. The Winsock reset rebuilds the Windows Sockets API catalog that all network-dependent apps rely on.
Fix 4: Change Your DNS Server
Your ISP’s default DNS servers are often slow, unreliable, or experience outages. Switching to a fast public DNS server like Google or Cloudflare fixes DNS errors caused by a bad upstream resolver.
Change DNS on Windows 11:
- Press Win + I to open Settings.
- Go to Network and Internet, then click Wi-Fi or Ethernet depending on your connection type.
- Click your active network, then click Edit next to DNS server assignment.
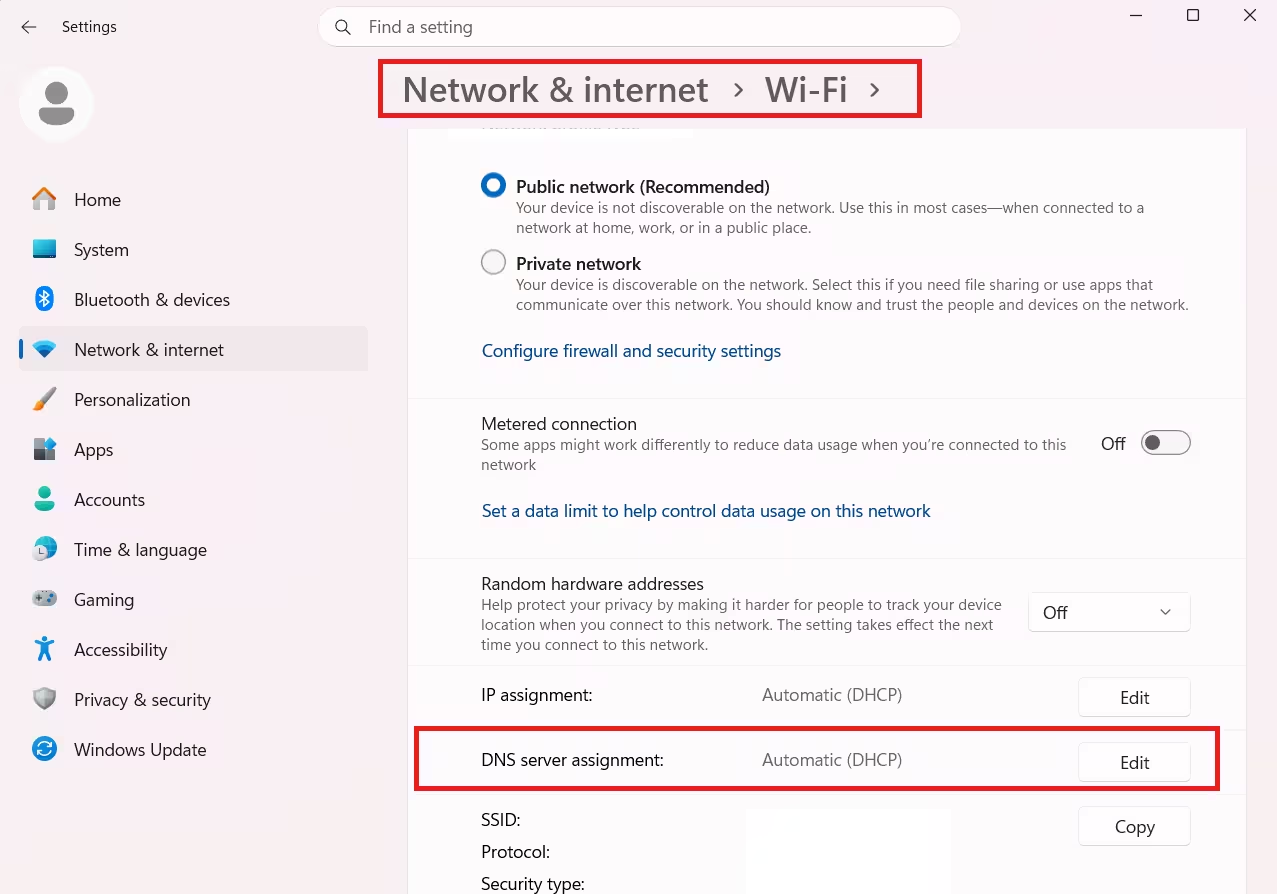
- Switch from Automatic (DHCP) to Manual.
- Enable IPv4 and enter:
- Preferred DNS:
8.8.8.8(Google) or1.1.1.1(Cloudflare) - Alternate DNS:
8.8.4.4(Google) or1.0.0.1(Cloudflare)
- Preferred DNS:
- Click Save.
After saving, flush the DNS cache again using ipconfig /flushdns in Command Prompt, then test your browser.
Fix 5: Update Your Network Adapter Driver
An outdated or corrupted network adapter driver causes intermittent DNS failures and drops. Updating it often resolves errors that survive all the command-line resets.
- Press Win + X and select Device Manager.
- Expand Network adapters.
- Right-click your Wi-Fi or Ethernet adapter and select Update driver.
- Choose Search automatically for drivers and let Windows scan online.
- If Windows finds nothing, visit your PC manufacturer’s support site (Dell, HP, Lenovo, etc.) and download the latest network driver manually.
- Install it and restart your PC.
If the driver update itself causes new issues, you can roll back the driver from the same Device Manager menu by selecting Properties then the Driver tab.
Fix 6: Run Windows Network Diagnostics
Windows 11 includes a built-in network troubleshooter that detects and automatically fixes common DNS configuration problems.
- Press Win + I to open Settings.
- Go to System, then select Troubleshoot.
- Click Other troubleshooters.
- Find Internet Connections and click Run.
- Follow the prompts and apply any fixes the tool suggests.
After the troubleshooter finishes, also run the Network Adapter troubleshooter from the same list. It checks adapter-specific issues that the Internet Connections troubleshooter sometimes misses.
Fix 7: Install the Latest Windows Updates
Microsoft patches DNS vulnerabilities through Windows Update. A known heap-based buffer overflow flaw in the Windows DNS client (CVE-2026-41096) lets an attacker send a crafted DNS response that corrupts memory and causes resolution failures. Installing the latest updates closes this flaw and fixes any DNS processing bugs introduced by earlier updates.
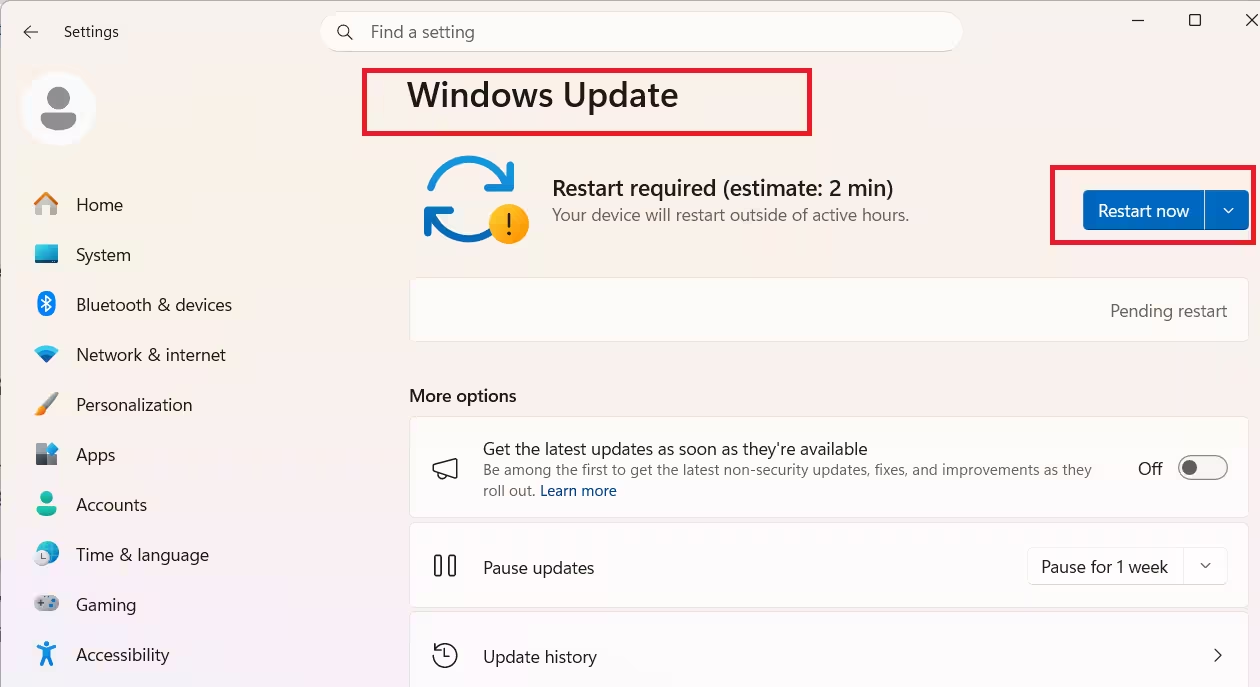
- Press Win + I and go to Windows Update.
- Click Check for updates.
- Download and install all available updates, including optional ones listed under Advanced options.
- Restart your PC when prompted.
Keeping Windows updated protects against DNS-level exploits and ensures the DNS client processes responses correctly.
Fix 8: Disable IPv6 Temporarily
IPv6 and IPv4 DNS resolution can conflict on some Windows 11 configurations, causing the DNS client to time out on IPv6 lookups before falling back to IPv4. Disabling IPv6 temporarily helps you determine whether this conflict is the cause.
- Press Win + R, type
ncpa.cpl, and press Enter. - Right-click your active network adapter and select Properties.
- Uncheck Internet Protocol Version 6 (TCP/IPv6).
- Click OK and test your DNS connection.
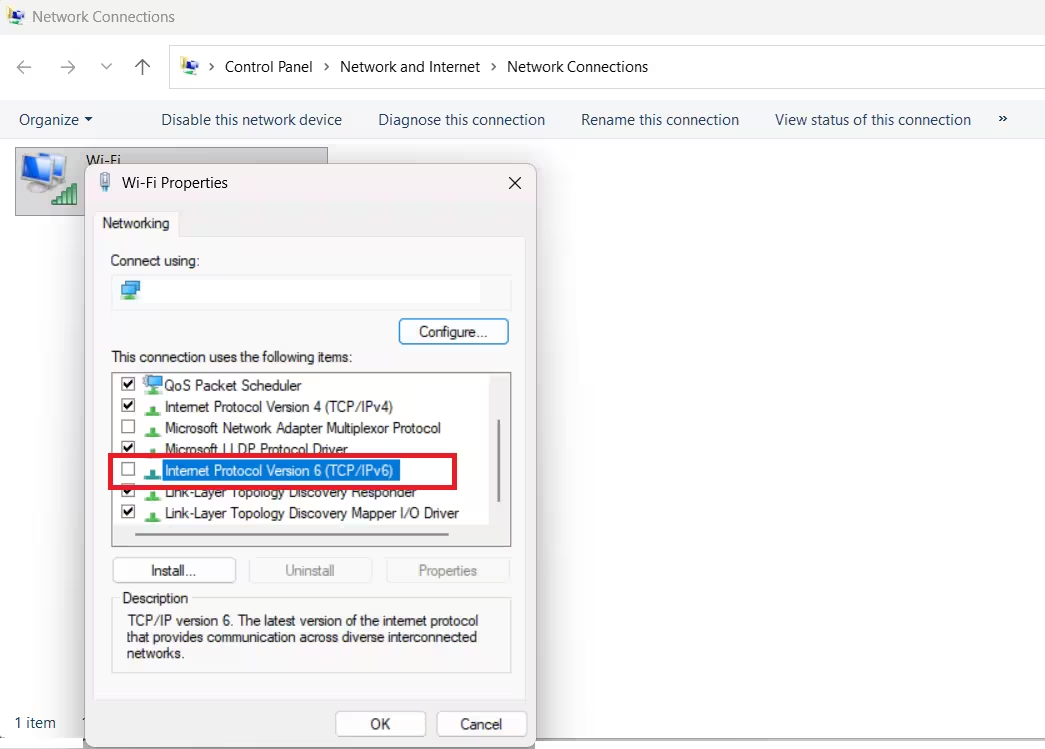
If DNS works after disabling IPv6, your router or ISP has a misconfigured IPv6 setup. Contact your ISP or update your router firmware to resolve the IPv6 conflict properly before re-enabling it.
Fix 9: Reset Network Settings Completely
If none of the fixes above work, a full network reset wipes all network adapters, configurations, and settings back to Windows defaults. Use this as a last resort before reinstalling Windows.
- Press Win + I and go to Network and Internet.
- Scroll down and click Advanced network settings.
- Click Network reset.
- Click Reset now and confirm.
Windows restarts and reinstalls all network adapters with default settings. You need to reconnect to your Wi-Fi network and re-enter your credentials after the reset.
Still Getting DNS Errors?
If DNS errors persist after all the fixes above, the problem likely sits outside your PC:
- Router issue: Restart your router by unplugging it for 30 seconds. Log into its admin panel and check the DNS settings under WAN or Internet settings.
- ISP outage: Check your ISP’s status page or call support. DNS outages at the ISP level affect all devices on your network, not just Windows.
- Malware: Some malware hijacks DNS settings to redirect traffic. Run a full scan with Windows Defender or your installed antivirus to rule this out.

