Chapter 4 of Crimson Desert kicks off with an unexpected explosion near Howling Hill. The Greymanes send Kliff to investigate, launching the Mysterious Pot questline, one of the most puzzle-heavy chapters in the early game. You will visit the Kilndren Workshop, solve a multi-step generator puzzle, repair three kilns using completely different mechanics, and ultimately earn the Kuku Pot, a key utility item for the rest of the game.
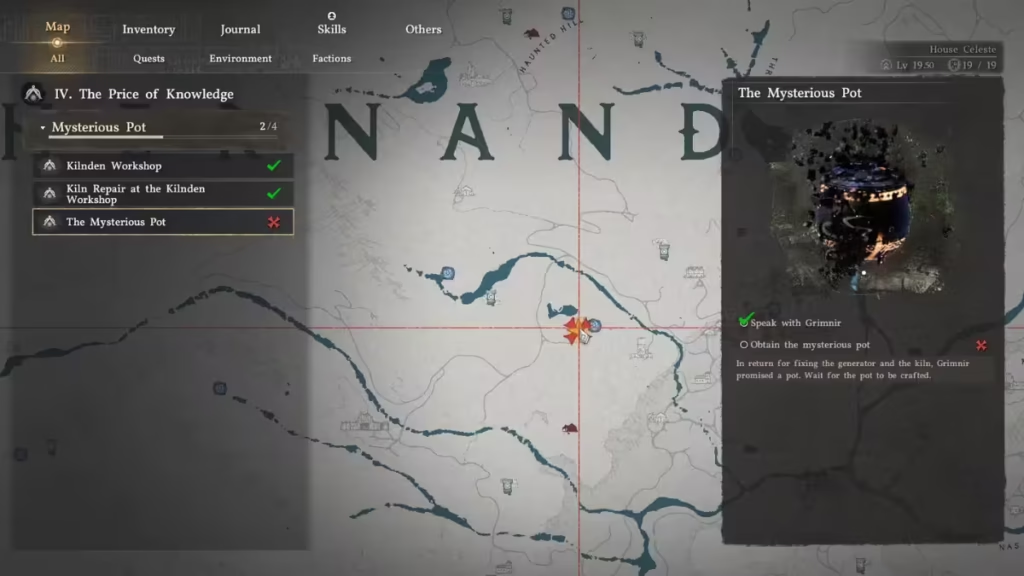
This guide walks you through every step, including the Duskwood Ruins bonus puzzle and all five fuel orb locations.
Kilndren Workshop
After the explosion cutscene at Howling Hill, your map marker points roughly one kilometer northwest of camp. The path is clear of combat, so skip the prep and head straight there.
- Stop at Hernand Town on the way: Sell any unwanted loot and upgrade your gear if you have been stockpiling ores. The town sits along the natural route to the workshop.
- Grab Azurite before entering the workshop: This rare blue mineral sits on the cliffside just southeast of Kilndren Workshop. It is easy to spot because of its bright blue color, but you need a pickaxe to mine it. Azurite becomes essential for pushing gear past the early upgrade tiers, so collect it now rather than backtracking later.
Once you reach the workshop, activate the Abyss Nexus nearby. This creates a fast travel point you will use multiple times throughout the questline. Blinding Flash illuminates Abyss Nexus markers from a distance if you have trouble spotting them.
Speak to Grimnir at the top of the hill. He explains that the kilns caused the explosion and asks for your help getting them operational again. Talking to him officially starts the Kiln Repair quest.
Optional: Duskwood Ruins Puzzle (Abyss Cresset)
Before you repair a single kiln, check these two optional objectives nearby. They reward an Abyss Cresset worth grabbing.
- Sealed Abyss Artifact: Located on the road to the northwest of the workshop.
- Duskwood Ruins Abyss Cresset Puzzle: Across the road to the northwest.
Save your game before starting the Duskwood Ruins puzzle. The puzzle can bug out if you run away mid-attempt, leaving plants unspawned and pillars non-functional. A fresh save lets you reload cleanly.
Step 1: Clear the creeper vines from the central mechanism and all five stone pillars. Use Blinding Flash to create a hotspot with Focus Light while the sun is out. The vines ignite and burn off quickly.
Step 2: Use the Stab Skill to drive your sword into the central round device. This reveals four control holes.
Control hole assignments:
| Hole | Controls Pillars |
|---|---|
| Hole 1 | 2 and 4 |
| Hole 2 | 2 and 5 |
| Hole 3 | 2, 3, and 4 |
| Hole 4 | 3, 4, and 5 |
(Pillars are numbered 1 to 5, left to right. Holes are numbered 1 to 4, starting from the side facing away from the pillars, then clockwise.)
Solve the puzzle in this exact order:
- Use Hole 2 to raise Pillars 2 and 5 half a block.
- Use Hole 3 to raise Pillars 2, 3, and 4 half a block.
- Use Hole 4 to raise Pillars 3, 4, and 5 half a block.
All five pillars reach equal height, unlocking the Abyss Cresset of the Witchwoods.
Activate the Ancient Generator
Before any kiln repair can begin, you need to restore power to the workshop. The ancient generator stands directly in front of Grimnir. It looks like a tall stone tower with glowing runes near the top.
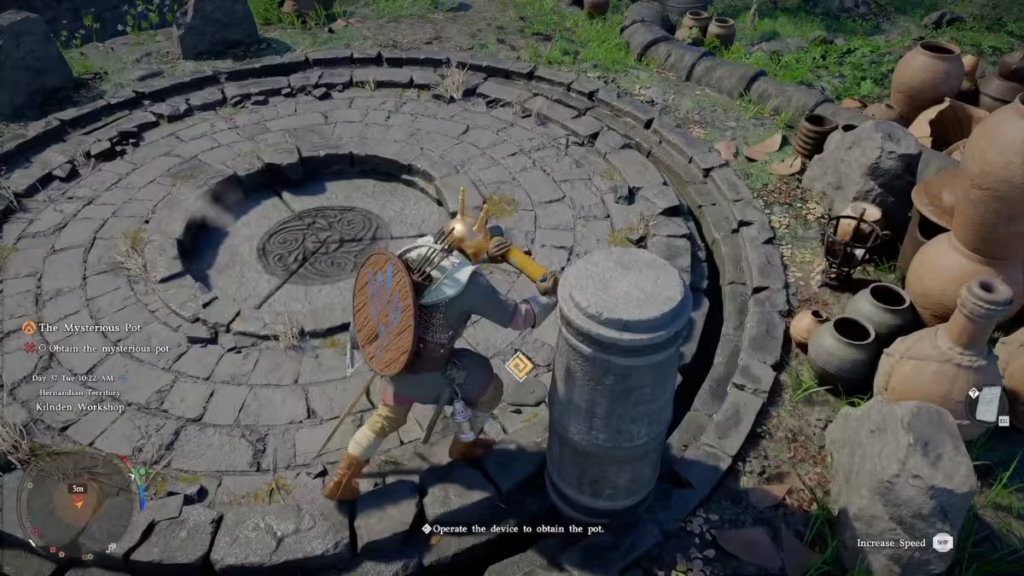
How the puzzle works:
The generator has several rotating rings, each marked with a glowing rune. Your goal is to align all the runes into a single vertical line.
- Push the yellow wooden handles sticking out of the generator to rotate the active ring.
- Use the lever at the base to switch between rings.
- A subtle rumble plays when a rune clicks into the correct position.
The single most important tip: Rotate each ring slowly. The alignment detection is strict. Spin too fast and you will skip past the correct position, forcing another full rotation. Take your time on each ring, and the puzzle becomes straightforward.
Once all runes align vertically, the generator powers on and unlocks the three kiln repair objectives.
Repair the Three Kilns
Each kiln uses a different repair mechanic. None of them repeats, so pay attention to what each one needs.
Kiln 1: Fix the Disconnected Kiln
This is the simplest repair in the questline. The kiln is just unplugged.
- Find the loose power tube on the eastern side of the kiln, near the yellow bar.
- Attach it to the Connecting Pipe on the kiln’s side.
- Push the yellow bar to activate the kiln.
Done. No puzzle, no combat.
Kiln 2: Fix the Dismantled Kiln
This kiln needs full reconstruction using Axiom Force.
- Find the first broken fragment to the right of the kiln base, near a brazier.
- Use Axiom Force to lift it and place it onto the kiln base. The game snaps it into position when you have the correct piece in the right spot.
- Find the second piece behind the kiln. It has a flat top and a large grate. Use Axiom Force to lift and slot it onto the middle piece.
- Climb to the top of the assembled kiln.
- Use Force Palm (R3) to lock the pieces together. You can either grab the ground and use Force Palm or jump and trigger it mid-air.
- Drop back down and push the yellow bar to bring the kiln online.
Kiln 3: Put Fuel Into the Kiln
This is the most involved kiln. You need to find and insert five glowing electric orbs into the fuel slots. Two sit right next to the kiln and are easy to collect. The remaining three require searching.
Orb locations:
| Orb | Location |
|---|---|
| Orbs 1 and 2 | Next to the kiln. Their blue glow makes them obvious. |
| Orb 3 | Near the water on the western side of the kiln, on a small patch of land before the water deepens. |
| Orb 4 | Inside the eye socket of a stone statue in the pond by the kiln. Look for the statue deepest in the water near the lily pads. One statue has a blue glowing eye. Use Axiom Force and pull backward to extract it. Take your time with the targeting since this one requires precision. |
| Orb 5 | Near the entrance of Duskwood Cave, slightly southeast of the kiln. Follow the water’s edge southeast and look for the cave opening. The orb sits just inside. |
After placing all five orbs into the fuel slots, push the yellow bar to power up the kiln and complete all three repairs.
Get the Mysterious Pot
With all three kilns running, return to Grimnir and speak to him. He acknowledges your work and tells you the Mysterious Pot will take a little time to prepare.
Before you wait: Dispatch any Freeswords on background missions now. The in-game wait function fast-forwards the clock, which also ticks down the timers on those tasks. You can knock out multiple things at once.
Open the pause menu and use the Wait function to pass three in-game days.
Once the time passes, return to Grimnir. He takes you to a workshop device on the hill. Interact with it and push the handlebar clockwise until the floor hatch opens. Smoke pours out, and the Iron Pot drops from above. Pick it up.
This is the Mysterious Pot, also known as the Kuku Pot. It is now in your inventory as a permanent key item.
How to Use the Kuku Pot
After acquiring the Kuku Pot, a follow-up quest starts: The Iron Pot’s Usage. Head to Togrum, an artisan located slightly southwest of Kilndren Workshop. He runs a quick tutorial on what the pot actually does.
How it works:
- Use Axiom Force to grab a large object, such as the boulder Togrum provides.
- While holding the object with Axiom Force, press Triangle (PS) / Y (Xbox).
- The object stores inside the Kuku Pot.
- Open your inventory, select the Kuku Pot, and retrieve stored items whenever you need them.
The Kuku Pot does not work on standard inventory items. It stores large environmental objects and Abyss items such as Magnetic Power Sources used to solve puzzles and unlock areas later in the game. This mechanic opens up new traversal and puzzle solutions throughout the rest of Crimson Desert.
Chapter 4 reward: Kuku Pot (Mysterious Iron Pot)
Your next quest is Daily Life, which introduces optional side activities including archery contests and brawls at Howling Hill. Play Now!
FAQs: Crimson Desert Mysterious Pot walkthrough
How do I get the Mysterious Pot in Crimson Desert?
Repair all three kilns at Kilndren Workshop, activate the ancient generator, then return to Grimnir and wait three in-game days. Interact with the workshop device and push the handlebar to drop the Iron Pot.
Where are all five fuel orbs for the third kiln?
Two sit next to the kiln. The third is on a small land patch west of the kiln near the water. The fourth is inside a glowing blue eye socket on a stone statue in the pond. The fifth is near the entrance of Duskwood Cave, slightly southeast of the kiln.
How do I solve the ancient generator puzzle in Crimson Desert?
Use the lever at the base to select each ring, then push the wooden handles to rotate it. Align all glowing runes into a single vertical line. Rotate slowly and listen for the rumble that confirms each rune is locked in correctly.
What does the Kuku Pot do in Crimson Desert?
The Kuku Pot stores large environmental objects and special Abyss items like Magnetic Power Sources. Use Axiom Force to grab an object, then press Triangle (PS) or Y (Xbox) to store it. You can retrieve stored items from your inventory anytime.
Can you miss the Mysterious Pot in Crimson Desert?
No. The Mysterious Pot is a required main story item in Chapter 4 and cannot be missed or skipped.

