HDR can make games look washed out or overly dark when the settings are wrong. Windows 11 gives you several controls that work together, and getting them right takes a few minutes.
Start with your monitor and cable, since no setting fixes a display that can’t support HDR. Then turn HDR on and calibrate it in Windows. After that, fine-tune brightness and color, layer in Auto HDR and in-game settings, then move to GPU-level tuning for a full setup. The last section covers fixes for common problems if something still looks off.
Monitor Requirements for HDR Gaming
Your panel sets the ceiling for how good HDR looks, and no amount of software calibration fixes a weak display.
| Requirement | Minimum Standard | Why It Matters |
|---|---|---|
| Display | DisplayHDR 600 certification or better | DisplayHDR 400 has no mandatory local dimming and caps at 400 nits, so HDR looks flat regardless of calibration |
| Panel type | OLED or mini-LED for the best result | These panels hit the contrast and peak brightness that HDR content is mastered for |
| GPU | A modern NVIDIA or AMD card with HDR output support | Check your card’s specs if you are unsure it supports HDR |
If your monitor is only DisplayHDR 400 certified, HDR gaming will look like a slightly adjusted SDR image rather than a real upgrade. Check your monitor’s spec sheet before spending time on calibration.
Turn On HDR in Windows 11
Once your monitor and cable check out, the next step is switching HDR on at the system level. This does not turn on Auto HDR yet, that comes later once the basics are calibrated.
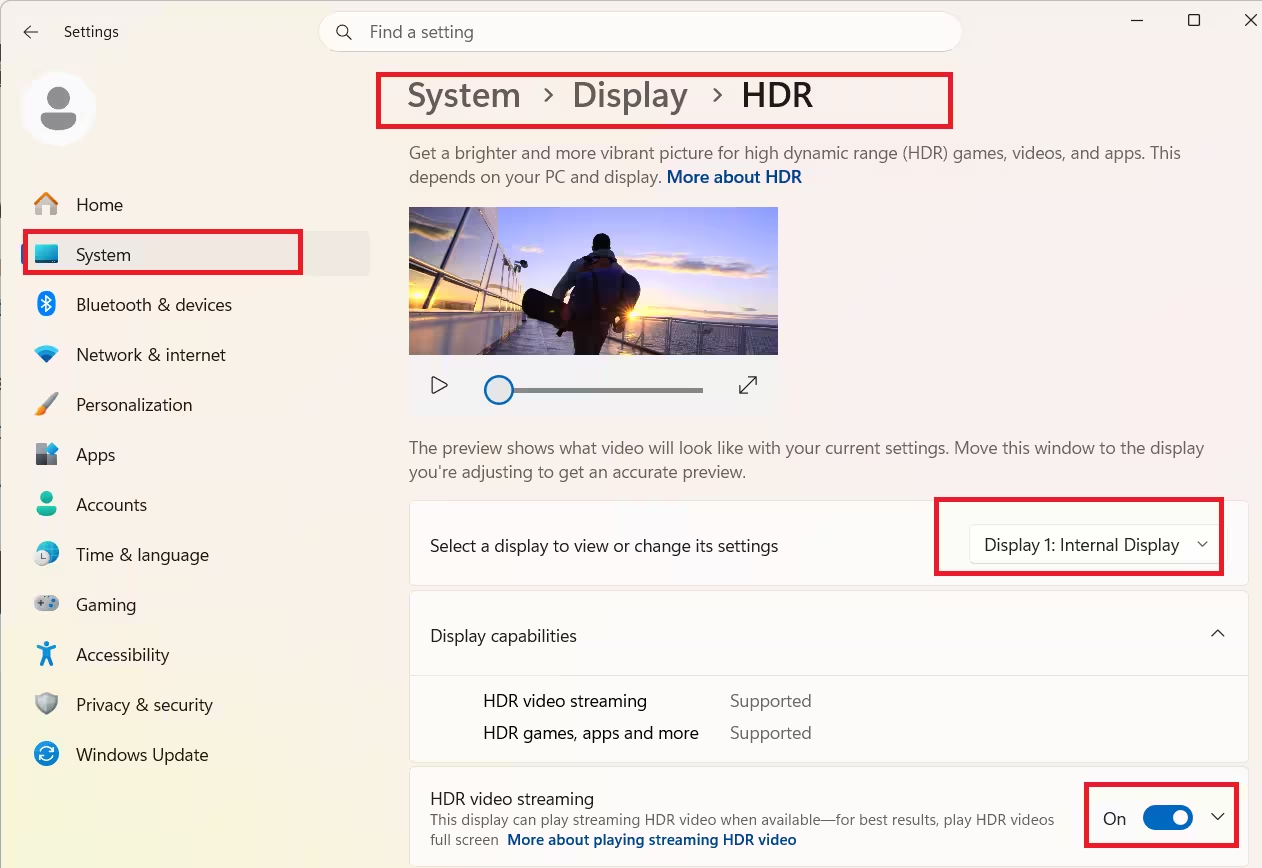
- Go to Settings > System > Display.
- Toggle HDR on for your primary monitor.
- Confirm your cable supports HDR, since an outdated cable will not carry the signal.
| Cable Type | Supports 4K HDR at 60Hz+ |
|---|---|
| HDMI 2.1 | Yes |
| DisplayPort 1.4 | Yes |
| HDMI 1.4 | No |
| DisplayPort 1.2 | No |
Calibrate HDR Settings in Windows 11
With HDR switched on, the picture will look off until you calibrate it. The default HDR brightness in Windows 11 rarely matches what your display can actually produce.
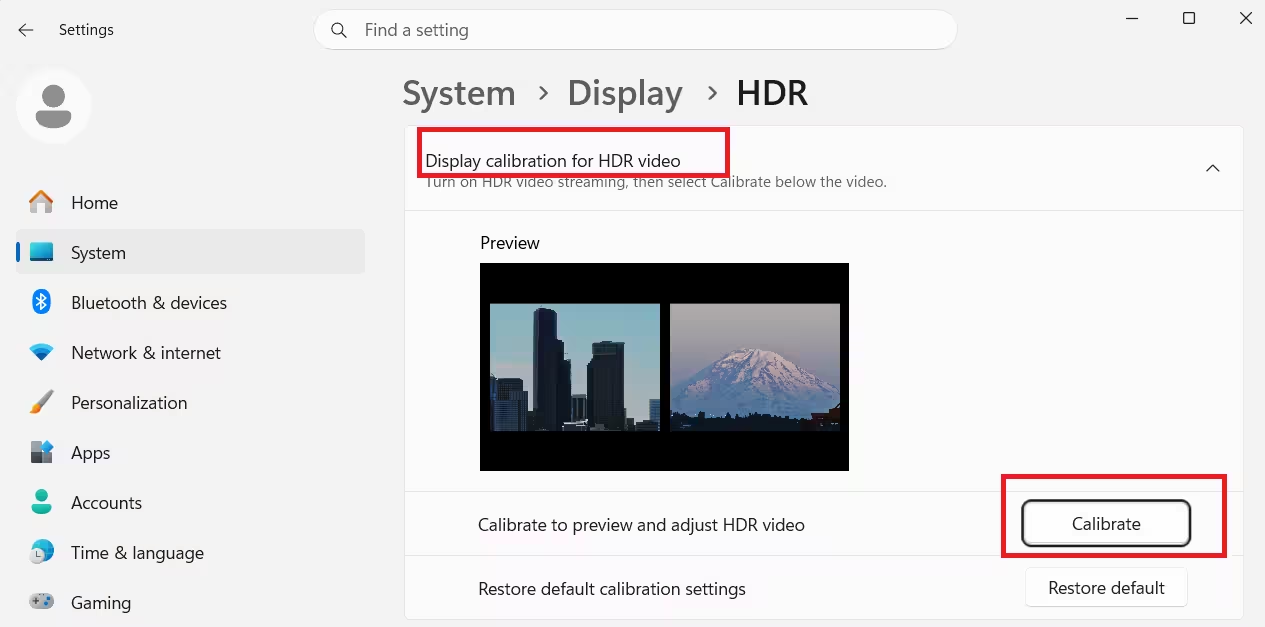
- Open Settings > System > Display > HDR.
- Click HDR Calibration to open the Windows HDR Calibration app.
- Move through the four brightness sliders for peak brightness, full-screen brightness, and color test patterns.
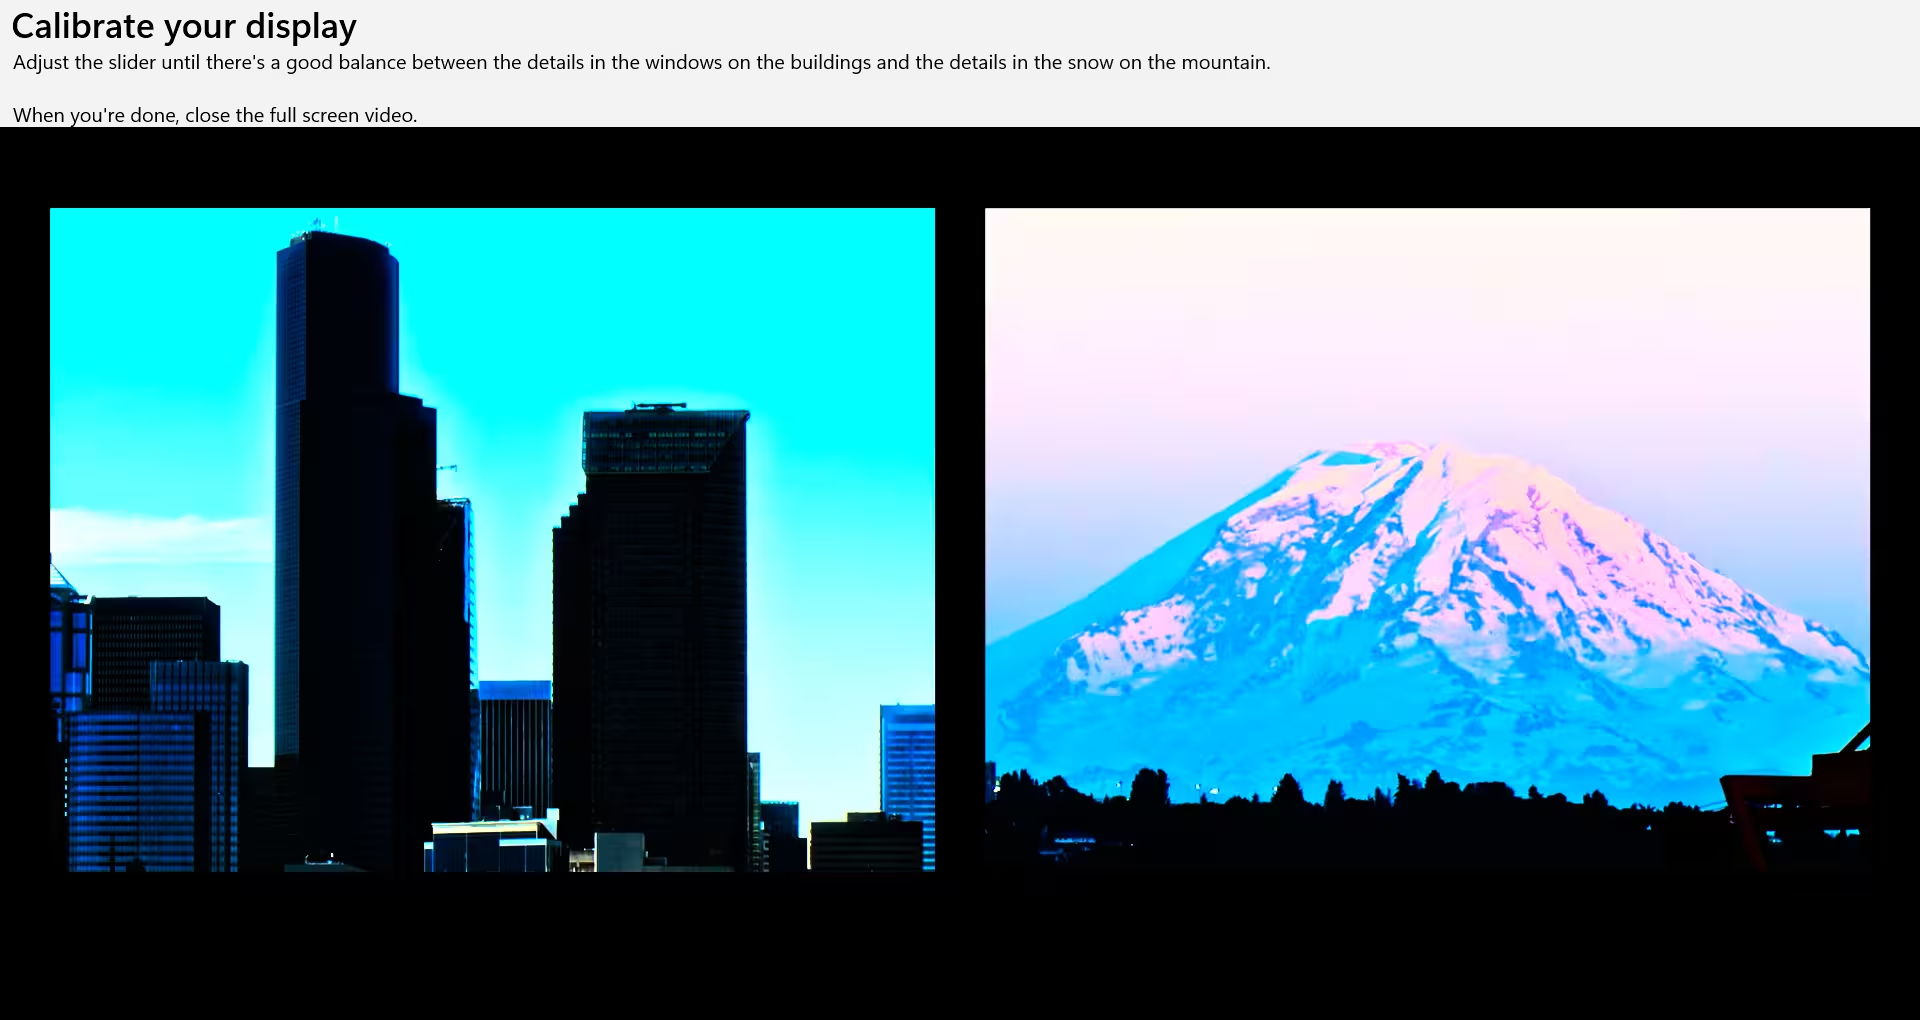
- Match each slider to the point where the pattern just disappears into the background, not before and not after.
- Save the calibration profile once you finish, since Windows applies it automatically across supported games.
SDR Content Brightness Settings in Windows 11
Calibration handles HDR content, but there is one more slider left over for everything that is not HDR. Non-HDR apps and games look overly bright or dim on an HDR display until you adjust this slider.
- Find SDR content brightness under Settings > System > Display.
- Set it between 30 and 50 for most monitors.
- Push it higher only if your desktop and non-HDR games look dim compared to HDR content.
ICC Profile Setup for HDR on Windows 11
This step is optional, but worth doing if you also use your PC for anything outside gaming, like photo editing or browsing. Calibration corrects brightness, but colors can still look off compared to how they appeared before HDR was on. An ICC profile is a small file that tells Windows exactly how your specific monitor renders color, so applying one brings desktop and app colors back in line.
- Search Windows for Calibrate display color and follow the steps to generate an ICC profile for your monitor.
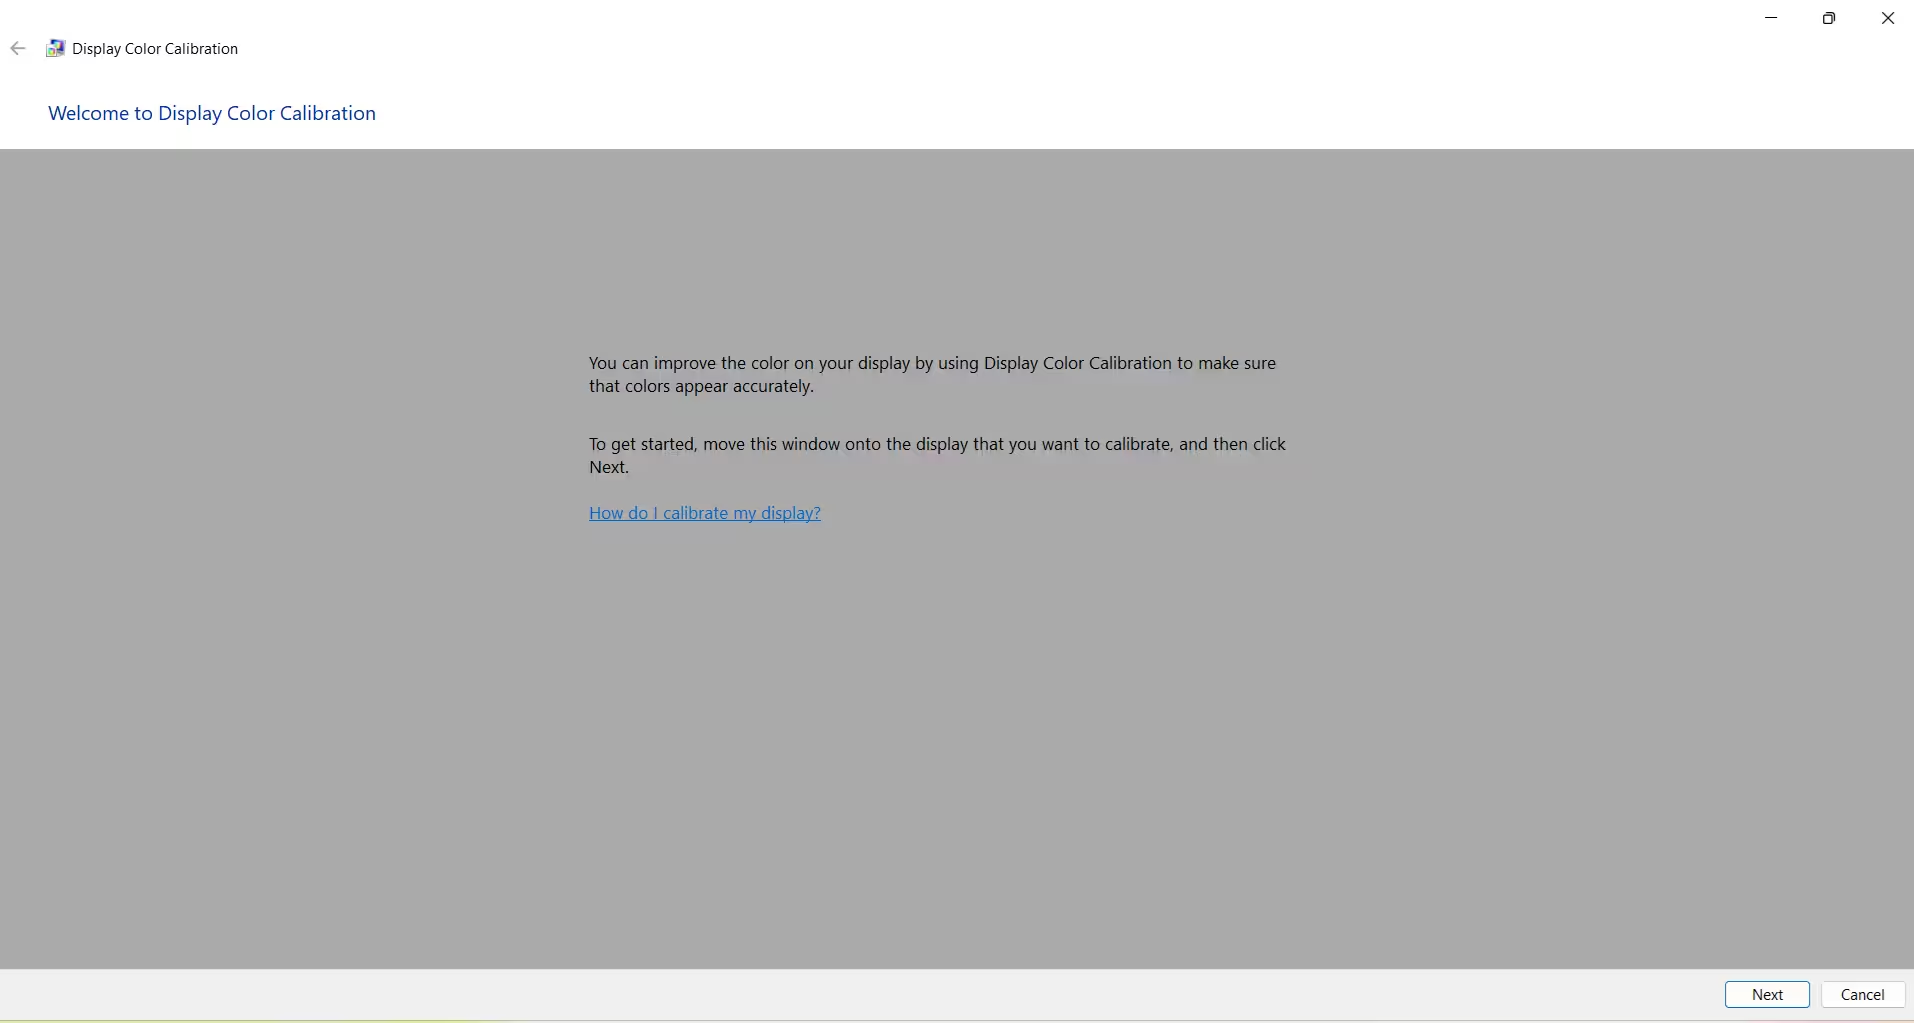
- Open Color Management from Windows Search, click Add, and select the profile you just created.
- Check the Add as HDR Profile box and click OK to set it as default.
- Go to the Advanced tab and confirm the Device profile matches the one you just set.
Auto HDR Settings for Older Games
With Windows-level HDR calibrated, you can now turn on Auto HDR, a separate feature from the base HDR toggle you enabled earlier. Auto HDR adds HDR-like enhancement to games that were built for standard dynamic range only.
- Go to Settings > System > Display > HDR.
- Toggle Auto HDR on.
- Check compatibility, since this works with DirectX 11 and DirectX 12 titles and has no effect on DirectX 9 games.
- Test each title individually, since some older games look oversaturated with Auto HDR.
- Disable it per game through the graphics settings if the colors look off.
Best In-Game HDR Settings
Windows-level settings only get you so far. Games with native HDR support ship their own brightness and tone mapping sliders, and these need to match your display’s real capability.
- Open the graphics or display menu inside the game.
- Look for Peak Brightness or Paper White settings.
- Set peak brightness close to your monitor’s actual nits rating, which you can find in your monitor’s spec sheet or box.
- Set paper white based on your room lighting, since this is the single most impactful setting for everyday HDR image quality.
| Room Lighting | Paper White |
|---|---|
| Dark room | 80 to 100 nits |
| Normal room lighting | 150 to 200 nits |
| Bright room or near a window | 200 to 250 nits |
If the image looks too bright overall, lower paper white. If it looks flat or dim, raise it.
GPU Driver Updates for HDR Gaming
The rest of this guide covers GPU-level tuning, which matters most if HDR still looks inconsistent after the Windows settings above. Start with the driver, since an outdated GPU driver causes flickering, incorrect colors, or HDR toggling off unexpectedly in games.
- Open NVIDIA App, AMD Software, or Intel Arc Control depending on your GPU.
- Check for the latest driver version.
- Install the update if one is available.
- Restart your PC before testing HDR again in your games.
GPU Output Settings for HDR (NVIDIA and AMD)
With the driver updated, the next thing to check is how the GPU outputs the signal itself. Windows-level HDR calibration means nothing if your GPU output settings are clipping the signal before it reaches your display.
For NVIDIA:
- Open NVIDIA Control Panel > Display > Change resolution.
- Set output color depth to 10 bpc.
- Choose RGB color format.
- Select Full dynamic range.
For AMD:
- Open AMD Software > Display settings.
- Enable the 10-bit pixel format.
- Set color depth to Full RGB.
RTX HDR Settings for NVIDIA Users
This section only applies if you have an NVIDIA GPU and play games without native HDR support that Auto HDR does not handle well. RTX HDR gives NVIDIA GPU owners a stronger alternative to Auto HDR for games that lack built-in HDR.
- Open the NVIDIA App and go to Graphics > Global Settings.
- Set RTX HDR to On.
- Launch a game, press
Alt + F3to open the overlay, and apply the RTX HDR filter.
RTX HDR preserves contrast better than Auto HDR in most titles, but it costs roughly 5 to 7 percent performance, so skip it if you are chasing high frame rates on a fast refresh-rate monitor. Never run RTX HDR and Auto HDR together, since layering both processing passes produces visible artifacts.
Best HDR Calibration Tools for Windows 11
If you followed every step above and HDR still looks slightly off, a dedicated tool can catch what the built-in Windows sliders miss.
- Windows HDR Calibration app (Microsoft Store): the most reliable free option, since it reads your display’s actual EDID data during setup.
- HDR10Plus Tool: useful for a deeper check on supported displays.
- Monitor manufacturer’s calibration software: check if your brand offers one, since some ship monitor-specific profiles that outperform the generic Windows calibration.
How to Fix HDR Problems in Windows 11
If you have set up HDR using the steps above and something still looks wrong, check your symptom against the list below. A few recurring issues cause most HDR complaints on Windows 11 gaming setups.
1. HDR Looks Too Dark
This usually means the peak brightness setting does not match your display’s real output.
- Raise the peak brightness slider in the Windows HDR Calibration app, covered in the calibration section above.
- Recheck the in-game paper white setting.
2. Colors Look Washed Out or Gray
This points to a cable or in-game HDR toggle issue.
- Confirm your cable supports HDR bandwidth.
- Check that the game’s HDR toggle is on, since some games default to SDR even when Windows HDR is active.
3. HDR Flickers On and Off
This is usually a driver or overlay software conflict.
- Update your GPU driver.
- Disable third-party overlay software like RGB control apps that can interfere with the HDR signal.
4. Black Crush (Shadow Detail Disappears)
This happens when the game’s black level setting or the display’s local dimming is too aggressive for HDR.
- Raise the game’s black level or gamma setting slightly.
- On OLED displays, reduce the local dimming intensity setting in the monitor’s on-screen menu.
5. Should You Disable HDR for Competitive Games?
Yes, for most competitive titles, since the HDR pipeline adds a small but measurable input latency increase over SDR.
- Disable Windows HDR while playing fast-paced competitive games like CS2, Valorant, or Apex Legends.
- Use
Win + Alt + Bto toggle HDR on and off quickly without opening the Settings menu.
Frequently Asked Questions
Does HDR reduce FPS in games?
HDR itself has minimal impact on frame rate, since it mainly changes color and brightness processing rather than rendering load. Any FPS drop usually comes from the higher resolution or refresh rate paired with HDR rather than HDR itself.
Why does my game look darker with HDR on?
Games look darker with HDR on when the peak brightness or paper white setting inside the game does not match your display’s real brightness output. Recalibrating through the Windows HDR Calibration app and adjusting the in-game brightness sliders usually fixes this.
Is Auto HDR the same as native HDR?
Auto HDR and native HDR are not the same. Auto HDR adds HDR-like processing to SDR games using machine learning, while native HDR uses HDR data the game was actually built with. Native HDR generally looks more accurate.
Do I need a specific cable for HDR gaming?
Yes, you need an HDMI 2.1 or DisplayPort 1.4 cable to carry a 4K HDR signal at 60Hz or higher without bandwidth issues, as shown in the cable table above.
Should HDR be on or off when using DLSS or FSR?
HDR and upscaling work together without conflict. Both DLSS and FSR support HDR input and output, so enable HDR alongside whichever upscaler your game uses.
Related Guides

