Rufus is a free, lightweight Windows tool that writes ISO files to USB drives and makes them bootable. You can use it to create a Windows installation drive, a Linux live USB, or an installation disk for other operating systems. It takes only a few minutes and requires no technical background.
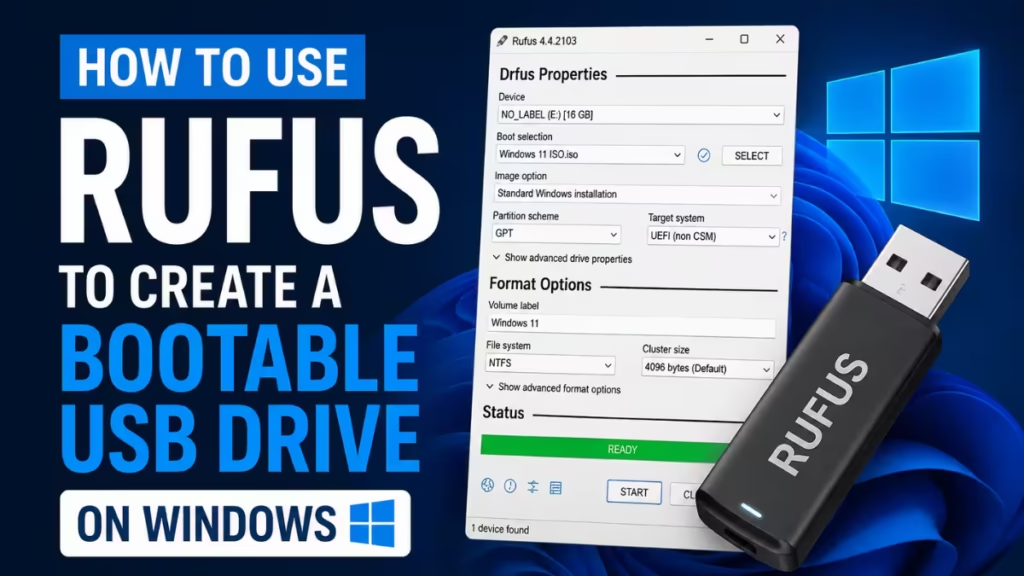
This guide walks you through the full process, from downloading Rufus to booting from the finished USB drive.
What You Need Before You Start
Before you open Rufus, gather these three things:
- A USB drive with at least 8 GB of storage: Most modern operating systems require a minimum of 4 GB, but 8 GB gives you a safe margin. Rufus will erase everything on the drive during the process, so back up any files you want to keep.
- An ISO file: This is the disk image of the operating system or software you want to install. You can download a Windows ISO from the Microsoft website or a Ubuntu ISO from the Ubuntu website.
- A Windows PC: Rufus runs only on Windows.
How to Download Rufus
- Open your browser and go to https://rufus.ie.
- Scroll down to the Download section.
- Click the standard Rufus executable. For most users, this is the regular version listed first.
- Save the file to your Downloads folder.
Rufus does not require installation. It runs as a standalone executable, so you can launch it immediately after the download finishes.
Note: If you are unsure about your system architecture, open Settings > System > About and check the System Type field. Choose the matching Rufus version (64-bit, 32-bit, or ARM64).
How to Create a Bootable USB with Rufus
Follow these steps in order:
Step 1: Launch Rufus
Go to your Downloads folder and double-click the Rufus executable. Windows may ask for administrator permission. Click Yes to continue. Rufus will open and may prompt you to check for updates. Choose your preference and proceed.
Step 2: Insert Your USB Drive
Plug the USB drive into any available USB port on your PC. Rufus detects it automatically and displays it under the Device dropdown at the top of the window.
If you have multiple USB drives connected, use the Device dropdown to select the correct one. Double-check the drive name and size before continuing.
Step 3: Select Your ISO File
Click the SELECT button on the right side of the Boot selection row. A file browser opens. Navigate to the folder where you saved your ISO file, select it, and click Open.
Rufus reads the ISO and automatically configures the following fields:
- Boot selection – set to the ISO you selected
- Partition scheme – usually set to GPT or MBR based on the ISO
- Target system – usually set to UEFI or BIOS based on the partition scheme
- File system – set automatically based on the ISO type
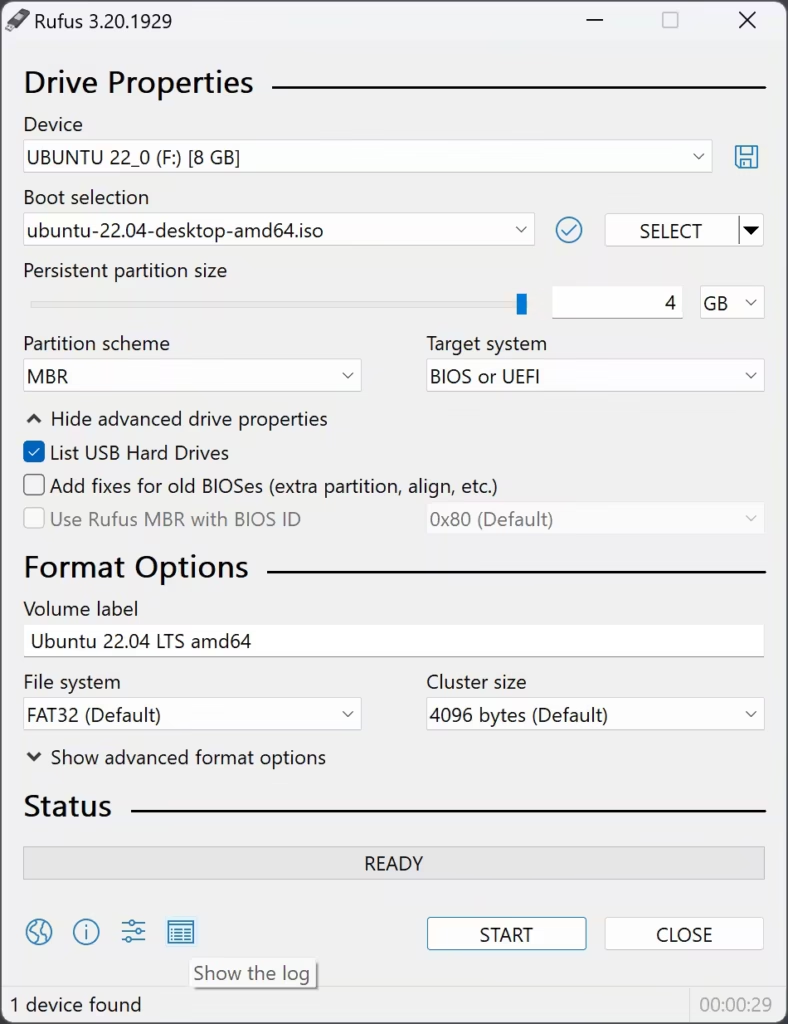
You do not need to change these values in most cases. Rufus detects the correct settings from the ISO.
Step 4: Set the Volume Label (Optional)
The Volume label field lets you give your USB drive a name. For example, you can name it “Windows 11 Install” or “Ubuntu 24.04.” This step is optional. Leave it as is if you do not need a custom name.
Step 5: Click START
Click the START button at the bottom right of the Rufus window. A warning dialog appears, telling you that all data on the USB drive will be destroyed. Click OK to confirm.
If you are creating a Windows bootable USB, Rufus may show an additional dialog with customization options. These options let you:
- Skip the TPM 2.0 and Secure Boot checks
- Skip the 4 GB RAM requirement
- Remove the requirement for an online Microsoft account
- Create a local account with a name you set directly in Rufus
- Disable data collection during Windows setup
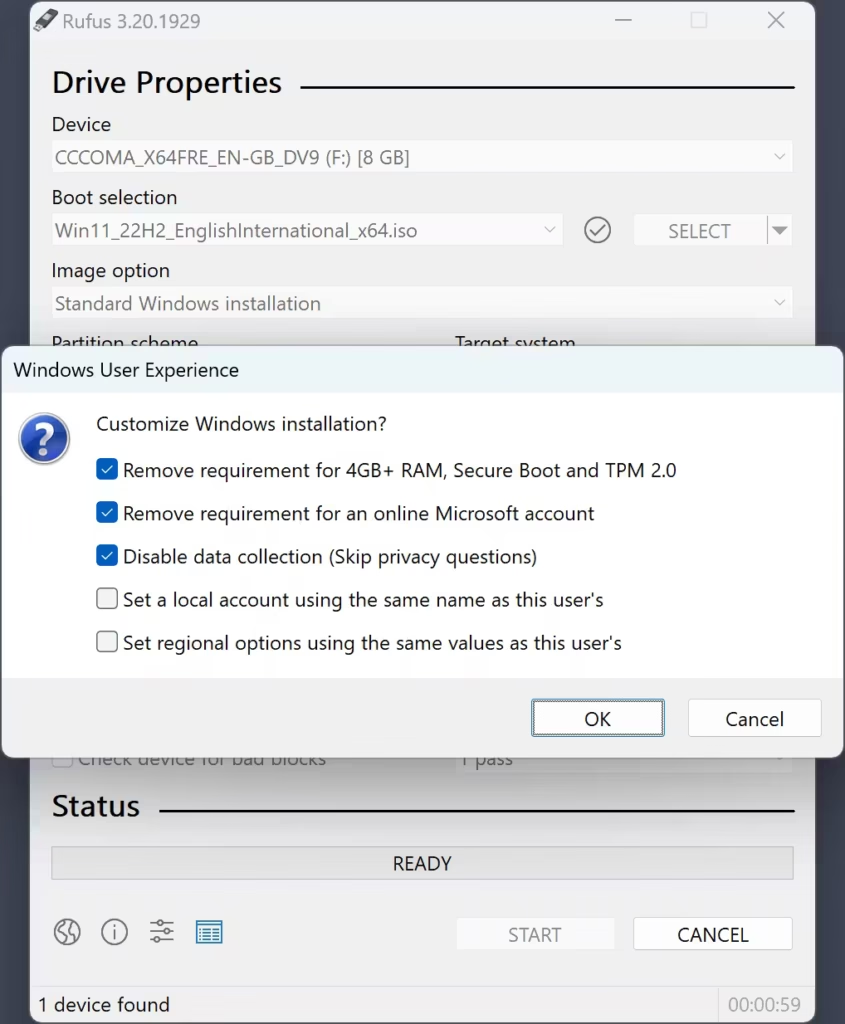
Select the options that fit your needs and click OK to continue.
Rufus will begin writing the ISO to the USB drive. A green progress bar at the bottom of the window shows how far along the process is. This usually takes between 5 and 15 minutes depending on your USB drive speed and the size of the ISO.
When the status bar reads READY, the process is complete. Your USB drive is now bootable.
How to Boot from the USB Drive
Once Rufus finishes, restart your PC with the USB drive still connected.
To boot from the USB drive, you need to enter your computer’s BIOS or UEFI firmware and change the boot order so the USB drive loads before the hard drive.
Here is how to do it:
- Restart your PC and press the BIOS key during startup. Common keys include F2, F10, F12, Delete, or Esc depending on your motherboard manufacturer. The correct key usually appears briefly on screen during the initial boot screen.
- Inside the BIOS or UEFI menu, find the Boot section.
- Move your USB drive to the top of the boot order list.
- Save the changes and exit. Your PC will restart and boot from the USB drive.
From here, follow the on-screen instructions to install the operating system.
Fix: Rufus Does Not Detect Your USB Drive
If Rufus fails to detect your USB drive, try the following fixes in order:
Show advanced drive properties: Click the small arrow next to Show advanced drive properties at the bottom of the Rufus window. Check the box next to List USB Hard Drives. This setting forces Rufus to scan for drives it may have skipped.
Try a different USB drive: Some older or low-quality USB drives are incompatible with Rufus. If you see an error about insufficient space or no media, swap in a different USB drive.
Re-enable automounting: If you see the error message “Error: [0x00000015] The device is not ready,” automounting may be disabled on your system. To fix this:
- Press Win + S and search for cmd.
- Right-click Command Prompt and select Run as administrator.
- Type the following command and press Enter:
mountvol /e- Close the Command Prompt and relaunch Rufus.
Use a different USB port: Some USB 3.0 ports can cause detection issues. Try plugging your USB drive into a USB 2.0 port instead.
Rufus vs. Windows Media Creation Tool
Both tools create bootable Windows installation drives, but they serve different needs.
The Windows Media Creation Tool is the official Microsoft option. It downloads and writes a Windows ISO directly with no extra steps. Use it if you want a simple, straightforward Windows installation drive with no customizations.
Rufus gives you more control. It works with any ISO, not just Windows, so you can create Linux live USBs or bootable drives for other operating systems. It also lets you bypass Windows 11 hardware requirements, skip the Microsoft account requirement, and disable data collection during setup. Use Rufus when you need flexibility or want to work around Windows 11 restrictions.

