VirtualBox is a free, open-source virtualization application developed by Oracle. It lets you run multiple operating systems inside isolated virtual machines (VMs) on your Windows 11 PC, without affecting your primary system.
You can use VirtualBox to test pre-release Windows builds through the Insider Program, run Linux distributions like Ubuntu or Kali Linux, or safely test software in a sandboxed environment.
This guide covers how to install VirtualBox on Windows 11 using both the installer and the winget command, configure the basic settings, and install the Extension Pack.
Before You Begin to Install VirtualBox on Windows 11
Before you install VirtualBox, check these three things to avoid setup errors.
Enable Hardware Virtualization in BIOS
VirtualBox requires hardware virtualization support. On most modern Windows 11 systems this feature is already enabled, but it is worth confirming before you start.
Restart your PC and enter the BIOS or UEFI settings. Look for options labeled Intel VT-x, AMD-V, or Hardware Virtualization and make sure they are enabled. The exact location varies by motherboard manufacturer, so check your hardware documentation if you are unsure.
Disable Hyper-V
If you have Microsoft Hyper-V enabled on your PC, you need to turn it off before installing VirtualBox. Running both simultaneously causes conflicts.
To disable Hyper-V:
- Press Win + S, type
Turn Windows features on or off, and open it. - Uncheck Hyper-V and click OK.
- Restart your PC.
System Requirements
VirtualBox itself has minimal requirements on the host machine. However, each virtual machine you create will consume RAM and disk space from your system. Plan your resources based on the guest OS you intend to run.
How to Install VirtualBox on Windows 11 (Installer Method)
This is the standard way to install VirtualBox using the official executable installer from Oracle.
- Go to the Oracle VirtualBox download page.
- Under VirtualBox Platform Packages, click Windows hosts to download the installer.

- Once the download completes, double-click the VirtualBox-x.x.x-Win.exe file to launch the setup wizard.
- Click Next on the welcome screen.
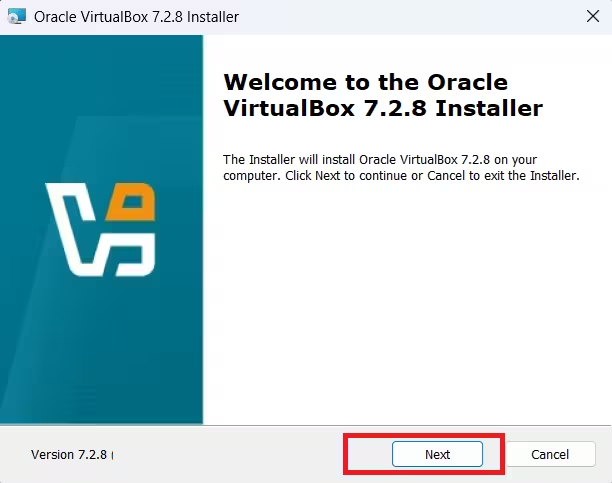
- Accept the license terms and click Next.
- On the Custom Setup screen, leave the default options unless you have specific requirements, then click Next.
- Click Yes when prompted about the virtual network adapter warning. This installs the network adapter VirtualBox needs to provide internet access to your VMs.
- Click Yes again if prompted to install any missing dependencies.
- Click Next, then click Install to begin the installation.
- Click Finish when the setup completes.
VirtualBox will launch automatically after installation. You can also open it anytime from the Start menu.
How to Install VirtualBox Using Winget (Command Line)
If you prefer the command line, you can install VirtualBox using the Windows Package Manager (winget). This method downloads and installs VirtualBox automatically without any manual steps.
- Press Win + S, type
Command Prompt, right-click the result, and select Run as administrator. - Run the following command to confirm the package name:
winget search virtualbox- Run this command to install VirtualBox:
winget install Oracle.VirtualBox- Wait for the download and installation to complete. No additional steps are needed.
After the process finishes, VirtualBox will be installed and ready to use from the Start menu.
How to Configure VirtualBox on Windows 11
The default settings work for most users, but a few configuration adjustments can improve your experience. Follow these steps to review the key settings.
- Open VirtualBox from the Start menu.
- Click File in the menu bar and select Preferences.
- Click General in the left panel.
- Check the Default Machine Folder path. This is where VirtualBox stores all your virtual machine files. If your primary drive has limited space, change this path to an external or secondary drive to avoid slowing down your system.
- Click Update in the left panel.
- Enable Check for Updates and choose your preferred update channel. Stick to the stable channel unless you want to test pre-release builds.
- Click Display and then select the Expert tab.
- Review the Maximum Guest Screen Size setting. You can leave this at the default and adjust the display resolution directly inside each VM later.
- Set the Scale Factor to control how large or small the VM interface appears on your screen.
- Click OK to save all changes.
VirtualBox automatically configures NAT (Network Address Translation) for each new VM you create, so you do not need to set up networking manually to get started.
How to Install the VirtualBox Extension Pack
The Extension Pack is optional but recommended. It adds support for USB 2.0 and 3.0 devices, VirtualBox Remote Desktop Protocol (RDP), disk encryption, NVMe storage, and PXE boot for Intel network cards.
Note: The Extension Pack version must match your installed VirtualBox version. Installing a mismatched version will cause an error.
- Go to the Oracle VirtualBox download page.
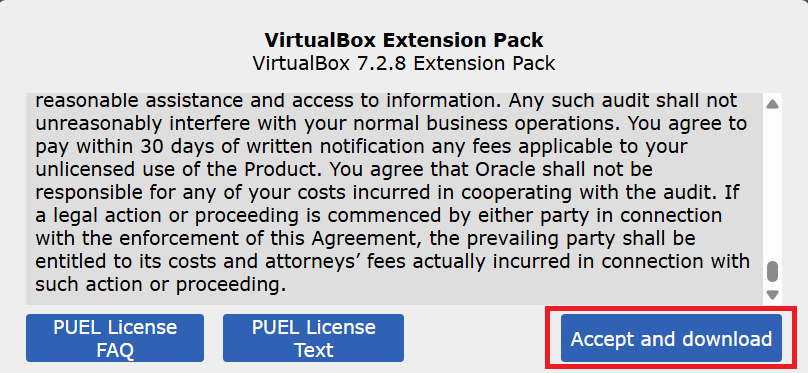
- Under VirtualBox Extension Pack, click Accept and download to save the
.vbox-extpackfile.
- Open VirtualBox.
- Click File, hover over Tools, and select Extension Pack Manager.
- Click the Install button (the green plus icon).
- Browse to the downloaded
.vbox-extpackfile and click Open. - Click Install in the confirmation dialog.
- Scroll down the license agreement page and click I Agree.
- Click OK twice to finish.
VirtualBox will confirm the Extension Pack is installed. You will now see it listed on the Extension Pack Manager screen.
To remove the Extension Pack later, select it on the Extensions page and click Remove Selected Package in the top-right corner.
Getting Started with VirtualBox on Windows 11
With VirtualBox installed and configured, you are ready to create your first virtual machine. You will need an ISO file of the operating system you want to install. For Windows VMs, download the ISO directly from Microsoft. For Linux, grab the ISO from the official distribution website.
When you create a new VM, allocate resources based on what your host system can comfortably spare. For a Windows 11 VM, Oracle recommends at least 4 GB of RAM and 20 GB of virtual disk space, though 8 GB RAM and 50 GB storage gives a noticeably smoother experience.
For a full list of features and advanced settings, refer to the official VirtualBox documentation.

