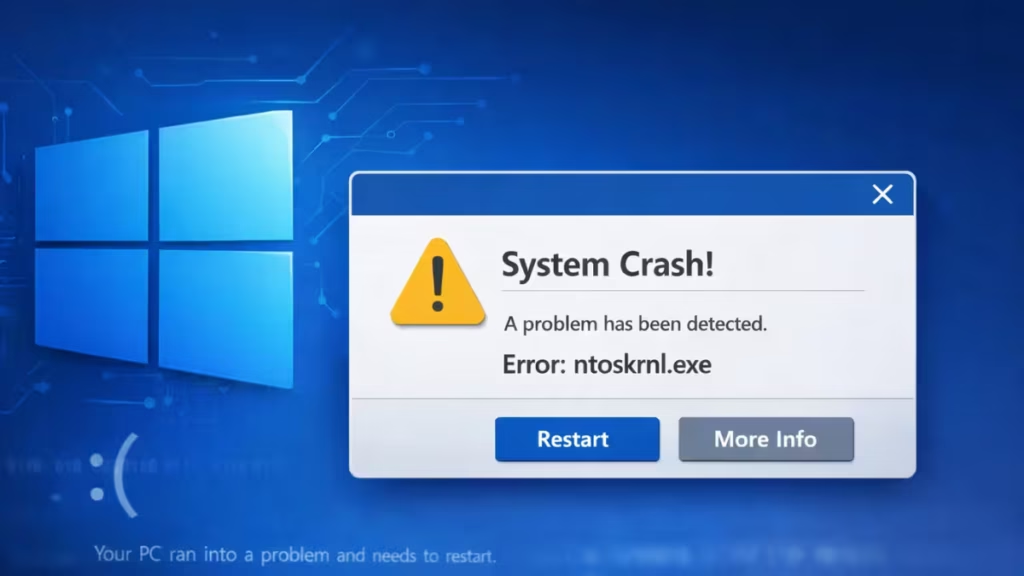
The ntoskrnl.exe BSOD crashes Windows without warning and often repeats on every reboot. The stop code points directly to the Windows NT kernel, which means the crash usually involves faulty RAM, outdated drivers, overclocked hardware, or corrupted system files. This guide covers every working fix for the ntoskrnl.exe BSOD on Windows 11 and 10, starting with the most common causes and working through each solution step by step.
What Is ntoskrnl.exe?
Ntoskrnl.exe is the Windows NT operating system kernel. It handles memory management, hardware abstraction, and process scheduling. Without it, Windows cannot run. When this file crashes or a component it depends on fails, Windows triggers a blue screen of death instead of letting the system continue in a broken state.
What Causes the ntoskrnl.exe Failed BSOD?
The most common causes are:
- Faulty or insufficient RAM: Bad memory modules cause kernel-level crashes.
- Outdated or corrupt drivers: This is especially common right after a driver update.
- Overclocked CPU or RAM: Pushing hardware beyond rated speeds destabilizes the kernel.
- Missing or corrupt system files: Including the ntoskrnl.exe file itself.
- Malware infection: Some threats corrupt core system files directly.
- No valid restore point after a bad update: Windows Update can sometimes introduce instability.
Can You Boot Into Windows?
If your PC is stuck on the blue screen and cannot reach the desktop, force Windows into the Recovery Environment first.
- Press and hold the Power button for 5 to 10 seconds to shut down.
- Power the PC back on. When Windows starts to load, hold the Power button again to shut it down.
- Repeat this process a third time. On the third boot, Windows automatically opens the Recovery Environment.
- From there, go to Troubleshoot > Advanced Options > Startup Settings > Restart, then press 5 to boot into Safe Mode.
Once you are in Safe Mode, work through the fixes below.
Fix 1: Run Windows Memory Diagnostic
RAM problems are the most common cause of the ntoskrnl.exe failed error. The Windows Memory Diagnostic tool scans your RAM for errors and flags any faulty modules.
- Press Windows + R to open the Run dialog.
- Type
MDSCHEDand press Enter. - Click Restart now and check for problems.
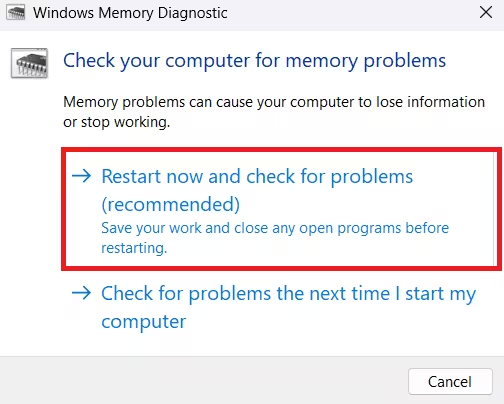
- Windows will reboot and run the memory test automatically. This takes several minutes.
- After the test completes, Windows boots back to the desktop and shows the results in the taskbar notification area.
If the tool reports errors, your RAM module is likely failing. Replacing the RAM stick is the next step.
Tip: If you have two RAM sticks installed, remove one and test with a single stick. Then swap and test the other. This identifies which module is faulty.
Fix 2: Update or Reinstall Drivers
Outdated drivers are a leading cause of blue screen of death errors. After a driver update gone wrong, the kernel loses stable communication with hardware and crashes.
Update drivers through Windows Update
- Right-click the Start button and select Settings.
- Go to Windows Update > Advanced Options > Optional Updates.
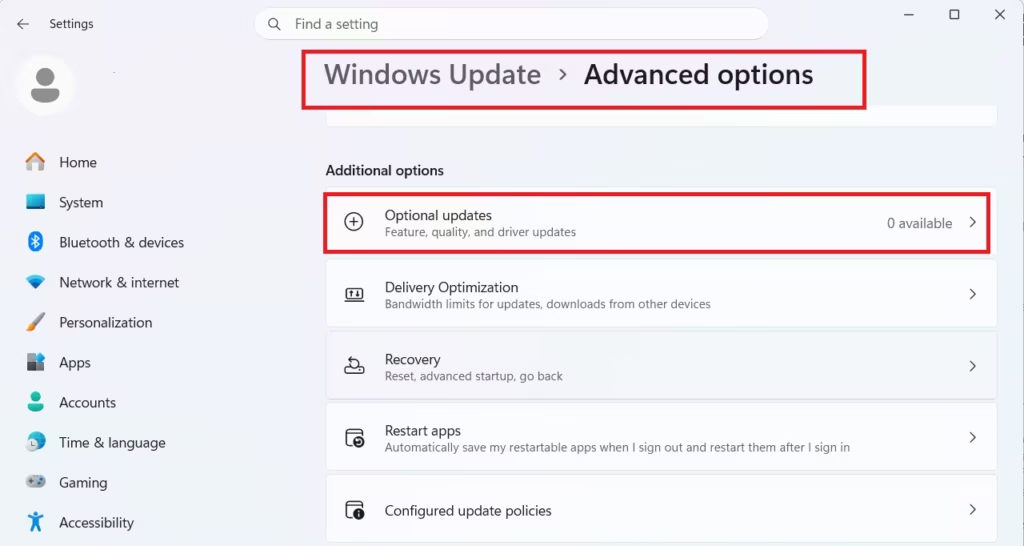
- Select all available driver updates and click Download and Install.
- Return to the Windows Update screen and click Check for Updates to install the latest Windows patches too.
- Restart your PC.
Roll back a recently updated driver
If the BSOD started right after updating a specific driver, rolling it back often fixes it immediately.
- Right-click the Start button and select Device Manager.
- Expand the category for the device whose driver you recently updated.
- Right-click the device and select Properties.
- Go to the Driver tab and click Roll Back Driver.
- Follow the prompts and restart your PC.
Tip: If Roll Back Driver is greyed out, the previous driver version is no longer stored on your system. In that case, visit the manufacturer’s website and download an older, stable driver version manually.
Fix 3: Run an SFC Scan
The System File Checker repairs missing or corrupt Windows system files, including ntoskrnl.exe itself. This is a fast, reliable fix when the error stems from file corruption.
- Press Windows + S, type
cmd, right-click Command Prompt, and select Run as administrator. - Click Yes to confirm the UAC prompt.
- Type the following command and press Enter:
sfc /scannow- Wait for the scan to finish. SFC replaces any corrupt files it finds automatically.
- Restart your PC and check whether the BSOD returns.
If SFC reports that it could not repair some files, run DISM afterward to repair the Windows image itself:
DISM /Online /Cleanup-Image /RestoreHealthThen run sfc /scannow again.
Fix 4: Reset BIOS Overclocking to Default
Overclocking pushes your CPU and RAM beyond their rated speeds. The Windows kernel handles memory operations directly, so even mild instability from overclocking can trigger the ntoskrnl.exe failed stop code.
Resetting your BIOS to default values removes the overclock entirely.
- Press and hold the Power button for about 10 seconds to fully shut down your PC.
- Power it back on. As soon as the manufacturer logo appears, repeatedly press the BIOS key. Common keys are F2, F10, F12, DEL, or ESC depending on your motherboard brand.
- Inside the BIOS, look for an option labeled Load Optimized Defaults, Load Setup Defaults, or Reset to Default. This option is usually in the Exit menu.
- Select it, confirm, save changes, and exit.
- Windows will boot with default hardware settings.
Fix 5: Disable CPU Overclocking Through Windows Power Settings
If you applied an overclock through Windows power settings rather than BIOS, you can undo it without entering BIOS at all.
- Press Windows + R, type
POWERCFG.CPL, and press Enter. - Click Change plan settings next to your active power plan.
- Select Change advanced power settings.
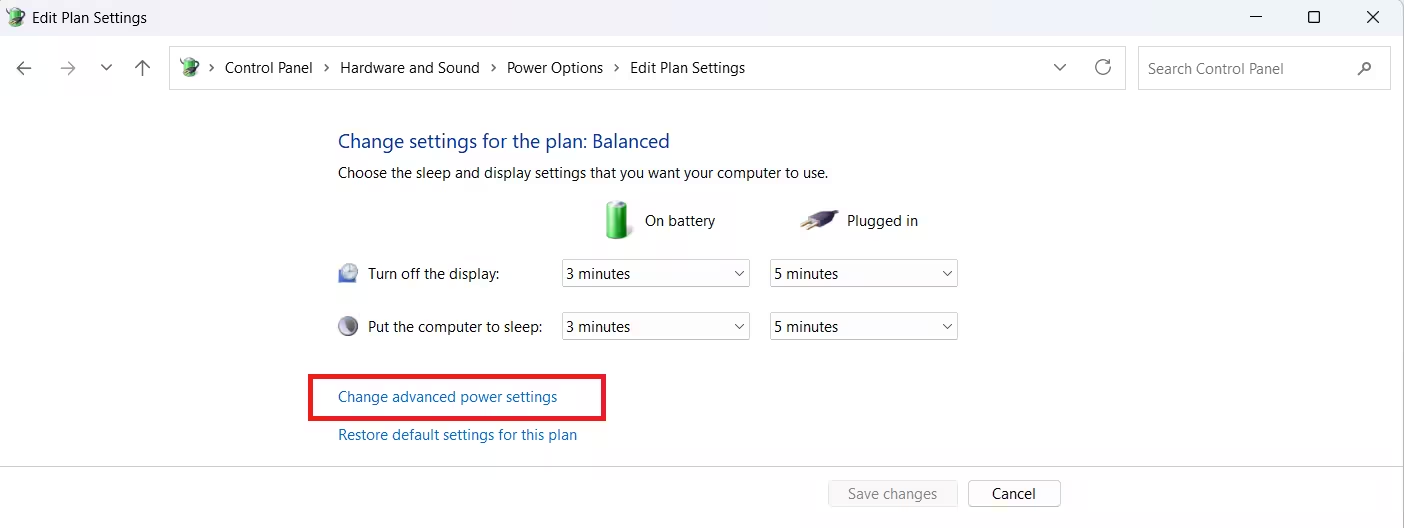
- Select Processor power management.
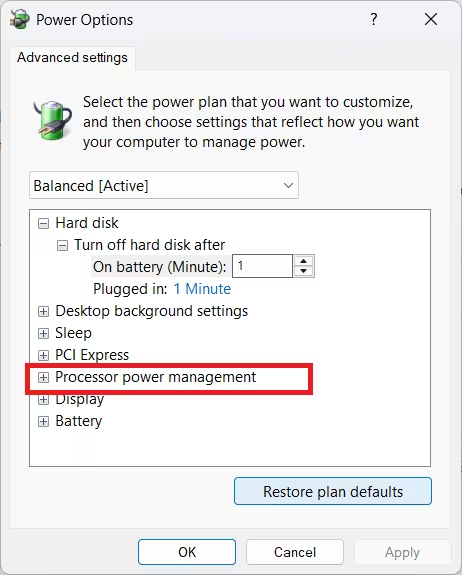
- Expand Minimum processor state and set both On battery and Plugged in values to 99%.
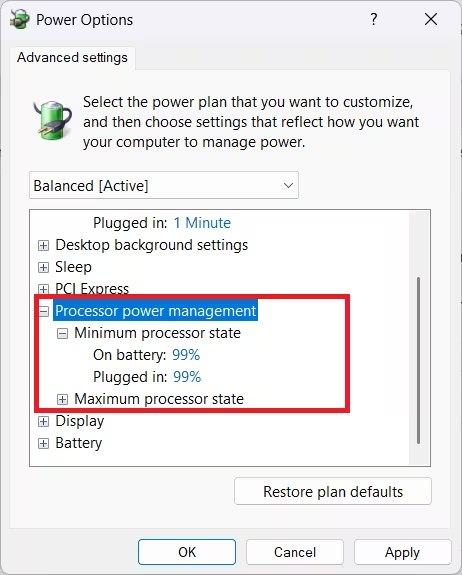
- Expand Maximum processor state and set both values to 99% as well.
- Click Apply, then OK.
- Restart your PC.
Fix 6: Scan for Malware
Some malware strains corrupt or replace core Windows system files. If ntoskrnl.exe itself is targeted, the result is a recurring BSOD. Running a full system scan rules out infection as the cause.
- Press Windows + S and type
Windows Security, then open it. - Click Virus and threat protection.
- Click Scan options.
- Select Full scan and click Scan now.
- Let the scan complete. Remove any threats found and restart your PC.
Fix 7: Perform a System Restore
If the ntoskrnl.exe failed BSOD started after a specific update, driver installation, or software change, rolling back to a restore point from before that event undoes the damage.
- Press Windows + S and type
Recovery, then open it. - Click Open System Restore.
- Click Next on the first screen.
- Select a restore point from before the BSOD started. Use the Show more restore points checkbox if needed.
- Click Next, then Finish to confirm.
- Windows will reboot and restore your system to the selected point.
Note: System Restore does not delete personal files, but it removes programs and drivers installed after the chosen restore point.
Fix 8: Replace or Add RAM
If Windows Memory Diagnostic reported errors and the BSOD persists after other fixes, your RAM hardware is likely failing. Replacing the faulty stick resolves the problem permanently.
- If you have two RAM sticks, test them one at a time by removing one stick, booting, and checking for stability.
- If your motherboard has a free RAM slot, adding a second stick can sometimes work around a borderline failing module temporarily, but replacing the bad stick is the correct fix.
- Make sure any replacement RAM matches your motherboard’s supported speed and type (DDR4 or DDR5).
Related Windows Error Fixes
- DPC_WATCHDOG_VIOLATION Fix Windows 10: Complete BSOD Repair Guide
- How to Fix BSOD With Different BugCheck Strings in Windows 11
- How to Fix KERNEL SECURITY CHECK FAILURE Error on Windows 11
The ntoskrnl.exe BSOD almost always comes down to faulty RAM, a bad driver, or overclocked hardware. Running Windows Memory Diagnostic and updating your drivers fixes the problem in most cases. If the BSOD persists, work through the remaining fixes in order, starting with the SFC scan and ending with System Restore. Leave a comment below if a specific fix worked for you or if you are still seeing the error.

