Git is the most widely used version control system in software development. Whether you work on personal projects, contribute to open source, or collaborate with a team, Git tracks every change you make to your code and lets you roll back to earlier versions when needed. This guide shows you how to install Git on Windows 11 using the official installer, and covers a faster command-line method as well.

Git is a free, open-source distributed version control system created by Linus Torvalds in 2005. It powers platforms like GitHub, GitLab, and Bitbucket. With Git, you can branch your codebase, merge changes from multiple contributors, and maintain a complete history of every edit.
Prerequisites
Before you install Git, make sure you have:
- Windows 11 (any edition)
- Administrator access to your PC
- A working internet connection
Method 1: Install Git Using the Official Installer
This is the recommended method for most users. The official installer gives you full control over installation settings, and it includes Git Bash, Git GUI, and Git CMD.
Step 1: Download the Git Installer
- Open your browser and go to the official Git download page for Windows.
- The site automatically detects your Windows version and starts the download. If it does not start, click Click here to download manually.
- Save the
.exefile to your Downloads folder.
Step 2: Run the Installer
- Open your Downloads folder and double-click the Git installer file (for example,
Git-2.47.0-64-bit.exe). - Click Yes on the User Account Control (UAC) prompt.
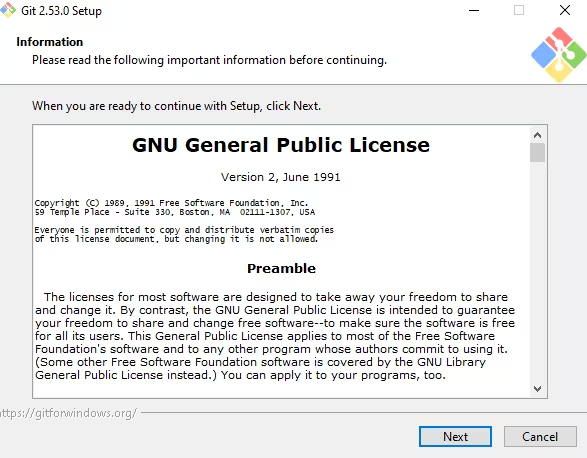
- Read the GNU General Public License screen and click Next.
Step 3: Choose the Installation Location
The default path is C:\Program Files\Git. You can leave this as-is unless you have a reason to change it. Click Next.
Step 4: Select Components
Keep the default selections. Make sure these options stay checked:
- Git Bash Here (adds Git Bash to the right-click context menu)
- Git GUI Here (adds GUI shortcut to the context menu)
- Associate .git configuration files with the default text editor
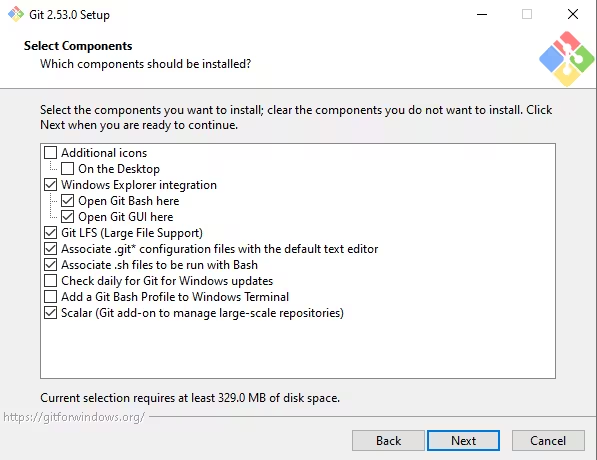
Click Next.
Step 5: Choose a Start Menu Folder
Leave the default folder name as Git or type a custom name. Click Next.
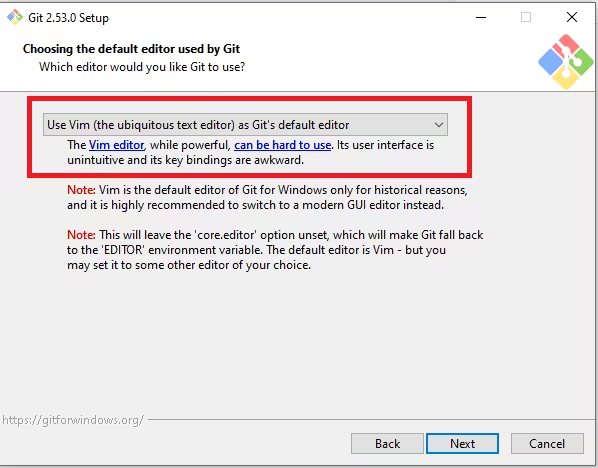
Step 6: Choose the Default Editor
Git uses a text editor to write commit messages. The installer defaults to Vim. If you prefer something easier, select Visual Studio Code, Notepad++, or Nano from the dropdown. Click Next.
Step 7: Set the Initial Branch Name
Select Let Git decide to use the default branch name (currently main). Click Next.
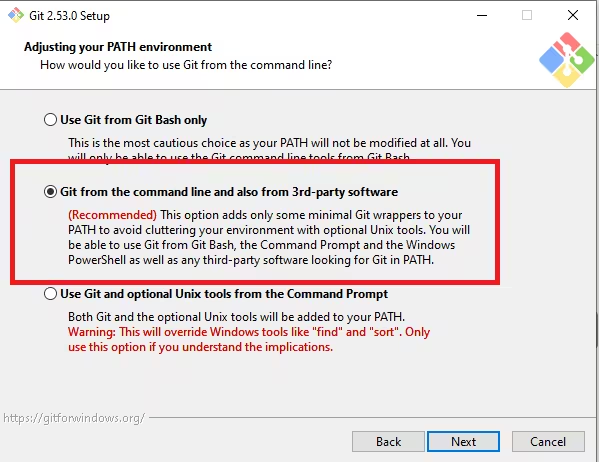
Step 8: Adjust the PATH Environment
Choose Git from the command line and also from 3rd-party software. This option lets you use Git from Command Prompt, PowerShell, and any terminal that reads the system PATH. Click Next.
Step 9: Choose the SSH Executable
Select Use bundled OpenSSH (the default). Click Next.
Step 10: Choose the HTTPS Transport Backend
Select Use the OpenSSL library (the default). Click Next.
Step 11: Configure Line Ending Conversions
Select Checkout Windows-style, commit Unix-style line endings. This setting avoids line-ending conflicts when you collaborate with developers on macOS or Linux. Click Next.
Step 12: Choose the Terminal Emulator
Select Use MinTTY (the default terminal of MSYS2). MinTTY gives you a clean, resizable terminal window inside Git Bash. Click Next.
Step 13: Set the Default Behavior of git pull
Select Default (fast-forward or merge). Click Next.
Step 14: Choose the Credential Helper
Select Git Credential Manager. This stores your GitHub or GitLab credentials so you do not need to type your password on every push. Click Next.
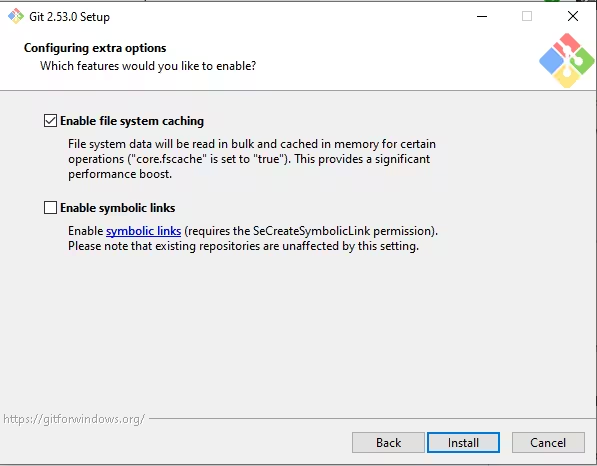
Step 15: Configure Extra Options
Keep the following options checked:
- Enable file system caching (speeds up Git operations)
- Enable Git LFS (Large File Storage support for binary files)
Click Next.
Step 16: Complete the Installation
Leave the experimental options unchecked and click Install. Wait for the installer to finish, then click Finish.
Method 2: Install Git Using Winget (Faster Option)
If you prefer installing Git from the command line without clicking through a wizard, use the built-in Windows Package Manager (winget).
- Press Win + X and select Windows Terminal (Admin) or PowerShell (Admin).
- Run the following command:
winget install --id Git.Git -e --source winget- Wait for the download and installation to complete. You will see a Successfully installed message when it finishes.
- Close and reopen your terminal so the PATH update takes effect.
This method installs Git with sensible defaults. If you need to customize settings (like the default editor or line endings), use Method 1 instead.
Verify the Installation
After installing Git, confirm it works correctly.
- Open Command Prompt, PowerShell, or Git Bash.
- Type the following command and press Enter:
git --versionYou should see output like this:
git version 2.47.0.windows.2If the command returns a version number, Git is installed and working correctly.
Configure Git After Installation
Before you start using Git, set your username and email address. Git attaches this information to every commit you make.
- Open Git Bash or PowerShell.
- Set your username:
git config --global user.name "Your Name"- Set your email address:
git config --global user.email "[email protected]"- Confirm your settings at any time with:
git config --listYou only need to do this once. Git stores these values in C:\Users\YourUsername\.gitconfig.
Essential Git Commands to Know
Once Git is installed and configured, here are the commands you will use most often:
| Command | What It Does |
|---|---|
git init | Initializes a new local repository |
git clone <url> | Copies a remote repository to your machine |
git status | Shows the current state of your working directory |
git add . | Stages all changed files for the next commit |
git commit -m "message" | Saves staged changes with a description |
git push | Uploads your commits to the remote repository |
git pull | Downloads and merges changes from the remote repository |
git branch | Lists all local branches |
git checkout -b <name> | Creates and switches to a new branch |
Frequently Asked Questions
How do I update Git on Windows 11?
Download the latest installer from the official Git download page and run it. The installer detects your existing Git installation and updates it automatically. Alternatively, run git update-git-for-windows from Git Bash.
What is Git Bash?
Git Bash is a terminal application that ships with Git for Windows. It provides a Unix-style shell environment (based on MSYS2) on Windows, so you can run Bash commands alongside Git commands.
Do I need a GitHub account to use Git?
No. Git works entirely on your local machine without any account. You only need a GitHub, GitLab, or Bitbucket account when you want to push code to a remote repository or collaborate with others.
What is Git LFS?
Git LFS (Large File Storage) is an extension that replaces large files like images, audio, and videos with text pointers inside your repository and stores the actual file content on a remote server. This keeps your repository size small and fast.
Can I use Git in Visual Studio Code?
Yes. Visual Studio Code has built-in Git support. Once you install Git and set it up, VS Code automatically detects it and shows you source control features in the sidebar without any extra configuration.
What is the difference between Git and GitHub?
Git is the version control system you install on your computer. GitHub is a cloud-based hosting service that stores Git repositories online and adds features like pull requests, issue tracking, and team collaboration tools.
Related Tech How-To
- How to Install Android Apps from GitHub: A Complete Step-by-Step Guide
- How to Install and Set Up VirtualBox on Windows 11
- Microsoft Coreutils for Windows 11: Install Native Linux Commands With WinGet

