When Windows 11 stops recognizing your keyboard, you lose the ability to type passwords, navigate menus, or use any keyboard shortcut. The keyboard might work inside BIOS but stop responding the moment Windows loads, or it might fail entirely from the login screen onward.
This guide covers every fix, starting with what you can do without a working keyboard and moving into driver and system-level repairs.
Why Windows 11 Stops Recognizing Your Keyboard
Windows 11 can lose keyboard recognition for several reasons:
- A recent Windows update corrupted the keyboard driver
- A USB port or controller stopped responding
- A system file became damaged
- A BIOS or firmware setting disabled the USB controller
- The keyboard driver is missing or conflicting with another device
Step 1: Use the On-Screen Keyboard to Log In
If your keyboard stops working at the login screen, you can still get into Windows using the on-screen keyboard.
- Click the Accessibility icon at the bottom-right corner of the login screen.
- Toggle on On-Screen Keyboard.
- Use your mouse to click the keys and type your password.
- Press Enter to log in.
Once you are inside Windows, you can run every fix listed below.
Step 2: Check Device Manager for Keyboard Errors
Device Manager shows whether Windows detects your keyboard and whether the driver has a fault.
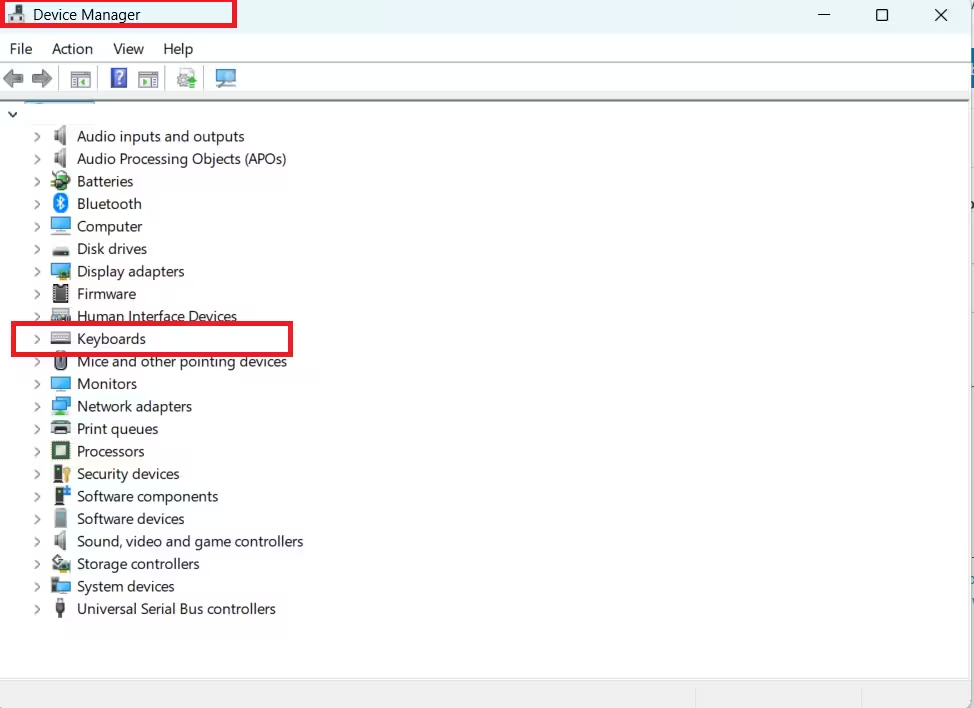
- Right-click the Start button.
- Select Device Manager.
- Expand Keyboards.
- Look for any device with a yellow warning triangle.
If you see a warning icon on the keyboard entry:
- Right-click it and select Update driver.
- Choose Search automatically for drivers.
- Let Windows search and install the updated driver.
- Restart your PC.
If no keyboard appears under Keyboards at all, Windows is not detecting the hardware. Plug the keyboard into a different USB port, then click Action > Scan for hardware changes inside Device Manager.
Step 3: Uninstall and Reinstall the Keyboard Driver
If updating the driver does not fix the problem, remove it entirely and let Windows reinstall it from scratch.
- Open Device Manager.
- Expand Keyboards.
- Right-click your keyboard and select Uninstall device.
- Check the box to delete the driver software if that option appears.
- Click Uninstall.
- Disconnect the keyboard, wait 10 seconds, and reconnect it.
Windows detects the keyboard as new hardware and reinstalls the driver automatically. If you use a wireless keyboard, replace the batteries and re-pair it using your manufacturer’s software after reinstalling.
Step 4: Run SFC to Repair Damaged System Files
A corrupted system file can break keyboard input even when the driver is installed correctly. System File Checker scans and repairs damaged Windows files automatically.
Use the on-screen keyboard to open Command Prompt if your physical keyboard does not work.
- Click Start and type cmd.
- Right-click Command Prompt and select Run as administrator.
- Type the following command and press Enter:
sfc /scannow
Wait for the scan to finish. If SFC finds and repairs files, restart your PC and test the keyboard.
Step 5: Fix USB Controller Settings in Device Manager
If you use a USB keyboard and it worked before a recent Windows update, the USB controller driver may be the root cause.
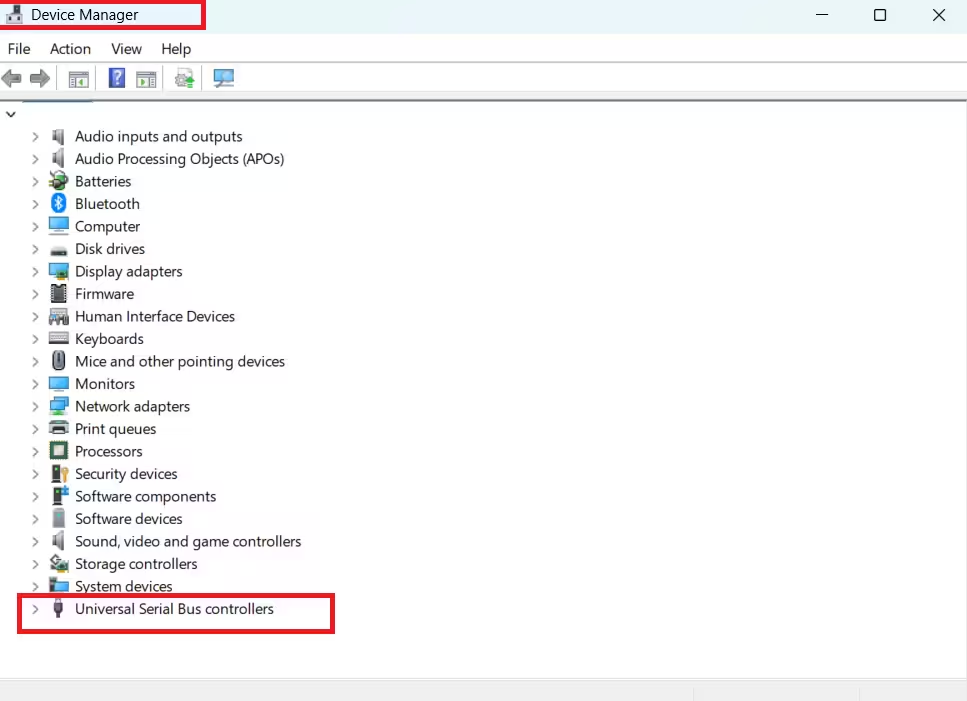
- Open Device Manager.
- Expand Universal Serial Bus controllers.
- Look for any entry with a yellow warning triangle.
- Right-click the flagged entry and select Update driver.
Then check the power settings on each USB hub:
- Right-click each USB Root Hub entry.
- Select Properties.
- Go to the Power Management tab.
- Uncheck Allow the computer to turn off this device to save power.
- Click OK and repeat for all USB Root Hub entries.
This stops Windows from cutting power to USB ports, which can interrupt keyboard detection after the PC wakes from sleep.
Step 6: Try a Different Keyboard or USB Port
Before going deeper into software fixes, confirm the hardware itself is not the problem.
- Plug the keyboard into a different USB port, preferably one on the back of the PC directly on the motherboard rather than a front panel or USB hub.
- If you have a second keyboard available, connect it and check whether Windows recognizes it.
- If the second keyboard works, the original keyboard or its cable has failed.
- If neither keyboard works on any port, the problem is with Windows or the USB controller, not the keyboard.
Step 7: Boot Into Windows Recovery Environment If You Cannot Log In
If you cannot reach the desktop and the on-screen keyboard does not help, boot into the Windows Recovery Environment to run repairs or restore your system.
- Click the power icon on the login screen.
- Hold Shift and click Restart.
- Your PC boots into the Windows Recovery Environment.
- Go to Troubleshoot > Advanced options.
From here you have two repair paths:
System Restore: If you have a restore point from before the keyboard stopped working, select System Restore and roll back to it. This reverses any driver or update change that caused the problem.
Startup Repair: Select Startup Repair to let Windows automatically detect and fix boot-related issues that may be affecting hardware recognition.
Step 8: Check BIOS for USB and Keyboard Settings
Some systems disable USB Legacy Support in BIOS, which prevents keyboards from working until Windows loads its own USB drivers. If your keyboard does not respond at the login screen even after trying every software fix, check this BIOS setting.
- Restart your PC.
- Press Delete, F2, or F10 during startup. The correct key depends on your motherboard manufacturer.
- Look for USB Legacy Support or USB Keyboard Support in the settings menu.
- Enable it if it is currently disabled.
- Save and exit.
This setting matters especially for older keyboard models and PS/2-to-USB adapters.
Step 9: Uninstall the Recent Windows Update
If the keyboard stopped working after a Windows update, removing that update may restore keyboard function. KB5083769, Microsoft’s April 2026 cumulative update, caused several hardware recognition issues on Windows 11 24H2 and 25H2 systems, including USB audio not working after KB5083769 and similar peripheral failures on affected machines.
- Open Settings.
- Go to Windows Update > Update history.
- Click Uninstall updates.
- Select the most recent update and click Uninstall.
- Restart your PC.
If the keyboard works after the uninstall, that update is the cause. Wait for Microsoft to release a corrected patch before reinstalling it.

