The Camera app in Windows 10 and Windows 11 throws error 0xA00F4245 (0x80070005) when a privacy restriction blocks app access to the webcam. A closely related variant, 0xA00F4246 (0x8007007E), appears when the camera driver is missing or corrupted. Both errors prevent the Camera app from showing a live viewfinder.
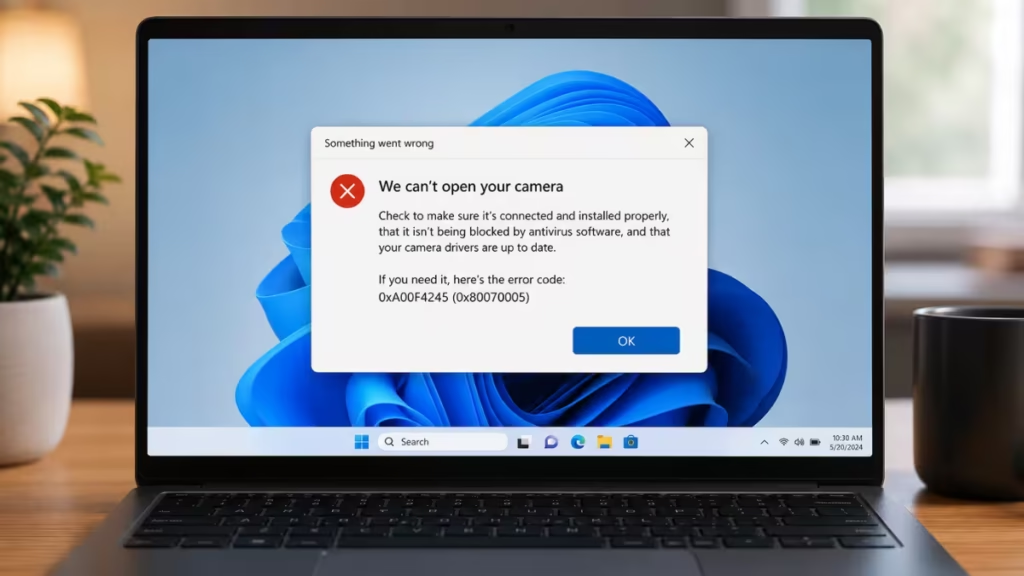
This guide covers every fix for these errors, starting with the most common cause.
Fix 1: Allow Apps to Use Your Camera
Windows can block app access to the camera through a privacy toggle. When that toggle is off, the Camera app cannot start and shows error 0xA00F4245 (0x80070005) every time you open it.
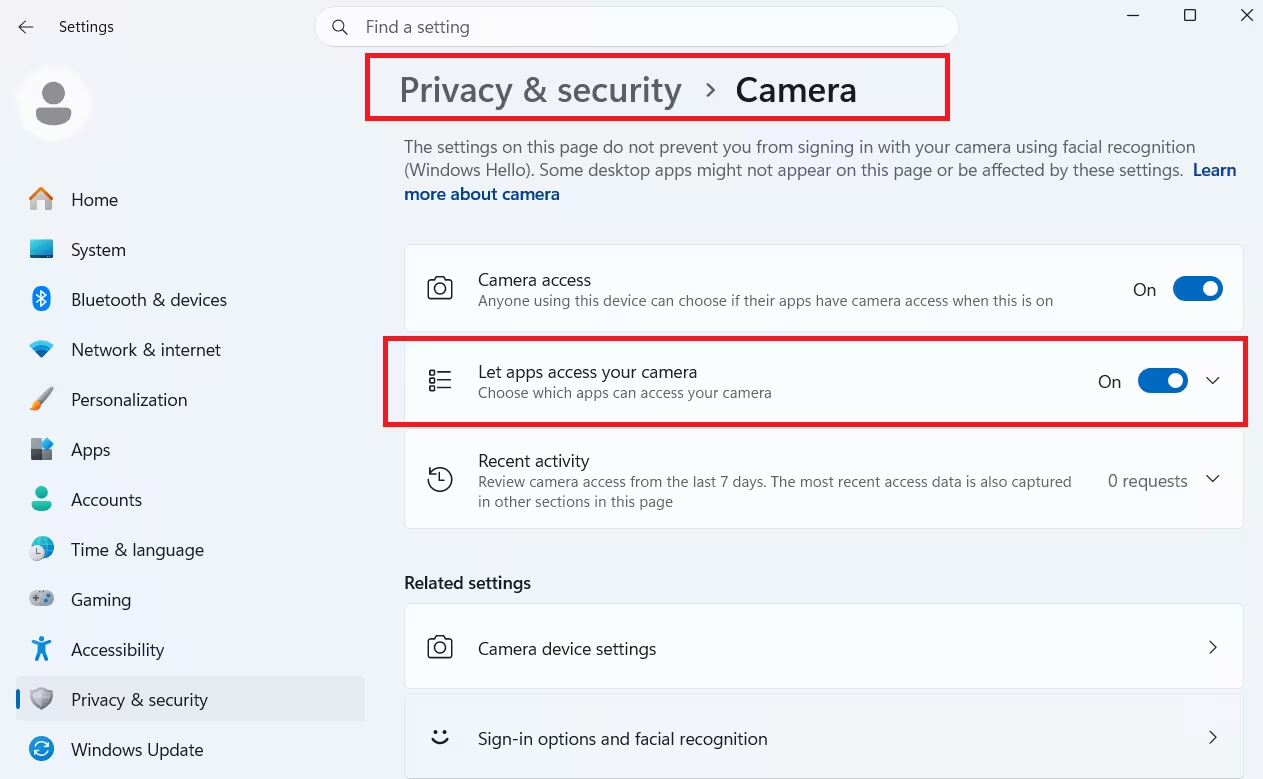
On Windows 11:
- Open Settings and go to Privacy & Security.
- Click Camera.
- Turn on Camera access.
- Make sure Let apps access your camera is also turned on.
- Scroll down and enable access for the Camera app individually.
On Windows 10:
- Open Settings and click Privacy.
- Click Camera in the left panel.
- Turn on Allow apps to use my camera.
- Scroll down and enable it for the Camera app.
Open the Camera app and check whether the error is gone. If the toggle was already on, move to the next fix.
Fix 2: Reset the Camera App
A corrupted app state causes this error even when privacy settings look correct. Resetting the Camera app clears that state without uninstalling it.
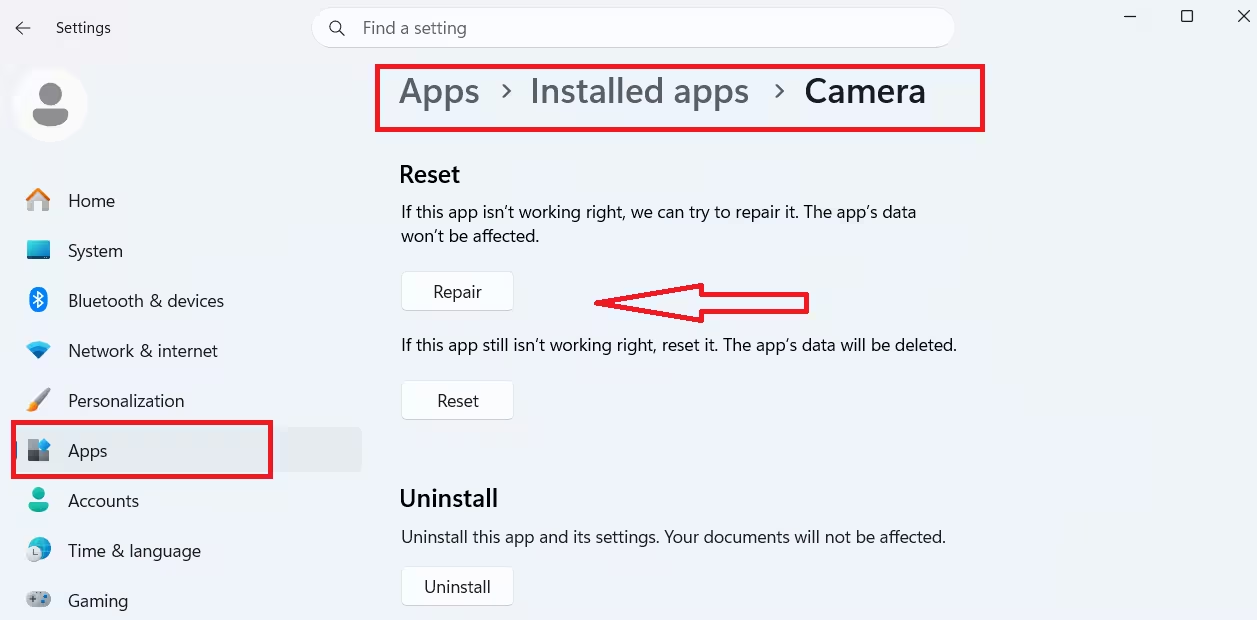
On Windows 11:
- Open Settings and go to Apps > Installed Apps.
- Find Camera in the list, click the three-dot menu, and select Advanced options.
- Click Reset and confirm.
On Windows 10:
- Open Settings and go to Apps.
- Find Camera, click it, and select Advanced options.
- Click Reset.
Reopen the Camera app after the reset. If the error persists, continue to the next fix.
Fix 3: Check the Physical Camera Switch or Function Key
Some laptops include a physical privacy shutter over the webcam lens or a function key that disables the camera at the hardware level. If either is active, no software fix will help.
- Look near the webcam for a sliding plastic shutter. If it is closed, slide it open.
- Check your keyboard for a camera icon on a function key, often F8 or F10, and press it to toggle the camera back on.
If your laptop camera is not working in Windows 11 and neither the shutter nor the function key is the cause, continue with the driver fixes below.
Fix 4: Reinstall the Camera Driver
Error 0xA00F4246 (0x8007007E) points directly to a missing, corrupted, or incompatible camera driver. This often happens after a Windows update replaces or removes the existing driver. Reinstalling it through Device Manager resolves the problem in most cases.
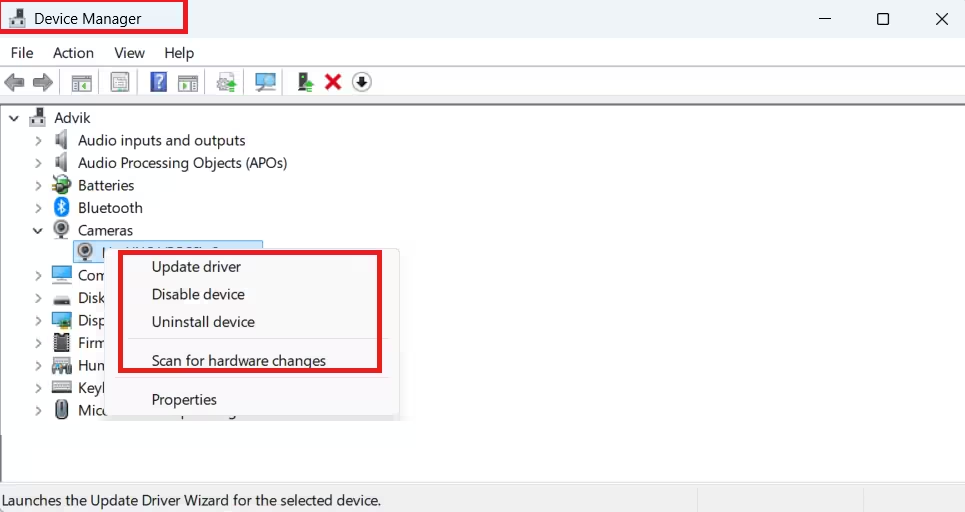
- Press Windows + X and select Device Manager.
- Expand Imaging Devices or Cameras.
- Right-click your camera and select Uninstall device.
- Check the box to delete the driver software if the option appears, then confirm.
- Restart your PC. Windows will attempt to reinstall the driver automatically on startup.
After the restart, open the Camera app and test it. If Windows does not reinstall the driver automatically, visit your laptop manufacturer’s support page, download the webcam driver for your specific model and Windows version, install it manually, and restart again.
Fix 5: Scan for Hardware Changes
If the camera does not appear in Device Manager at all, Windows may not be detecting it. A hardware scan forces Windows to look for connected or built-in devices it missed.
- Open Device Manager.
- Click the Action menu at the top.
- Select Scan for hardware changes.
Windows scans for devices and installs any missing drivers it finds. After the scan, check whether the camera appears under Imaging Devices or Cameras and open the Camera app to test.
If you use a Surface device and the camera is blocked at an administrator level, follow the steps in How to Enable Camera on Surface Pro as an Administrator (Step-by-Step).
Fix 6: Check for Windows Updates
An outdated version of Windows can leave the camera driver in a broken state, especially on newer hardware. Installing pending updates lets Windows apply any driver patches or compatibility fixes it has queued.
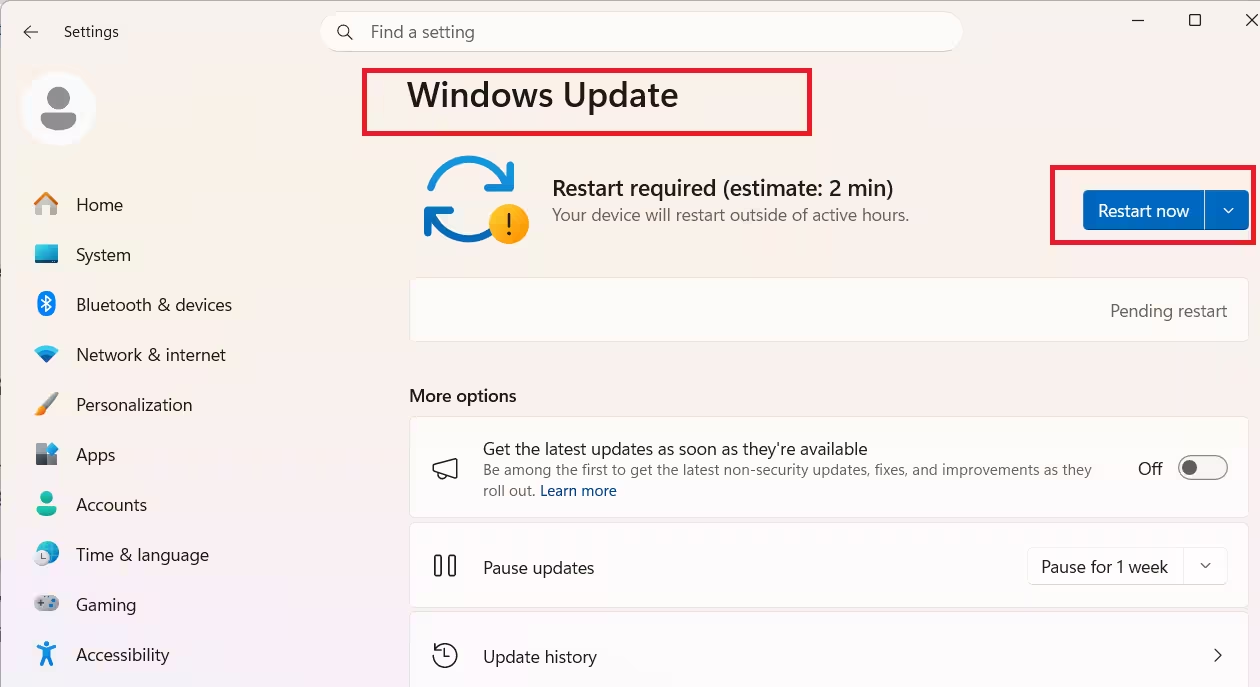
- Open Settings and go to Windows Update.
- Click Check for updates.
- Install all available updates, including optional driver updates.
- Restart your PC and open the Camera app.
Note that some updates can also introduce new camera problems. If you installed a recent cumulative update just before the error appeared, check whether that update is known to cause webcam and lock screen failures and consider uninstalling it as a test.
Fix 7: Reset Your PC (Last Resort)
If none of the fixes above resolve the error, resetting Windows restores the system to a clean state and clears deep driver or system file conflicts. This removes all installed applications but gives you the option to keep your personal files.
- Open Settings.
- Go to Update & Security > Recovery on Windows 10, or System > Recovery on Windows 11.
- Click Reset this PC or Get started under Reset this PC.
- Select Keep my files to preserve your personal data.
- Follow the on-screen steps to complete the reset.
After the reset, Windows reinstalls with clean drivers and the Camera app runs without the error.
Related Guides

