Manually hunting for driver updates through menus takes time, especially when multiple devices need attention at once. Windows 11 includes built-in command-line tools that let you update drivers faster, with more control, and in some cases without any manual downloading at all.
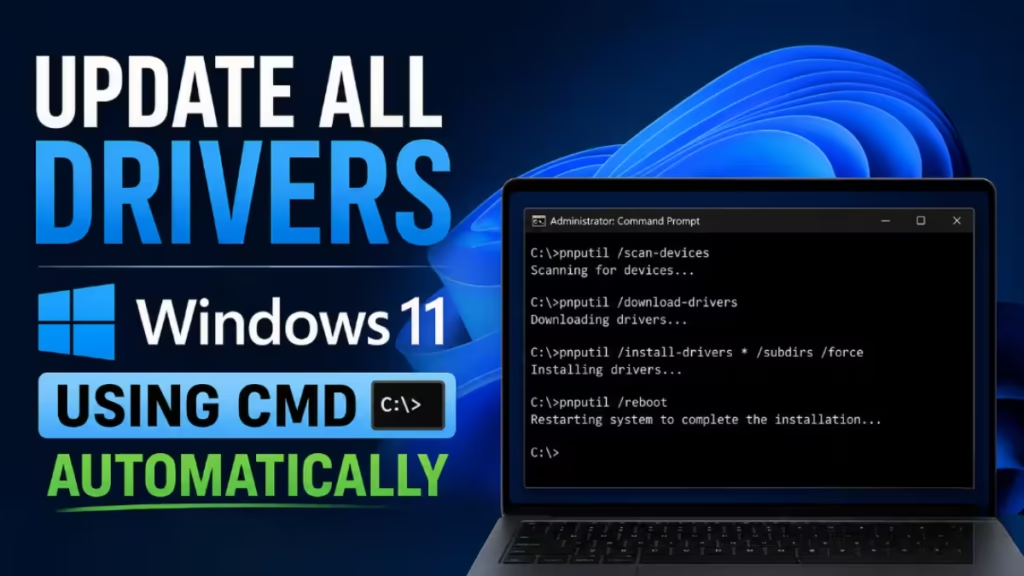
This guide covers four working methods to update drivers in Windows 11 using Command Prompt and PowerShell, from the simplest fully automatic approach to batch installs for advanced users.
Before You Start
Two quick steps before running any driver commands protect you if something goes wrong.
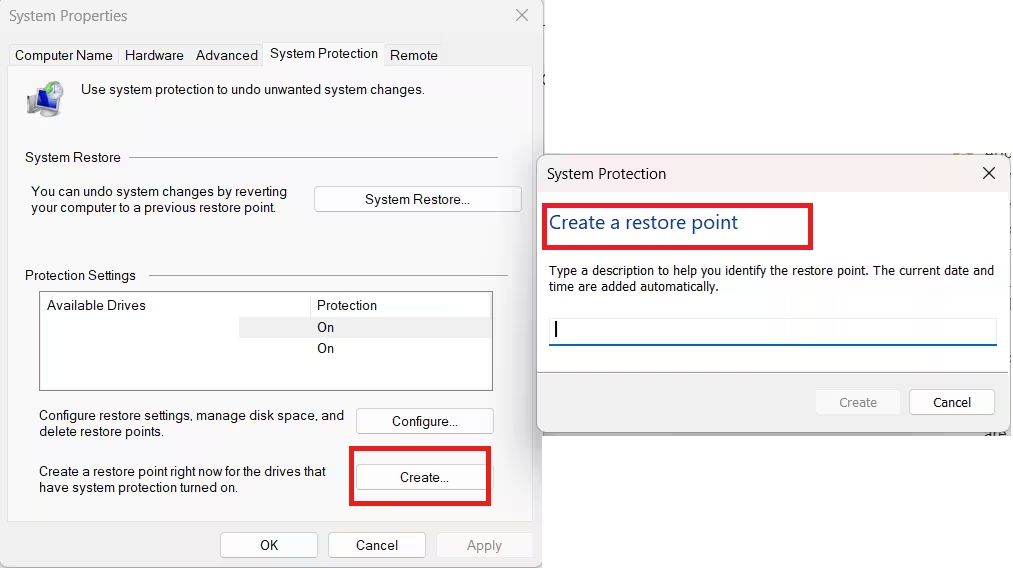
Create a System Restore Point
- Press Windows + S and search for Create a restore point.
- Open System Properties and click Create.
- Name it something like “Before Driver Update CMD” and click Create.
Open Command Prompt or PowerShell as Administrator
All methods in this guide require administrator privileges.
- Right-click the Start button.
- Select Terminal (Admin) or Windows PowerShell (Admin).
- Click Yes if User Account Control prompts you.
Keep this window open throughout the process.
Method 1: Update All Drivers Automatically Using PowerShell and PSWindowsUpdate
This is the most beginner-friendly fully automatic method. It uses the PSWindowsUpdate module to pull all available driver updates that Microsoft has approved through Windows Update, without requiring you to download anything manually.
Step 1: Install the PSWindowsUpdate Module
Run this command in PowerShell (Admin):
Install-Module -Name PSWindowsUpdate -Force -SkipPublisherCheckPress Y if PowerShell asks you to confirm installing from an untrusted repository. This module works on Windows 11 and Windows 10.
Step 2: Import the Module
Import-Module PSWindowsUpdateStep 3: Allow Script Execution (If Blocked)
If PowerShell blocks the module from running, set the execution policy first:
Set-ExecutionPolicy -ExecutionPolicy RemoteSigned -ForceStep 4: Check Available Driver Updates
Get-WindowsUpdateThis lists all pending updates, including driver packages, with their KB IDs, sizes, and descriptions.
Step 5: Install All Available Updates Automatically
Install-WindowsUpdate -AcceptAll -AutoReboot
-AcceptAllconfirms all update prompts without manual input-AutoRebootrestarts your PC automatically if a driver requires it
Step 6: Verify What Got Installed
After your PC restarts, open PowerShell (Admin) again and run:
Get-WUHistory -MaxResults 20 | Select-Object Date, KB, Title, ResultThis shows the last 20 updates installed, including any driver packages.
Limitation: PSWindowsUpdate only pulls drivers that Microsoft has tested and approved. For the absolute latest GPU or specialized hardware drivers, use Method 3 or Method 4 below.
Method 2: Update Drivers in Windows 11 Using CMD with UsoClient
If you prefer a lightweight CMD-only approach without installing any module, you can trigger Windows Update from the command line using the UsoClient tool built into Windows 11.
Start a Windows Update Scan and Install
Open Command Prompt (Admin) and run:
usoclient StartScanThen run:
usoclient StartDownloadThen run:
usoclient StartInstallRun each command one after the other and wait a moment between each one. Windows Update runs in the background and downloads and installs available driver updates.
To force an immediate interactive update session, run:
usoclient RefreshSettings && usoclient StartScanNote: UsoClient does not display progress in the CMD window. Open Settings > Windows Update to monitor the scan and download status while the commands run in the background.
Check Update History After Installation
wmic qfe list brief /format:tableThis lists all installed updates, including driver packages with their KB numbers and installation dates.
Method 3: Install Multiple Downloaded Drivers at Once Using PnPUtil
PnPUtil is a built-in Windows command-line tool that installs driver packages directly into the Windows Driver Store. Use this method when you have downloaded driver files from manufacturer websites and want to install all of them in a single command.
When to Use PnPUtil
- You need a specific driver version that Windows Update does not carry
- You want to install drivers for multiple devices in one step
- You manage multiple PCs and need consistent, repeatable driver installs
- You work offline without internet access
Step 1: Download Driver Packages
Visit the official support pages for your hardware and download the driver packages. Extract any ZIP or compressed files. Place all extracted driver folders into one location, for example:
C:\DriversUpdateCommon manufacturer support pages:
| Hardware | Manufacturer Site |
|---|---|
| NVIDIA GPU | nvidia.com/drivers |
| AMD GPU | amd.com/support |
| Intel GPU / Chipset | intel.com/support |
| Realtek Audio / Network | realtek.com/en/downloads |
| Dell Laptops | dell.com/support |
| HP Laptops | support.hp.com |
| ASUS | asus.com/support |
| Lenovo | support.lenovo.com |
Step 2: Install All Drivers With One Command
Open Command Prompt (Admin) and run:
pnputil /add-driver "C:\DriversUpdate\*.inf" /subdirs /installWhat each part does:
| Flag | Function |
|---|---|
/add-driver | Adds the driver package to the Windows Driver Store |
"C:\DriversUpdate\*.inf" | Targets all .inf files in your folder |
/subdirs | Includes all subfolders in the scan |
/install | Installs each driver on matching hardware immediately |
PnPUtil only installs a driver if it detects compatible hardware. It skips drivers that do not match any connected device, so you will not accidentally install something incompatible.
Step 3: Restart Your PC
shutdown /r /t 30 /c "Restarting to complete driver installation"This restarts your PC in 30 seconds with a custom message. Change the number to adjust the delay.
View All Currently Installed Drivers
To see a full list of drivers in the Windows Driver Store after installation:
pnputil /enum-driversMethod 4: Update Drivers on a Specific Device Using PnPUtil and Device ID
If you want to target one specific device rather than a batch, combine PnPUtil with the device’s hardware ID to install the exact driver you need.
Step 1: Find the Device Hardware ID
- Open Command Prompt (Admin) and run:
devmgmt.msc- Device Manager opens. Right-click the device you want to update and select Properties.
- Click the Details tab.
- In the Property dropdown, select Hardware Ids.
- Copy the top value in the list.
Alternatively, list all connected devices and their IDs from CMD:
pnputil /enum-devices /connectedStep 2: Update the Specific Device Driver
Once you have the hardware ID, run:
pnputil /add-driver "C:\DriversUpdate\yourdriver.inf" /installReplace yourdriver.inf with the actual filename of the driver package for that device.
Method 5: Add Drivers to an Offline Windows Image Using DISM
DISM (Deployment Image Servicing and Management) handles drivers at the image level. IT administrators and advanced users use it to inject drivers into a Windows installation image before deploying it to multiple machines.
When DISM Applies
- You prepare Windows 11 deployment images for multiple PCs
- You work in a recovery environment and need to add drivers offline
- You inject drivers into a Windows image before first boot on new hardware
Mount a Windows Image and Add Drivers
If your Windows image is at C:\WinImage\install.wim and your drivers are in C:\Drivers, run:
dism /Mount-Image /ImageFile:"C:\WinImage\install.wim" /Index:1 /MountDir:"C:\Mount"Then add all drivers recursively:
dism /Image:"C:\Mount" /Add-Driver /Driver:"C:\Drivers" /RecurseVerify the drivers were added:
dism /Image:"C:\Mount" /Get-DriversCommit the changes and unmount the image:
dism /Unmount-Image /MountDir:"C:\Mount" /CommitCommon DISM Errors and Fixes
| Error | Cause | Fix |
|---|---|---|
| Error 87 | Wrong command syntax | Double-check all flags and paths |
| Error 2 | File or folder not found | Verify your driver and image paths exist |
| Access Denied | Not running as Administrator | Reopen CMD with admin rights |
| Error 14098 | Component store corrupted | Run sfc /scannow first, then retry |
Note: For a live running Windows 11 system, use PnPUtil (Method 3) instead of DISM. DISM driver management targets deployment and pre-boot scenarios.
Verify All Installed Drivers After Updating
After running any of the methods above, confirm your driver updates took effect.
List all drivers on your system:
driverquery /v /fo tableExport the full driver list to a text file for review:
driverquery /v > C:\driver-report.txtOpen the file in Notepad to review every installed driver, its version, and its status.
Check a specific device driver version:
Get-WmiObject Win32_PnPSignedDriver | Select-Object DeviceName, DriverVersion, DriverDate | Sort-Object DeviceNameTroubleshooting Common CMD Driver Update Errors
PSWindowsUpdate module fails to install Run PowerShell as Administrator and check your execution policy:
Get-ExecutionPolicyIf it returns Restricted, run:
Set-ExecutionPolicy RemoteSigned -ForceThen retry the module installation.
PnPUtil says “No driver packages found” Your driver folder path is either incorrect or the .inf files sit inside nested subfolders. Make sure you include /subdirs in the command and verify the folder path contains the extracted driver files, not just the original downloaded installer.
UsoClient runs but no updates appear UsoClient triggers a background scan. Give it 5 to 10 minutes, then check Settings > Windows Update to see if drivers appear in the pending updates list.
DISM returns Error 2 or Error 87 Verify your folder paths contain no typos and that the image file actually exists at the path you specified. Run the command again with corrected paths.
Frequently Asked Questions
Does PowerShell install the latest GPU drivers automatically?
No. PSWindowsUpdate installs Microsoft-approved driver versions from Windows Update. For the absolute latest NVIDIA or AMD GPU drivers, download them from the manufacturer’s site and install with PnPUtil or the installer directly.
Is PnPUtil safe to use?
Yes. PnPUtil is a Microsoft-built tool included in every Windows installation. It only installs drivers on hardware it detects as compatible and adds them to the protected Windows Driver Store.
Can I use these commands on Windows 10?
Yes. All methods in this guide work on Windows 10 as well as Windows 11.
Do I need to restart after every driver update?
Not always, but a restart is recommended after updating any core driver such as graphics, audio, or chipset to ensure the changes apply fully.
What is the difference between PnPUtil and Windows Update for drivers?
Windows Update delivers Microsoft-tested drivers automatically. PnPUtil installs drivers you download manually from manufacturers. PnPUtil gives you control over the exact version you install, while Windows Update prioritizes stability over recency.
Related Guides
- How to Use DDU to Remove GPU Drivers Completely on Windows 10 and 11
- How to Download and Install AMD Chipset Drivers on Windows 11 (Version 8.05.04.516)
- Windows 11 Will Now Automatically Roll Back Bad Drivers Before You Notice a Problem
- How to Fix Windows 11 No Device Drivers Were Found Error During Installation

