When the Minecraft launcher won’t connect to services, two error messages appear back to back. The top-right corner shows “We’re unable to verify what products you own. Please check your internet connection.” The bottom banner adds “Oh no! Something went wrong, and we couldn’t connect to the Minecraft services. Please connect to the internet to refresh your offline access. Try again.”
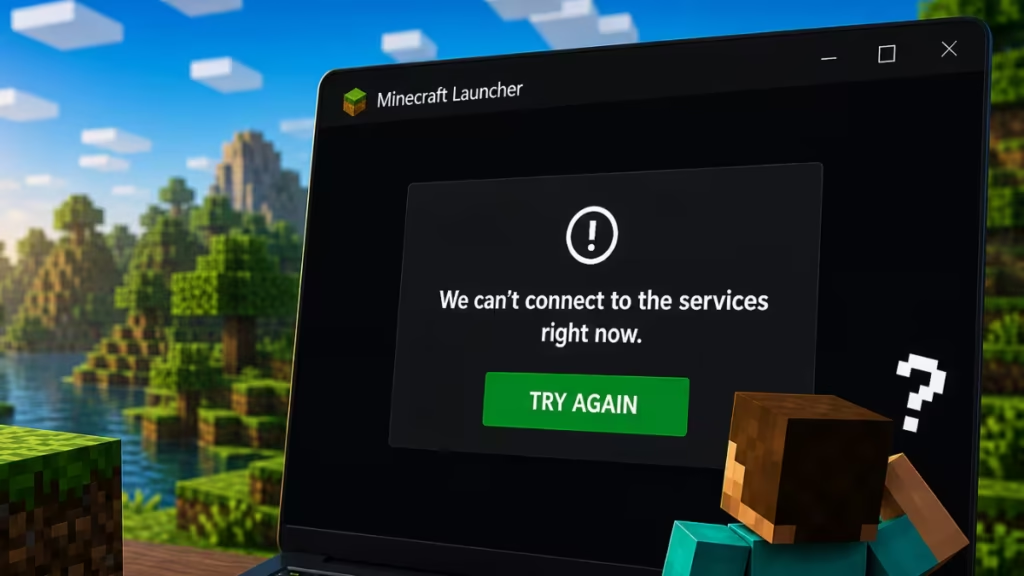
The frustrating part is that your internet works fine everywhere else. The error hits intermittently too, so the launcher connects maybe once every ten tries and fails the rest. When it gets bad enough, the launcher stops letting you play offline entirely.
Both messages point to the same root cause: the launcher cannot complete a handshake with Microsoft’s authentication servers. Stale Windows credentials, DNS failures, firewall blocks, and a broken Gaming Services package are the most common culprits. Work through each fix below in order until the launcher connects cleanly.
Fix 1: Clear Stale Credentials from Credential Manager
Windows stores authentication tokens for Xbox Live and Mojang in Credential Manager. When these tokens expire or become corrupted, the launcher cannot verify your account even though your password is correct.
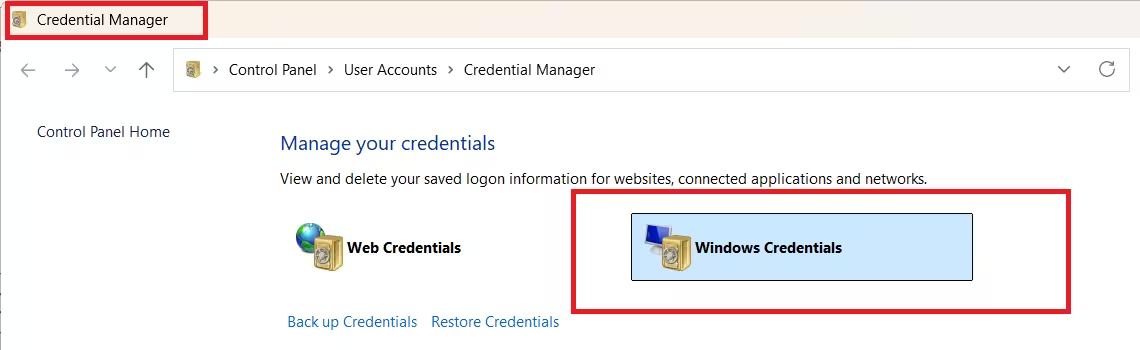
- Press Win + S, type Credential Manager, and press Enter.
- Click Windows Credentials.
- Expand every entry that matches one of these patterns:
- Your Microsoft account email address
- Entries starting with or containing Xbl
- Entries containing Mojang
- Click Remove on each matching entry and confirm the deletion.
- Restart your PC.
- Open the Minecraft Launcher and sign in again.
This fix resolves the problem for most players. If the launcher still fails after a restart, move to the next fix.
Fix 2: Sign Out and Back In Through the Xbox App
The Xbox app manages your Microsoft account session, and the Minecraft Launcher pulls tokens directly from it. If the Xbox app holds an expired session, clearing Credential Manager alone sometimes is not enough.
- Open the Xbox app.
- Click your profile picture in the bottom-left corner.
- Select Sign out.
- Wait 30 seconds, then sign back in with your Microsoft account.
- Restart the Minecraft Launcher.
If Minecraft Bedrock Edition refuses to launch entirely after this step, that guide covers additional Xbox service fixes you can run alongside these steps.
Fix 3: Repair or Reinstall Gaming Services
The Gaming Services package handles the connection between the Microsoft Store, Xbox app, and Minecraft Launcher. A corrupted Gaming Services installation triggers the “couldn’t connect to the Minecraft services” error consistently.
- Press Win + X and select Windows PowerShell (Admin) or Terminal (Admin).
- Run this command to remove the broken package:
Get-AppxPackage *GamingServices* | Remove-AppxPackage -AllUsers- Run this command to open the reinstall page:
start ms-windows-store://pdp/?productid=9MWPM2CQNLHN- Install Gaming Services from the Store page that opens.
- Restart your PC and relaunch Minecraft.
The same corrupted package causes Minecraft Error 0x89235107 (GamingServicesTcui.exe crash) and the Minecraft Launcher crash on the Xbox app with error 0xc0000005, so repairing it often fixes multiple issues at once.
Fix 4: Flush Your DNS Cache
A stale or corrupted DNS cache stops Windows from resolving Microsoft’s authentication servers. This makes the launcher report a connection failure even though your browser and other apps work fine.
- Press Win + S, type cmd, right-click Command Prompt, and select Run as administrator.
- Run each command in order:
ipconfig /flushdns
   ipconfig /registerdns
   ipconfig /release
   ipconfig /renew
netsh winsock reset- Restart your PC after the final command completes.
Fix 5: Switch to a Public DNS Server
If you set custom DNS addresses on your PC, they may not resolve Microsoft’s servers reliably. Switching to a public DNS service often clears intermittent connection failures.
- Open Settings and go to Network and Internet.
- Click Change adapter options (Windows 10) or select your active connection (Windows 11).
- Right-click your active connection and choose Properties.
- Select Internet Protocol Version 4 (TCP/IPv4) and click Properties.
- Choose Use the following DNS server addresses.
- Enter one of these pairs:
- Google: Preferred 8.8.8.8, Alternate 8.8.4.4
- Cloudflare: Preferred 1.1.1.1, Alternate 1.0.0.1
- Click OK and restart your PC.
Fix 6: Allow Minecraft Through Your Firewall
Windows Firewall or a third-party antivirus can silently block the launcher’s outbound connections. The launcher needs access to these ports to reach Minecraft services:
| Protocol | Ports |
|---|---|
| TCP | 80, 443, 3748 |
| UDP | 19132, 19133 |
To add a firewall exception manually:
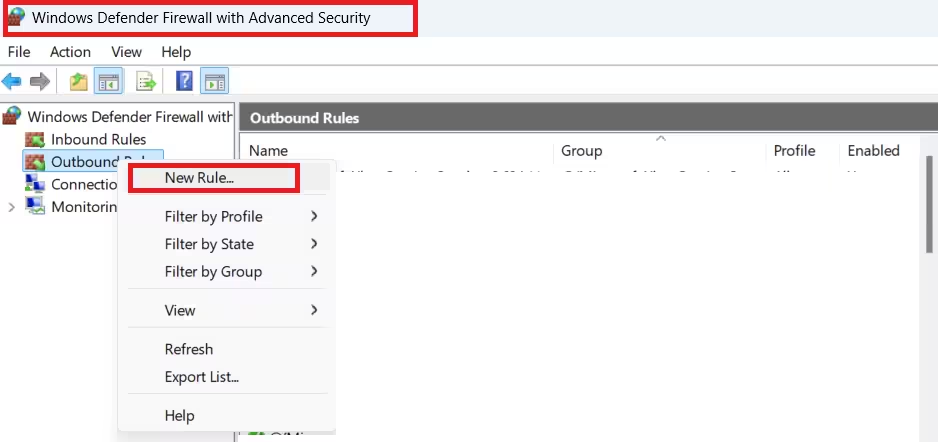
- Search for Windows Defender Firewall with Advanced Security and open it.
- Click Outbound Rules, then New Rule.
- Select Port and click Next.
- Choose TCP, enter 80, 443, 3748, and click Next.
- Select Allow the connection and complete the wizard with a recognizable name like “Minecraft TCP.”
- Repeat the process for UDP with ports 19132, 19133.
If you use a third-party antivirus like Norton, Bitdefender, or Kaspersky, open its settings and add the Minecraft Launcher executable as a trusted or excluded application.
Fix 7: Disable Your VPN or Proxy
A VPN routes your traffic through a different server, which can confuse Microsoft’s authentication checks and trigger the services error. Disable your VPN before opening the Minecraft Launcher, then re-enable it after the game fully loads.
If your router uses a custom NAT configuration for port forwarding, set it back to moderate or open NAT so the launcher can communicate freely with Microsoft’s servers.
Fix 8: Reset the Network Stack
If none of the fixes above work, a full network stack reset clears deeper problems that DNS flushes and adapter resets miss.
- Open Command Prompt as administrator.
- Run these commands one at a time:
netsh int ip reset
   netsh winsock reset catalog
ipconfig /flushdns- Restart your PC.
After the restart, open the Minecraft Launcher before any other apps so it gets a clean network session from the start.
Fix 9: Switch to a Personal Network
School, university, and workplace networks often block the ports Minecraft needs. These restrictions sit at the network level and you cannot bypass them without admin access to the router.
Switch to a personal mobile hotspot or home network to test. If the launcher connects on your phone’s hotspot, the school or office network is the problem, not your PC.
If you use a third-party launcher and still see account errors after trying every fix, check the Feather Launcher failed to get Minecraft profile fix for launcher-specific login problems. Players who lost access to their Microsoft account entirely should read the Minecraft account transfer from a stolen Microsoft account guide for recovery options.
If you play on Realms and still see connection problems after the launcher is working, the Minecraft Realms connection errors guide covers server-side fixes. Before troubleshooting locally, check whether Minecraft Realms is down today to rule out a Mojang outage.

