Frequent blue screens, random freezes, and sluggish performance often point to a RAM problem. Testing your RAM confirms whether faulty memory is causing these issues before you spend time troubleshooting elsewhere.
Windows 11 supports several free tools to test RAM health. Some run inside Windows, while others boot from a USB drive for a deeper scan.
Signs Your RAM May Be Faulty
Check your RAM if you notice any of these symptoms on your Windows 11 PC:
- Random Blue Screen of Death (BSOD) errors
- Apps crashing without warning
- System freezes or unexpected restarts
- Severe slowdowns during normal tasks
- File errors or data corruption
1. Windows Memory Diagnostic (Built-in Tool)
Windows Memory Diagnostic is a built-in tool that requires no download. It runs RAM tests in the boot environment, so you do not need to install anything extra.
How to run it:
- Press Win + S and search for Windows Memory Diagnostic.
- Click the top result to open the tool.
- Click Restart now and check for problems (recommended).
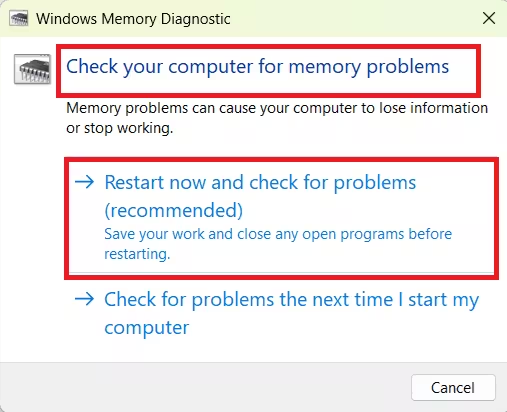
- Your PC restarts and the scan starts automatically.
The tool runs in Standard mode by default. This mode includes the LRAND, Stride6, CHCKR3, WMATS+, and WINVC tests in addition to all Basic mode tests.
Optional: Change the scan mode
Press F1 during the scan to open settings. You can switch between three modes:
- Basic – Runs MATS+, INVC, and SCHCKR (cache enabled) tests.
- Standard – Runs all Basic tests plus additional checks. This is the default.
- Extended – Runs everything in Standard mode plus Stride38, WSCHCKR, CHCKR4, CHCKR8, and more for the most thorough scan.
Press TAB to toggle cache settings. Disabling the cache forces the tool to read data directly from RAM, which produces a more complete test. Press F10 to save your settings and return to the scan.
How to Check Memory Diagnostic Results
The tool does not display results on screen after restarting. You need to check Event Viewer manually.
- Press Win + S and search for Event Viewer. Open it.
- Expand Windows Logs in the left panel.
- Right-click System and select Find.
- Type MemoryDiagnostics-Results and click Find Next.
- Click Cancel, then double-click the MemoryDiagnostics-Results entry on the right.
- Read the result in the description field.
If the result reads “detected no errors,” your RAM is healthy. If errors appear, run the Extended scan and check again. Persistent errors indicate a faulty memory module. If you cannot determine which module is faulty, remove and test each stick individually.
2. MemTest
MemTest is a lightweight portable tool that tests only the free (unused) RAM on your system. Because it runs inside Windows, you do not need a bootable USB drive.
How to use it:
- Download MemTest from HCI Design.
- Extract the ZIP file and double-click the
.exeto launch it. - Close all other running applications before you start.
- Click Start Testing and let it run.
The tool detects your available free RAM automatically and begins the test. It stops on its own if it finds errors. If no errors appear, you must stop it manually.
How long should you run MemTest?
| Coverage | What It Catches |
|---|---|
| 100% | Basic errors |
| 400% | Intermittent errors reliably |
| Overnight | Most thorough results |
Running it to 400% gives you confidence that intermittent faults will not go undetected. Leaving it overnight works best if you want a full sweep without monitoring it.
3. MemTest64
MemTest64 is a free portable tool from TechPowerUp. It offers more configuration options than MemTest while still running inside Windows without a reboot.
How to use it:
- Download MemTest64 from TechPowerUp.
- Run the executable file directly. No installation needed.
- Configure your settings before starting.
Key settings to know:
- Tested Mode – Set to Maximum by default, which uses all available free RAM. You can select a custom amount from the dropdown.
- Parallel CPU – Displays the number of logical processors on your system. A higher value speeds up the test.
- Stop on Error – Enable this checkbox to stop the test automatically when the tool detects a fault.
- Run Indefinitely – The default mode. Disable this if you want the tool to stop after a set number of loops or hours.
Click Begin Test to start.
4. MemTest86
MemTest86 is the most thorough option on this list. It tests all of your RAM, including the portions Windows actively uses, because it runs entirely in the boot environment. Many professionals consider it the gold standard for RAM testing.
What you need: A USB flash drive (all data on it will be erased).
Step 1: Create the Bootable USB Drive
- Download MemTest86 from PassMark.
- Extract the ZIP file.
- Connect your USB flash drive to your PC.
- Back up all data on the USB drive before proceeding.
- Run the
.exefile inside the extracted folder. - Select your USB drive and click Write.
Step 2: Boot from the USB Drive
- Enter BIOS by pressing the correct key during startup. Check your motherboard manual if you are unsure which key to use.
- Set the USB flash drive as the first boot device.
- Save your changes and exit BIOS.
- Your PC boots into MemTest86 automatically.
Step 3: Run the Test
MemTest86 runs 4 passes by default. You can adjust this before starting. The test duration depends on your total RAM size and CPU core count. When the test finishes, it displays a clear PASS or FAIL result. Exit MemTest86 and boot back into Windows afterward.
5. MemTest86+
MemTest86+ works similarly to MemTest86. It runs in the boot environment and requires a bootable USB drive. You can download it from the MemTest86+ website.
Follow the same steps as MemTest86 to create the USB drive, set your boot order, and run the test. MemTest86+ is a good alternative if you prefer an open-source option.
How to Check Your RAM Speed on Windows 11
After confirming your RAM is healthy, you may want to verify its speed. Here are four quick ways to do it.
Method 1: Task Manager
- Right-click the taskbar and select Task Manager, or press Ctrl + Shift + Esc.
- Go to the Performance tab.
- Click Memory in the left panel.
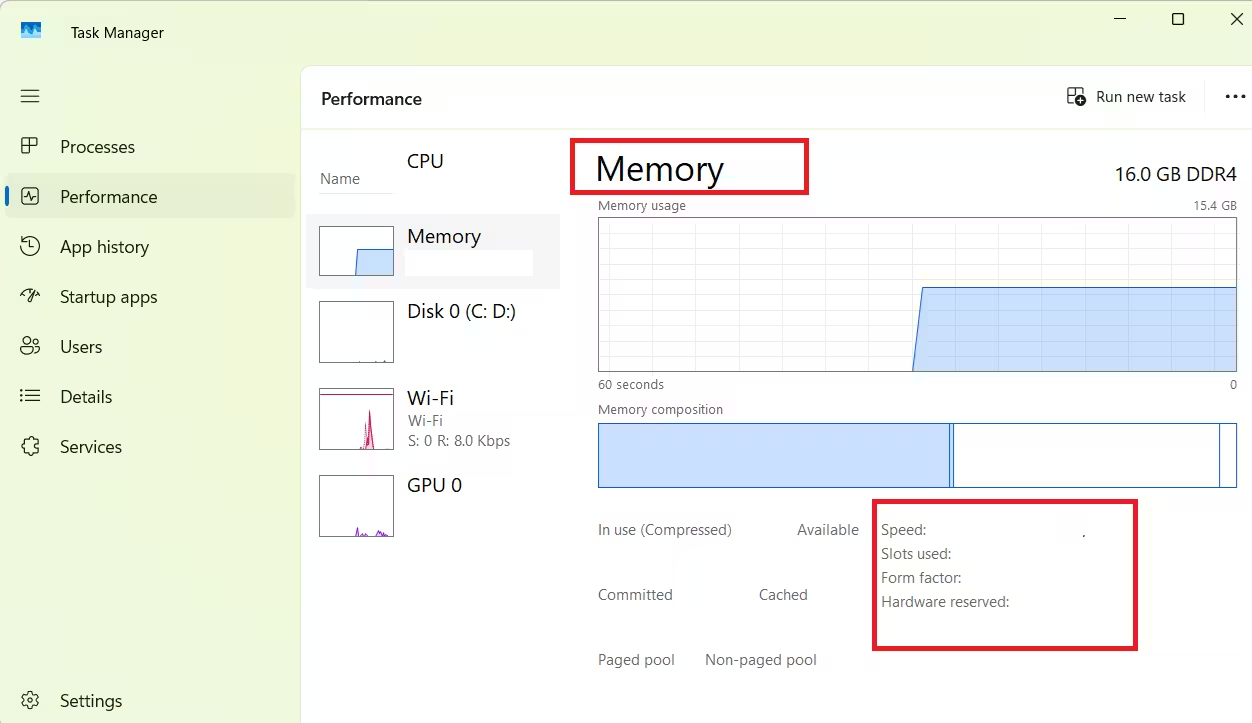
- Find the speed listed under the memory stats on the right side.
Method 2: Command Prompt
- Press Win + R, type
cmd, and press Enter. - Run this command:
bash
systeminfo | findstr /C:"Total Physical Memory"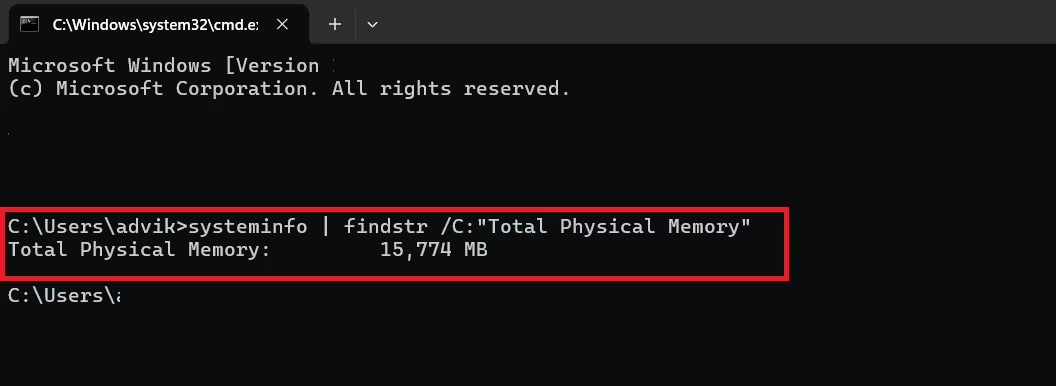
This shows your total installed RAM. To get the RAM speed, use Method 3 (PowerShell) instead, as the older wmic command no longer works on Windows 11 22H2 and later.
Method 3: PowerShell
- Open the Start menu, type PowerShell, right-click it, and select Run as administrator.
- Run this command:
powershell
Get-CimInstance -ClassName Win32_PhysicalMemory | Format-Table Devicelocator, Manufacturer, Speed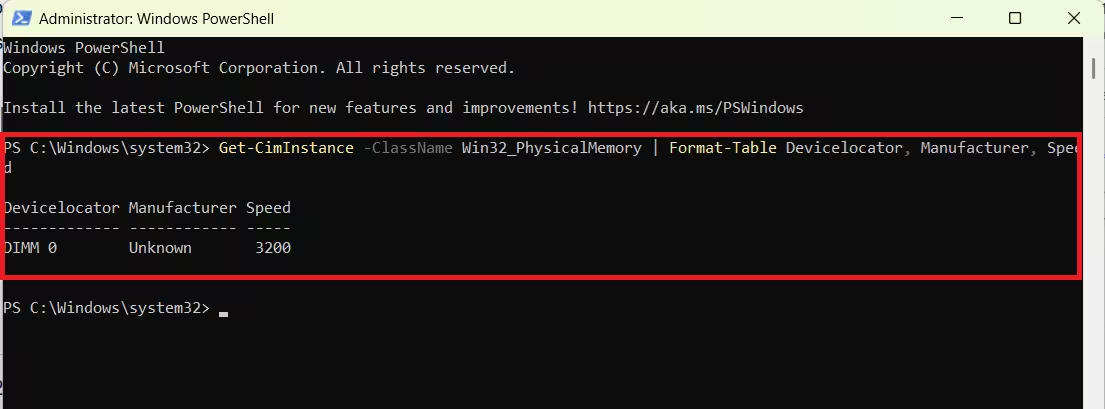
The table displays your RAM speed and additional module details.
Method 4: System Information
- Open the Start menu and search for System Information.
- Open the app and check the right panel for detailed RAM specs including installed capacity and speed.
How to Test RAM in Windows 11: Choosing the Right Tool
| Tool | Runs In | Best For |
|---|---|---|
| Windows Memory Diagnostic | Boot | Quick built-in check |
| MemTest | Windows | Fast scan without rebooting |
| MemTest64 | Windows | Configurable in-Windows test |
| MemTest86 | Boot | Deepest, most reliable scan |
| MemTest86+ | Boot | Open-source boot environment test |
Start with Windows Memory Diagnostic for a quick check. If errors persist or you want certainty, run MemTest86 from a USB drive for the most accurate result.

