If your iPhone keeps throwing “Storage Almost Full” warnings but your photos and apps look normal, System Data is almost certainly the culprit. This hidden storage category can quietly balloon to 50 GB, 80 GB, or even over 100 GB on high-capacity models, and Apple gives you no single button to clear it.
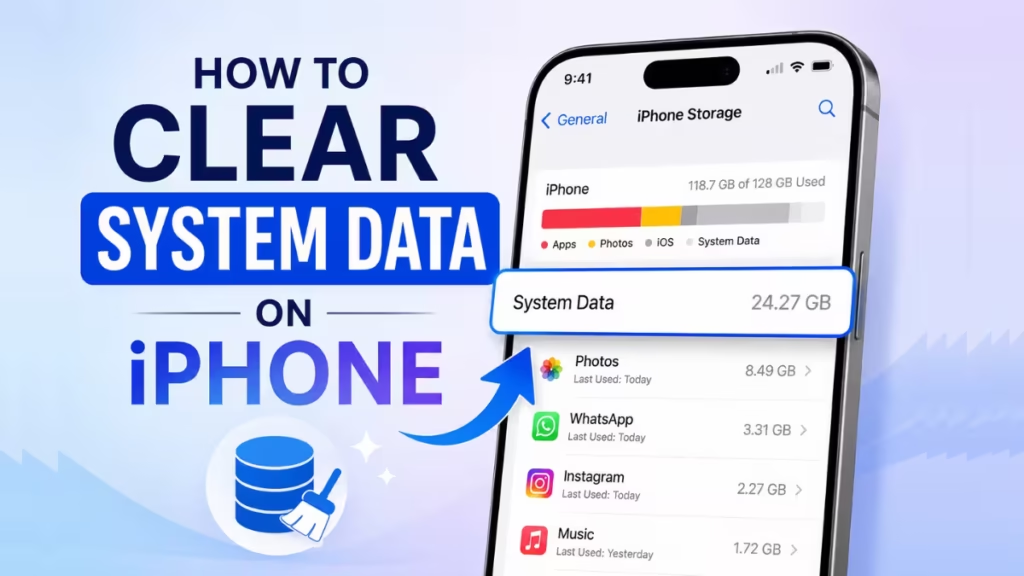
This guide explains exactly what System Data is, how to check its size, and every practical method to bring it back down without losing your photos, contacts, or app progress.
What Is System Data on iPhone?
System Data is a catch-all storage category that iOS uses for files that do not belong to a specific app, photo library, or media collection. If you used an iPhone before iOS 15, you may recognize it as the “Other” storage bar in iTunes or Finder.
According to Apple, this section “includes caches, logs, and other resources currently in use by the system.” In practical terms, it holds:
- App caches:Temporary data that apps like Instagram, Spotify, YouTube, and WhatsApp store to speed up loading times
- Browser caches: Saved website images, scripts, login tokens, and autofill data from Safari, Chrome, or Firefox
- Streaming media caches: Buffered audio and video that iOS retains for smoother playback
- System files: Downloaded Siri voices, fonts, and other iOS-level assets that do not belong to a single app
- Temporary files: Leftover installation files from iOS updates, system logs, and error reports
- Message data: Cached photos, videos, GIFs, and stickers from iMessage threads
The frustrating part is that Apple does not let you open a System Data folder and delete items directly. You have to reduce it indirectly, by clearing specific categories of data through settings and app management.
How to Check System Data Storage on iPhone
Before you start cleaning, check how much space System Data actually occupies so you know whether the situation needs urgent action.
Steps to check System Data on iPhone:
- Open the Settings app.
- Tap General.
- Tap iPhone Storage.
- Look at the color-coded storage bar at the top of the screen.
- Scroll to the very bottom of the app list to find System Data.
Note: The iPhone does not display the exact gigabyte size for each color segment in the bar. You only see the number when you scroll down to the System Data entry. Wait a few seconds after opening iPhone Storage because iOS takes a moment to calculate the exact size.
You can also check System Data from a Mac or PC:
- Connect your iPhone with a USB cable.
- Open Finder (Mac) or the Apple Devices app/iTunes (PC).
- Select your device from the sidebar.
- Look at the storage bar at the bottom of the General tab.
How Much System Data Is Normal?
| System Data Size | Status |
|---|---|
| Under 20 GB | Normal |
| 20 GB to 50 GB | Elevated — monitor it |
| 50 GB to 100 GB | High — take action |
| Over 100 GB | Abnormal — full reset likely needed |
A temporary spike after a major iOS update is common because the installer keeps old system files until it confirms the update ran cleanly. If the size drops on its own within a day or two, no action is needed. If it stays high, work through the methods below.
Why Does iPhone System Data Get So Large?
iOS is designed to automatically purge old cache files when storage runs low. This background maintenance runs when your phone charges overnight. However, this automatic cleanup sometimes fails to trigger, particularly when storage reaches a critically low level, which creates a catch-22: the phone cannot clean up because it is too full to run cleanup scripts.
The main contributors to oversized System Data are:
- Social media and streaming apps: Instagram, TikTok, Spotify, and YouTube preload content aggressively. As you scroll, the app caches frames, thumbnails, and audio segments. These files can accumulate to several gigabytes per app.
- iMessage threads with large attachments: Every video, high-resolution photo, and GIF you receive in group chats gets stored locally, and it stays there indefinitely by default.
- iCloud local copies: When iCloud is active, files you upload to iCloud Drive also stay on your device for fast offline access. This doubles the storage footprint of those files.
- Browser history and website data: Safari and third-party browsers cache images, scripts, and login sessions. Heavy daily browsing builds up gigabytes of website data over months.
- Failed or interrupted iOS updates: An update that stalls partway through can leave gigabytes of installer files stuck in System Data with no automatic cleanup path.
How to Clear System Data on iPhone
Work through these methods in order. Start with the quick fixes and move to the more involved steps only if System Data remains high after the earlier ones.
Method 1: Delete Message History
iMessage stores every text, photo, video, and GIF you ever send or receive. By default, iOS keeps all of it forever. Changing this setting to auto-delete old messages is one of the fastest ways to reduce System Data, especially if you have years of group chat threads.
Enable automatic message deletion:
- Open Settings and tap Messages.
- Scroll down and tap Keep Messages.
- Select 30 Days or 1 Year.
- iOS will ask you to confirm deleting older messages. Tap Delete.
Delete large message attachments manually:
- Open Settings and tap General.
- Tap iPhone Storage, then tap Messages.
- Browse the Documents section, which breaks down your message storage by Top Conversations, Photos, and Videos.
- Tap any category to review its contents.
- Swipe left on items you want to delete, or tap the red minus icon (iOS 15 and later), then confirm deletion.
Method 2: Clear Safari Cache and Website Data
Safari accumulates browsing history, login cookies, cached images, and website scripts over time. Clearing this data regularly can reclaim 2 GB to 5 GB or more on an iPhone used daily for web browsing.
Clear Safari cache on iPhone:
- Open Settings and tap Safari.
- Tap Advanced, then tap Website Data.
- Tap Remove All Website Data and then tap Remove Now to confirm.
Alternatively, you can go to Settings > Safari > Clear History and Website Data for a faster single-tap option. Note that this also removes your browsing history and logs you out of websites.
Tip: If you also use Google Chrome on your iPhone, open the Chrome app, tap the three-dot menu at the bottom, go to History, tap Clear Browsing Data, select All Time as the range, and tap Clear Browsing Data again.
If Firefox, Edge, or another browser is installed on your device, repeat the same process inside each one. Every browser maintains its own separate cache.
Method 3: Clear App Caches and Offload Unused Apps
iOS does not offer a universal one-tap button to clear cache for third-party apps. The most reliable approach is to delete the app entirely and reinstall it from the App Store. The reinstalled app starts with zero cached data.
Identify cache-heavy apps:
- Open Settings, tap General, then tap iPhone Storage.
- Tap any app from the list.
- Compare the App Size figure against the Documents & Data figure.
- If Documents & Data is significantly larger than the App Size, the app has a large cache that is contributing to System Data.
Apps like Instagram, TikTok, Discord, Spotify, and YouTube are frequent offenders. Users on Apple support forums regularly report dropping System Data by 10 GB to 15 GB by deleting and reinstalling just their top three most-used social and streaming apps.
Some apps offer a built-in clear cache option in their own settings menus. TikTok and Telegram, for example, include this feature. Check the settings inside each heavy-use app before deleting it.
Offload unused apps instead of deleting them:
Offloading removes the app’s core installation files but keeps your documents, save data, and settings intact. The app icon stays on your Home Screen with a small cloud symbol. When you tap it, iOS reinstalls only the app without touching your data.
- Open Settings, tap General, then tap iPhone Storage.
- Tap any app you use infrequently.
- Tap Offload App and confirm.
You can also enable automatic offloading so iOS handles it on its own:
- Open Settings, then tap App Store.
- Turn on Offload Unused Apps.
Method 4: Delete iCloud Local Backups
iCloud syncs your files across devices and stores backups automatically. By default, everything saved to iCloud is also kept locally on your iPhone for fast offline access. If you have large backups or multiple device backups stored, removing them can recover significant space.
Delete iCloud device backups:
- Open Settings and tap your name at the top.
- Tap iCloud, then tap Manage Account Storage.
- Tap Backups.
- Select the device whose backup you want to delete.
- Tap Delete Backup, then tap Turn Off and Delete to confirm.
Important: Deleting a backup also disables automatic iCloud backup for that device. You can turn it back on in Settings > [Your Name] > iCloud > iCloud Backup at any time.
If you use iCloud Drive for documents, photos, or desktop files synced from a Mac, consider reviewing the iCloud Drive section in Manage Account Storage and removing files you no longer need.
Method 5: Remove Location Data, Background Refresh, and Siri Voice Downloads
Several less obvious sources add to System Data over time.
Disable background app refresh:
Background refresh lets apps update their content while running in the background, which generates temporary files and logs.
- Open Settings, tap General, then tap Background App Refresh.
- Turn off Background App Refresh entirely, or disable it for specific apps you do not need to update constantly.
Remove unused Siri voices:
Downloaded Siri voices can each take several hundred megabytes of space in System Data.
- Open Settings, tap Siri, then tap Siri Voice.
- Review the downloaded voice options and delete any you do not use.
Restrict location services:
Constant location tracking generates system logs in the background.
- Open Settings, tap Privacy and Security, then tap Location Services.
- Change apps from Always to While Using the App wherever possible, or disable location access for apps that do not need it.
Method 6: Try the Date Trick to Force a Cache Purge
A workaround circulating on Reddit and Apple Support forums attempts to trick iOS into treating cached files as outdated, which can trigger an automatic background purge. The results vary significantly between devices and iOS versions. Some users report immediate drops of 30 GB to 60 GB. Others see the System Data bounce back to its original size within 30 minutes.
Caution: Changing the system date can temporarily disrupt two-factor authentication apps, calendar alerts, and secure website certificates. Do not perform this trick if you need to log into banking apps, use 2FA codes, or take time-sensitive actions before you can complete and reverse the process.
The date trick steps:
- Go to Settings > Messages > Keep Messages and set it to Forever before starting. This prevents the date change from triggering mass iMessage deletion.
- Turn on Airplane Mode and disable Wi-Fi and Bluetooth manually.
- Go to Settings > General > Date and Time and turn off Set Automatically.
- Change the date to one year in the future.
- Wait 60 seconds with the screen active and the Settings app closed.
- Check Settings > General > iPhone Storage to see whether System Data has dropped.
- Change the date to three months in the future and wait another 60 seconds.
- Turn Set Automatically back on and disable Airplane Mode.
If System Data dropped and stays low, the trick worked. If it rebounds quickly, proceed to the factory reset method below.
Method 7: Factory Reset Your iPhone (Last Resort)
When System Data exceeds 50 GB and the methods above make no lasting difference, a full factory reset is the only reliable fix. This process wipes all system logs, cached files, and temporary data that iOS excludes from normal backups. Users who have performed this step consistently report dropping System Data from 100 GB or more down to under 15 GB.
This process is time-consuming and requires some post-restore setup such as re-authorizing Apple Pay, Face ID for banking apps, and two-factor authentication. Only proceed when the phone is actively malfunctioning due to storage.
Step 1: Back up your iPhone to your computer
An encrypted local backup preserves passwords, Health data, and Face ID settings that an iCloud backup may leave out.
- Connect your iPhone to your Mac with a USB cable.
- Open Finder and select your iPhone from the sidebar.
- Under the General tab, select Back up all the data on your iPhone to this Mac.
- Check the Encrypt local backup box and set a password. Without encryption, your Wi-Fi passwords, saved Safari passwords, and Health app data will not restore.
- Click Back Up Now and wait for the process to complete fully.
- Confirm the “Last backup” timestamp reflects today’s date before proceeding.
On a PC, use the Apple Devices app or iTunes and follow the same steps under the General tab.
Step 2: Erase your iPhone
- Go to Settings, tap General, then tap Transfer or Reset iPhone.
- Tap Erase All Content and Settings.
- Enter your device passcode and Apple ID password when prompted.
- Tap Erase iPhone and wait for the process to finish. The phone will restart to the setup screen.
Step 3: Restore from your backup
- Keep your iPhone connected to your computer.
- Follow the on-screen setup until you reach the Transfer Your Apps and Data screen.
- Select From Mac or PC.
- Choose the backup you created and enter the encryption password you set.
- Wait for the restore to finish. This can take 30 minutes to over an hour depending on backup size.
After the restore, System Data will typically sit under 15 GB because all the accumulated cache and log files are excluded from the backup by design.
How to Prevent System Data From Building Up Again
System Data will always grow over time because caching is a normal part of how iOS works. The goal is management, not permanent elimination. These habits keep it from spiraling out of control.
- Check iPhone Storage once a month: Open Settings > General > iPhone Storage and review the System Data figure. Catching a 5 GB spike is far easier than dealing with a 50 GB one.
- Clear browser data every few months: Clearing your Safari cache every two to three months prevents website data from stacking up invisibly. Do the same inside Chrome, Firefox, or any other browser you use regularly.
- Delete large message attachments after group events: Weddings, trips, and group outings generate gigabytes of shared videos and high-resolution photos that sit in iMessage threads indefinitely. Review and delete them from iPhone Storage > Messages within a few weeks.
- Keep iOS updated: Apple includes background storage management fixes in iOS point updates. Keeping your software current ensures your device benefits from the latest cache-clearing improvements.
- Reinstall cache-heavy apps periodically: If you use Instagram, Spotify, Discord, or TikTok heavily every day, deleting and reinstalling them once every few months prevents their cached data from compounding over time.
Frequently Asked Questions
Can I delete System Data directly on iPhone?
No. Apple does not expose a System Data folder or direct delete option. You reduce it indirectly by clearing specific sources: browser caches, message attachments, app caches, and iCloud backups. A full factory reset is the only way to eliminate it all at once.
Is it safe to clear System Data on iPhone?
Yes. Clearing browser caches, message attachments, and app caches does not delete your photos, contacts, or app progress. Some cache will always rebuild after you clear it because your apps need it to function. The goal is to keep it under 20 GB, not to eliminate it permanently.
Why is my iPhone System Data so high even after restarting?
A restart does not clear app caches or log files. It only clears RAM, which is separate from storage. To reduce System Data, you need to actively clear caches, delete attachments, and remove old backups as described in the methods above.
Will clearing System Data delete my photos or contacts?
No. Photos, contacts, notes, and messages are stored in separate categories. Clearing browser caches, app caches, and message attachments does not touch your personal files. The factory reset method does erase everything, but you restore from an encrypted backup immediately afterward.
Does System Data affect iPhone performance?
Yes, indirectly. When storage falls below approximately 1 GB of free space, iOS cannot write temporary files, which causes apps to crash, slow down, or fail to open. If System Data has consumed most of your available storage, reducing it will directly improve performance and stability.
Why does System Data keep coming back?
Because iOS constantly rebuilds caches as you use apps and browse the web. This is normal and expected behavior. System Data returning to 5 GB to 15 GB after a cleanup is healthy. It only needs attention again if it climbs back above 20 GB to 30 GB and starts causing storage warnings.
What if System Data is so large that iOS cannot download a software update?
Connect your iPhone to a Mac or PC and update through Finder or iTunes. The computer downloads the full update package using its own storage, bypassing your iPhone’s available space entirely. After the update installs, the installer files typically clear themselves and System Data may drop on its own.
Is System Data the same as Other storage on older iPhones?
Yes. Apple renamed “Other” to “System Data” in iOS 15. The contents and behavior are identical. The steps to clear Other storage on older iOS versions are the same as the methods described in this guide.
Related iOS How-To
- How to Clear Cache on iPhone (Safari, Chrome, Firefox & Apps)
- How to Protect Your iPhone Data Before Handing It In for Repair
- How to Unlock iPhone If You Forgot Your Passcode
- How to Disable Video on Spotify (PC, Android & iPhone Guide)
- How to Enable iPhone Mirroring in the EU (What Works and What Doesn’t)

