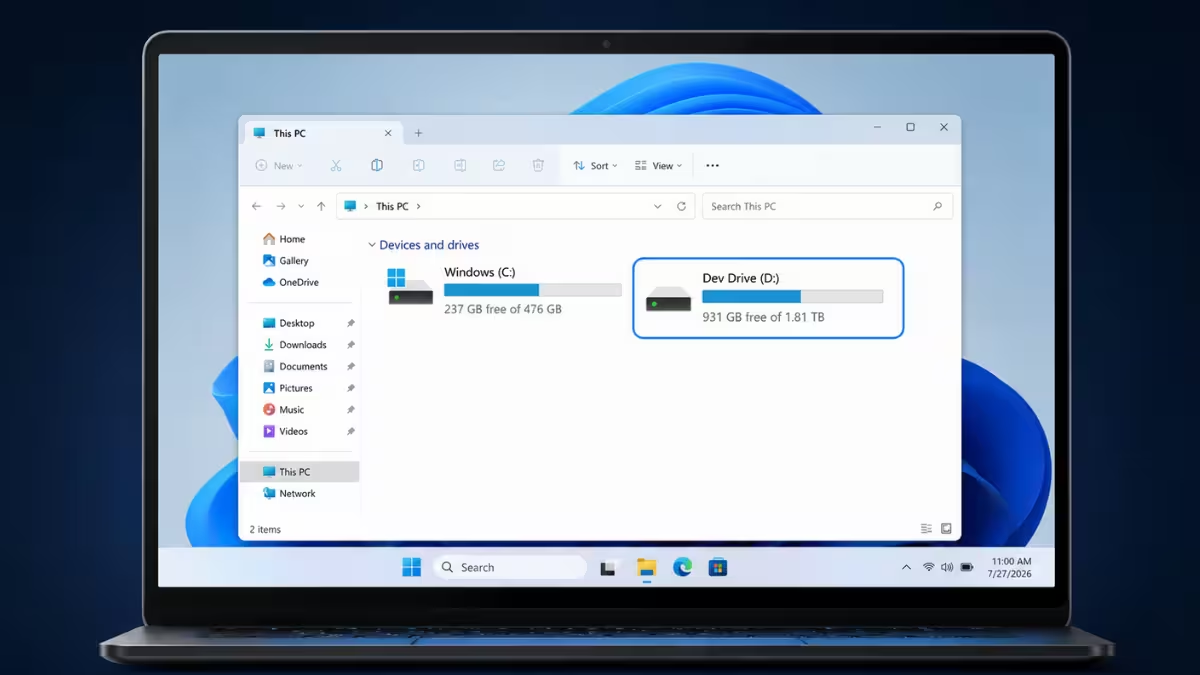
Windows 11 includes a storage feature built specifically for developers called Dev Drive. It creates a separate volume that speeds up common coding tasks like builds, package installs, and repo cloning. This article walks through what Dev Drive does, how to set one up, and how to configure it for real projects.
Who Actually Needs This
Dev Drive helps with one specific pattern: folders where lots of small files get created, deleted, and rewritten constantly. Git repositories fall into this category since Git writes many small metadata files behind the scenes. Package manager caches do too, since installing dependencies means unpacking thousands of small files at once. Build output folders behave the same way, since compilers generate large numbers of temporary files before producing a final result.
If you regularly clone repos, install dependencies, or run builds, moving those specific folders to a Dev Drive is worth doing. If your daily work is documents, photos, videos, or a game library, skip it. Those files are large but mostly static, and NTFS already handles them without issue.
What Is Dev Drive on Windows 11
A Dev Drive is a storage volume that uses the Resilient File System (ReFS) instead of NTFS. Microsoft built ReFS to handle large data sets with better integrity and resilience against corruption, and Dev Drive applies file system level optimizations on top of it to speed up developer workloads specifically.
You get more control over the volume too. Windows lets you set trust designation, adjust antivirus filtering, and manage which system filters attach to the drive. That control is what makes the performance gains possible, since fewer background scans mean faster read and write operations for source files and build output.
Dev Drive vs Regular Drive
A Dev Drive runs on ReFS with configurable antivirus scanning, while a regular drive runs on NTFS with full real-time scanning on every file operation. That gap in scanning behavior is what drives the performance difference for development work, and the table below covers where each one fits best.
| Aspect | Dev Drive | Regular Drive (NTFS) |
|---|---|---|
| File system | ReFS | NTFS |
| Antivirus scanning | Configurable, supports async performance mode | Full real time scanning on every file operation |
| Filter control | You choose which filters attach | System defaults apply, limited control |
| Copy performance | Block cloning support on 24H2 and later | Standard read/write copy |
| Best use case | Repos, package caches, build output | General files, apps, OS |
| App installs | Not recommended | Standard, fully supported |
| Minimum size | 50 GB | No minimum |
| Removable drive support | Not supported | Supported |
The core difference comes down to purpose. A regular NTFS drive scans every file operation in real time and works fine for general use, but that constant scanning adds overhead during builds, installs, and repo operations. A Dev Drive lets you tune that scanning behavior and pairs it with ReFS optimizations, which is where the speed gains for developer workloads come from.
Prerequisites Before You Start
Check these requirements first, since Dev Drive will not appear as an option if your system falls short.
- Windows 11 build 10.0.22621.2338 or later. Run
Win + Ito open Settings and check for updates if you are unsure. - 8 GB of memory minimum, though 16 GB is recommended since ReFS uses slightly more memory than NTFS.
- At least 50 GB of free disk space, which is also the minimum size for the volume itself.
- Local administrator permissions on the machine.
- Dev Drive works on every Windows SKU, so edition is not a blocker.
If you just installed a Windows update, you may need to reboot again before the option shows up in Settings. On a managed business or enterprise machine, an administrator has to enable Dev Drive through Dev Drive security policy before it becomes available to you.
How to Create a Dev Drive on Windows 11
Open Settings and go to System > Storage > Advanced Storage Settings > Disks & volumes, then select Create dev drive. Windows gives you three ways to build the volume:
- Create new VHD: This builds the Dev Drive inside a new virtual hard disk file.
- Resize an existing volume: This carves out unallocated space from a volume you already have.
- Unallocated space on disk: This uses space that is already unallocated, and it only shows up as an option if such space exists on your storage.
You cannot convert an existing volume into a Dev Drive directly. The designation only applies at format time, so reformatting is required either way.
Choosing Between a Partition and a VHD
A disk partition generally performs faster since it talks to the physical disk directly without a virtualization layer. The downside is flexibility. Resizing a partition later carries more risk, and the partition stays tied to that physical disk.
A VHD trades a small amount of performance for flexibility. You can resize it dynamically, move it, or back it up as a single file, and it is portable across machines. One caution here: if the VHD sits on a fixed HDD or SSD, avoid copying it to another machine and continuing to use it there as a Dev Drive, since the trust and filter settings do not travel with the file.
Setting Up a New VHD
If you go with the VHD route, Windows asks for a few details:
- Name: A label for the VHD.
- Location: The folder path where the VHD file lives. The default is
C:\, though a per-user path is safer to avoid unintentional sharing on shared machines. - Size: 50 GB minimum.
- Format: VHD supports up to 2040 GB. VHDX supports up to 64 TB and handles unexpected power loss more gracefully, so it is the recommended choice.
- Disk type: Fixed size allocates the full space immediately. Dynamically expanding grows the file as data gets written, and Microsoft recommends this option for most setups.
Formatting From the Command Line
If you manage multiple machines or want to script the setup, you can skip Settings entirely and format a Dev Drive from an elevated command prompt or PowerShell session.
Using Command Prompt:
Format D: /DevDrv /QUsing PowerShell:
Format-Volume -DriveLetter D -DevDriveReplace D: with whichever drive letter you are targeting in either command.
What Belongs on a Dev Drive
Dev Drive is designed for source code repositories, package caches, and build output or intermediate files. It is not meant to be a general-purpose storage volume, and Microsoft does not recommend installing regular applications on it.
If you plan to install developer tools or SDKs directly onto the Dev Drive, weigh the trade-offs around Defender scanning first. On shared or multi-user machines, IT admins should set up per-user ACL folders on the drive to prevent elevation-of-privilege attacks.
Redirecting Package Caches
Package managers like npm, NuGet, and pip store a global cache of downloaded packages, and moving that cache to your Dev Drive speeds up install and restore operations. This usually means setting an environment variable, such as pointing npm’s cache path or NuGet’s global packages folder to the new drive. After changing an environment variable, restart open console windows or reboot so the new value takes effect.
If you repoint your terminal or IDE to project folders on the new drive, check any existing shortcut scripts or launch configs afterward. It is easy to move a project over and forget that an old script still references the previous drive letter, which then fails silently or throws a confusing path error.
Filters and Trust Settings
By default, a newly created Dev Drive is trusted, which limits which filesystem filters attach to it and is where most of the performance gain comes from. If you need a specific filter for a workflow, such as ProjFS for Live Unit Testing, you add it manually with fsutil:
fsutil devdrv setfiltersallowed PrjFltFor scenarios needing multiple filters at once, list them together:
fsutil devdrv setfiltersallowed "PrjFlt, MsSecFlt, WdFilter, bindFlt, wcifs, FileInfo, ProcMon24, WinSetupMon, applockerfltr"A practical way to figure out which filters a given scenario needs is to temporarily mark the drive as untrusted, run the scenario, note which filters attach, then re-trust the drive and add only the filters that were actually used.
After a reboot, a VHD-based Dev Drive does not always stay marked as trusted. If performance suddenly feels off after restarting your machine, check the drive’s trust status under Virus & Threat Protection before troubleshooting anything else.
Block Cloning Support
Starting with Windows 11 24H2 and Windows Server 2025, Dev Drive supports block cloning. Because the volume runs on ReFS, copying files becomes a low-cost metadata operation instead of a full read and write cycle. That means faster copies, less disk I/O, and better storage efficiency when multiple files end up sharing the same underlying data blocks.
Limitations to Know Before You Commit
A few scenarios are not supported, and running into them after the fact usually means starting over:
- Your C: drive can never be a Dev Drive.
- Reformatting an existing volume to Dev Drive wipes its contents. There is no way to preserve data through that conversion.
- Removable or hot-pluggable drives, including USB drives, cannot be designated as a Dev Drive, and neither can a VHD hosted on one.
- Dynamic Disks are not supported. Use Storage Spaces instead if you need that kind of flexibility.
- Moving a VHD-based Dev Drive to a different machine means re-mounting and re-designating it, since trust status and filter policies are stored per machine.
Backing Up a Dev Drive
For a VHD-based Dev Drive, back up the .vhd or .vhdx file itself like any other file, whether that is to an external drive, a network share, or cloud storage. Just remember the Dev Drive designation and filter policies won’t transfer with it, so you will need to re-mount and re-designate after a restore. Automated backup tools tend to skip VHD-based Dev Drives since they don’t always get flagged as a standard user folder, so add yours to the backup routine manually rather than assuming it is already covered.
For a partition-based Dev Drive, use standard tools like File History or robocopy to back up the actual contents. Package caches such as npm, NuGet, or pip do not need to be backed up since they regenerate automatically.
How to Delete a Dev Drive on Windows 11
Go to System > Storage > Advanced Storage Settings > Disks & volumes, select Properties next to the Dev Drive, then choose Delete under the Format section.
If the Dev Drive was created as a VHD, deleting it in Settings does not reclaim the disk space. You need to detach the virtual disk first. Open Computer Management, go to Disk Management, right-click the disk (not the volume) hosting the Dev Drive, and select Detach VHD. Once detached, you can delete the VHD file to free up the space.
Frequently Asked Questions
Does Dev Drive work with WSL project files?
You can access Dev Drive files from a Linux distribution running in WSL, but WSL itself runs inside a VHD and performs best when files live on the Linux file system. Dev Drive’s performance benefits do not carry over to WSL access, so do not expect a speed boost there.
Do I need to reinstall applications to use a Dev Drive?
No. Applications installed on your C: drive can still read files from a Dev Drive without any reinstallation. For active projects, move the project files, repos, and caches onto the Dev Drive rather than reinstalling the tools themselves.
Will a VHD-based Dev Drive get encrypted if BitLocker is on?
Yes. If BitLocker is enabled on the hosting volume, the Dev Drive VHD is included in that encryption automatically. You do not need to separately enable BitLocker on the mounted VHD.
Can I have more than one Dev Drive?
Yes, as many as your disk space allows. Using a separate Dev Drive per project is a common approach, since you can just delete the whole drive when a project wraps up instead of repartitioning. Keep the 50 GB minimum in mind for each one.
What should I know about using Dev Drive with Visual Studio?
Visual Studio automatically detects a Dev Drive and defaults new or cloned projects to it. For the best results, move existing package caches and MSBuild copy-on-write tasks there too. Redirecting the %TEMP% and %TMP% environment variables to the Dev Drive can help further, though it requires adding the WinSetupMon filter for Windows Update to keep working correctly.

