Locked out of your own PC? You can reset Windows password without logging in, and you do not need to wipe your files to do it. The right method depends on the type of account you use and the tools you set up earlier. This guide walks you through five proven methods to reset Windows password without logging in on Windows 10 and Windows 11, starting with the easiest options.
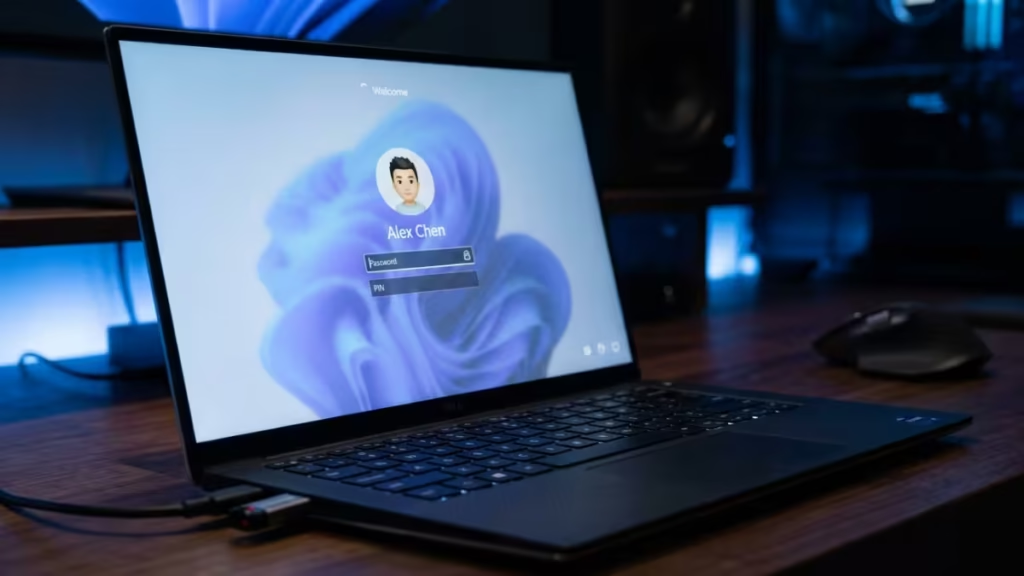
Pick the method that matches your situation. If you sign in with an email address, start with Method 1. If you use a local account, jump to Method 2 or Method 5.
Method 1: Reset a Microsoft Account Password Online
Most Windows 11 PCs and many Windows 10 PCs sign in with a Microsoft account. If you see an email address on the lock screen, this is your fastest fix because you reset the password from any other device.
- Open a browser on your phone or a second computer.
- Go to account.live.com/password/reset.
- Enter the email, phone number, or Skype name tied to your account, then click Next.
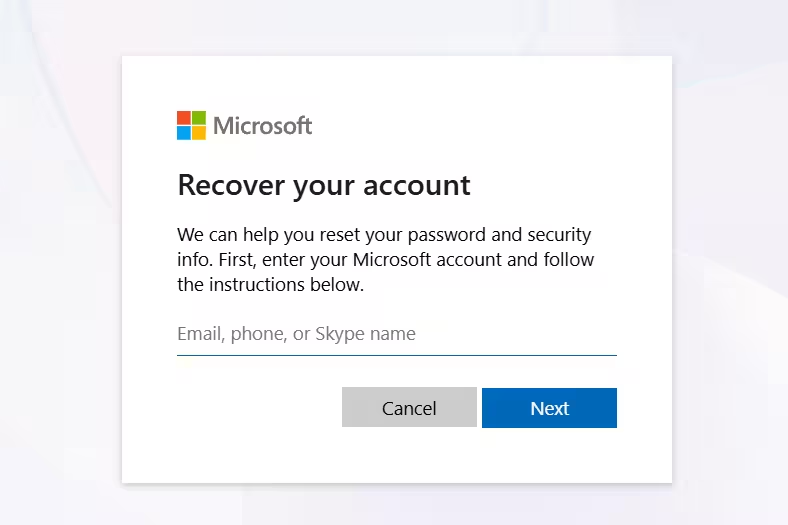
- Choose how you want to receive the security code, such as email or text message.
- Type the code Microsoft sends you to verify your identity.
- Create a new password and confirm it.
Once you finish, return to your locked PC, make sure it has an internet connection, and sign in with the new password. A wired or Wi-Fi connection at the lock screen is required so Windows can confirm the change with Microsoft.
Method 2: Use Security Questions on a Local Account
Windows 10 (version 1803 and later) and Windows 11 let you set three security questions for local accounts. If you added them when you created the account, you can reset the password right from the lock screen.
- On the sign-in screen, type any password and press Enter.
- When Windows shows the wrong password message, click Reset password below the password box.
- Answer your three security questions.
- Enter a new password and confirm it.
Windows logs you in immediately after you set the new password. If you never added security questions, you will not see the Reset password link, so move on to Method 5.
Method 3: Use a Password Reset Disk
A password reset disk is a USB drive you create in advance. It only works on the specific local account it was made for, and it must exist before you get locked out.
- Insert the USB password reset disk into the locked PC.
- On the sign-in screen, enter a wrong password so Windows shows the reset option.
- Click Reset password to open the Password Reset Wizard.
- Click Next, then select your USB drive from the list.
- Type a new password, confirm it, and add a hint if you want one.
- Click Next, then Finish.
Sign in with the new password. The same disk keeps working for future resets, so store it somewhere safe.
Method 4: Sign In With Another Administrator Account
If a second administrator account exists on the PC, you can use it to change the locked account’s password. This avoids any recovery media.
- Sign in with the other administrator account.
- Press
Win + R, typenetplwiz, and press Enter. - Select the locked user account from the list.
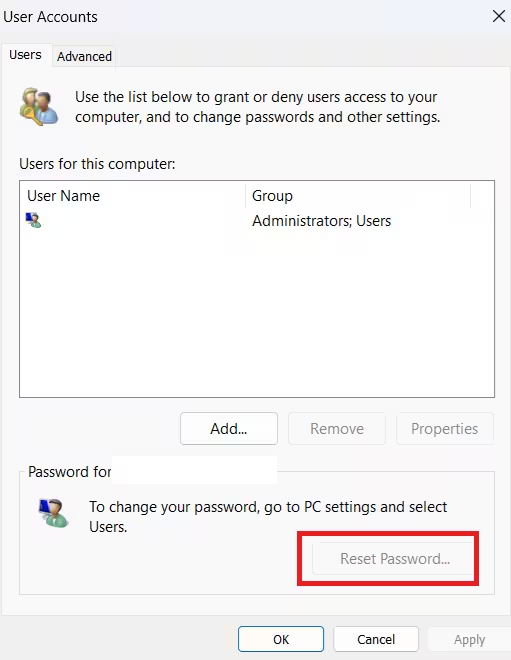
- Click Reset Password.
- Type a new password, confirm it, and click OK.
You can also right-click Start, open Computer Management, expand Local Users and Groups, click Users, right-click the locked account, and choose Set Password. Both routes change the password without the old one.
Method 5: Reset Windows Password Without Logging In Using Command Prompt
This method works when you have no Microsoft account access, no security questions, and no second admin account. You boot from Windows installation media, open Command Prompt, and reset the password from there. This works on your own PC for which you have the right to access.
What You Need
- A Windows 10 or Windows 11 installation USB. Create one with the Media Creation Tool on a working computer.
- Access to the BIOS or UEFI boot menu on the locked PC.
Step 1: Boot From the Installation USB
- Plug the installation USB into the locked PC.
- Power on and press the boot menu key (often F12, F2, Esc, or Del).
- Select the USB drive to boot from it.
- On the Windows Setup screen, press
Shift + F10to open Command Prompt.
Step 2: Swap the Accessibility Tool for Command Prompt
These commands replace the lock screen accessibility button with Command Prompt so you can run admin tasks. First find your Windows drive letter, since it is often C but can change in the recovery environment.
move d:\windows\system32\utilman.exe d:\windows\system32\utilman.exe.bak
copy d:\windows\system32\cmd.exe d:\windows\system32\utilman.exe
Replace d: with the letter of your Windows drive if it differs. Type dir d:\windows to confirm you have the right letter before you run the commands.
Step 3: Reboot and Reset the Password
- Type
wpeutil rebootand press Enter. - Remove the USB so the PC boots into Windows.
- At the sign-in screen, click the Ease of Access (accessibility) icon. Command Prompt opens with system rights.
- Reset the password with this command:
net user YourUsername NewPasswordReplace YourUsername with your account name and NewPassword with the password you want. If you do not know the exact account name, type net user alone to list every account on the PC.
Close Command Prompt and sign in with the new password.
Step 4: Restore the Original File
Put the accessibility tool back so the button works normally again. Boot from the USB once more, press Shift + F10, and run:
copy /y d:\windows\system32\utilman.exe.bak d:\windows\system32\utilman.exeThis step keeps your system clean and restores the default behavior of the accessibility button.
Which Method Should You Choose?
Match the method to your account and your preparation:
Microsoft account sign-in: Use Method 1 for the quickest reset. Local account with security questions: Use Method 2 directly from the lock screen. You made a reset disk earlier: Use Method 3. A second admin account exists: Use Method 4. None of the above: Use Method 5 with installation media.
Which Method Should You Choose?
Match the method to your account and your preparation:
Microsoft account sign-in: Use Method 1 for the quickest reset. Local account with security questions: Use Method 2 directly from the lock screen. You made a reset disk earlier: Use Method 3. A second admin account exists: Use Method 4. None of the above: Use Method 5 with installation media.
Which Method Should You Choose?
Match the method to your account and your preparation:
- Microsoft account sign-in: Use Method 1 for the quickest reset.
- Local account with security questions: Use Method 2 directly from the lock screen.
- You made a reset disk earlier: Use Method 3.
- A second admin account exists: Use Method 4.
- None of the above: Use Method 5 with installation media.
Tips to Avoid Future Lockouts
A few habits keep you from getting locked out again. Add security questions to any local account so you always have the lock screen reset option. Switch to a Microsoft account if you want online recovery from any device. Set up Windows Hello PIN or fingerprint sign-in as a backup, and store any password reset disk in a fixed, memorable spot.
Frequently Asked Questions
Will resetting my Windows password delete my files?
No. Methods 1 through 4 keep all your files and settings. Method 5 also keeps your files, but you may lose access to encrypted files and saved browser passwords that depended on the old password.
Can I reset the password without any USB or disk?
Yes, if you use a Microsoft account (Method 1), have security questions set (Method 2), or have a second admin account (Method 4). Method 5 is the only option that requires installation media.
Why does the password drive letter show as D instead of C?
Windows recovery environment assigns drive letters differently. Run dir d:\windows to confirm which letter holds your Windows folder before you run any commands.
Does this work on Windows 11?
Yes. All five methods apply to both Windows 10 and Windows 11. Menu names match across both versions.
Related Guides
- How to Use Disk Management in Windows 11: Create, Delete, Format Partitions
- How to Check CPU Temperature in Windows 11
- How to Turn Off BitLocker in Windows 11 (5 Methods That Work)
- How to Check If Low Latency Profile Is Active on Windows 11
- How to Uninstall AI Model in Windows 11 Settings (Remove Phi Silica)
- How to Clean Install Windows 11 from USB (Step-by-Step Guide)

