By default, Windows 11 removes a document from the print queue as soon as printing finishes. That works fine for one-time print jobs, but if you reprint the same document often, you end up repeating the whole process every time.
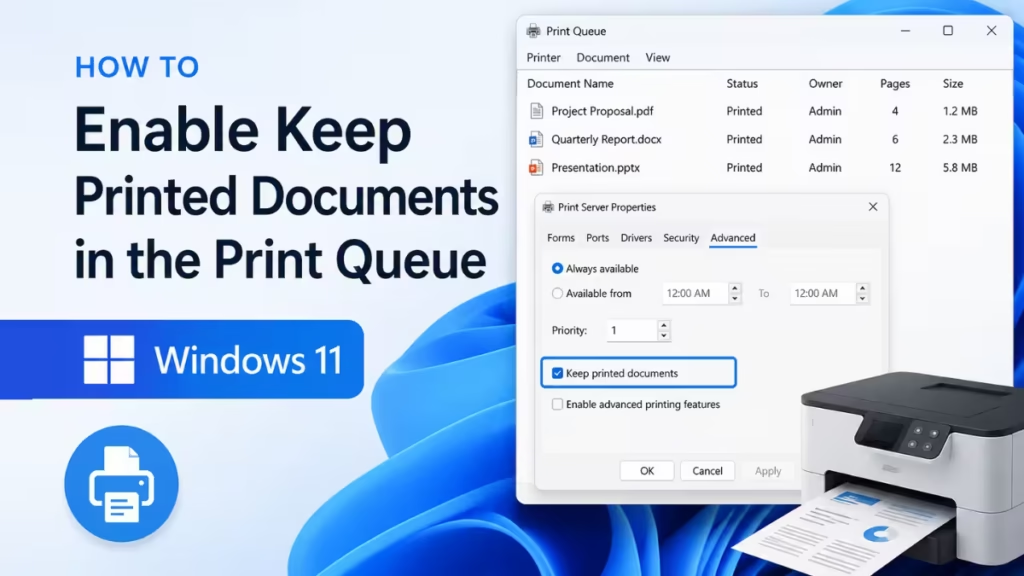
The Keep printed documents option solves this. Once you turn it on for a printer, Windows holds every completed job in the print queue so you can reprint it whenever you need, without reopening the original file.
What Does Keep Printed Documents in Print Queue Do on Windows 11?
After enabling Keep printed documents:
- Every completed print job stays visible in the print queue.
- You can right-click any job and restart it to reprint.
- The documents stay in the queue until you manually clear them or turn the option off.
- The setting applies per printer, so you can enable it for one printer and leave others unchanged.
Method 1: Enable Keep Printed Documents via Windows Settings
This is the fastest way to reach printer properties on Windows 11.
- Press Windows + I to open Settings.
- Go to Bluetooth and devices from the left panel.
- Click Printers and scanners.
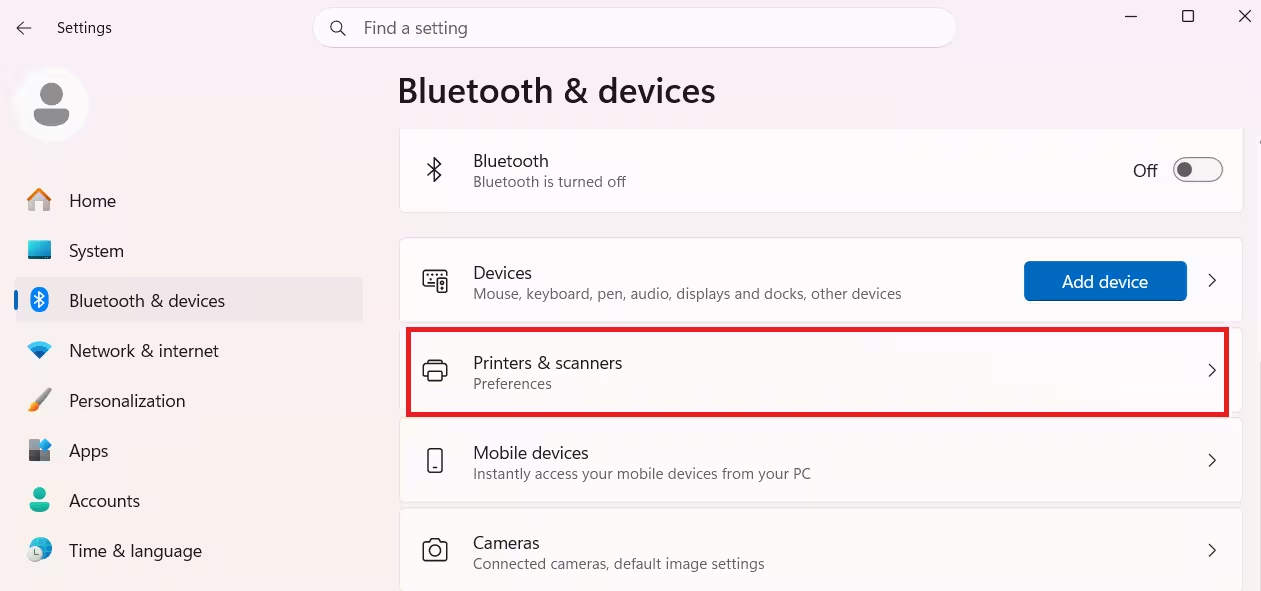
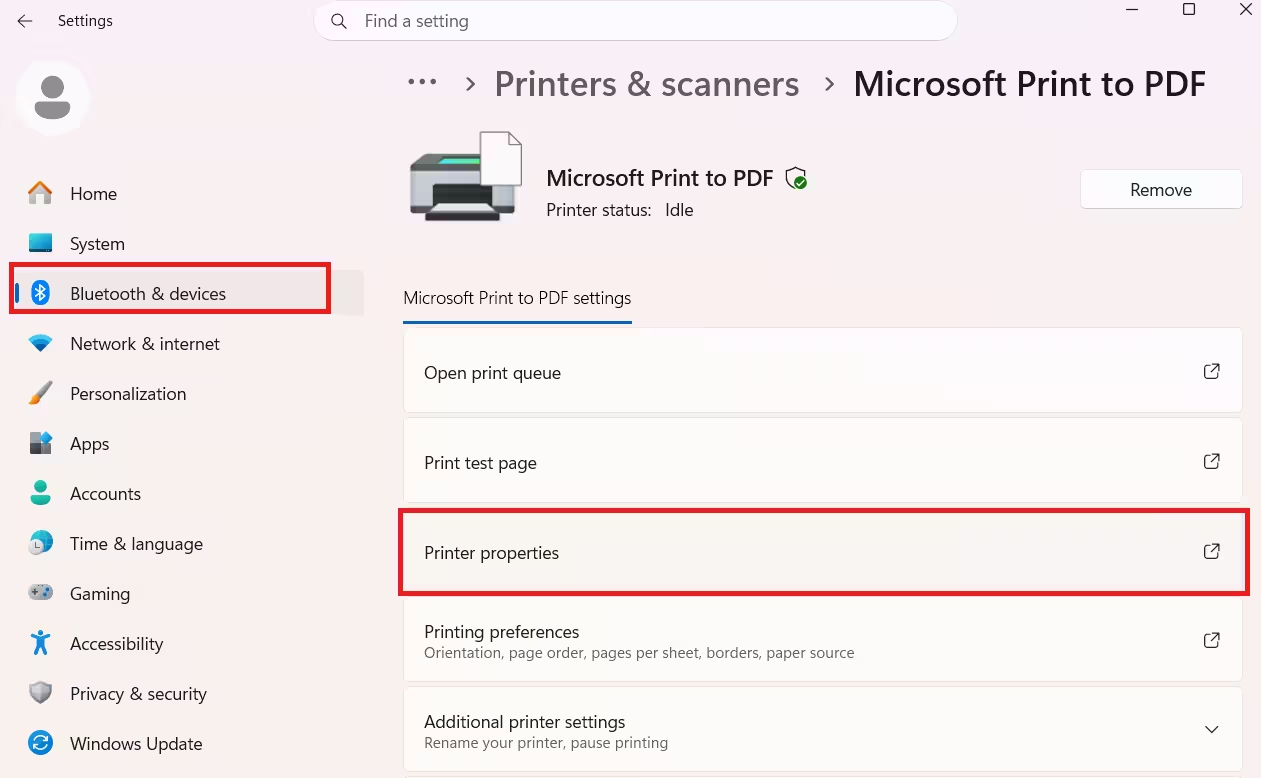
- Select the printer you want to configure.
- Click Printer properties.
- In the Printer Properties window, click the Advanced tab.
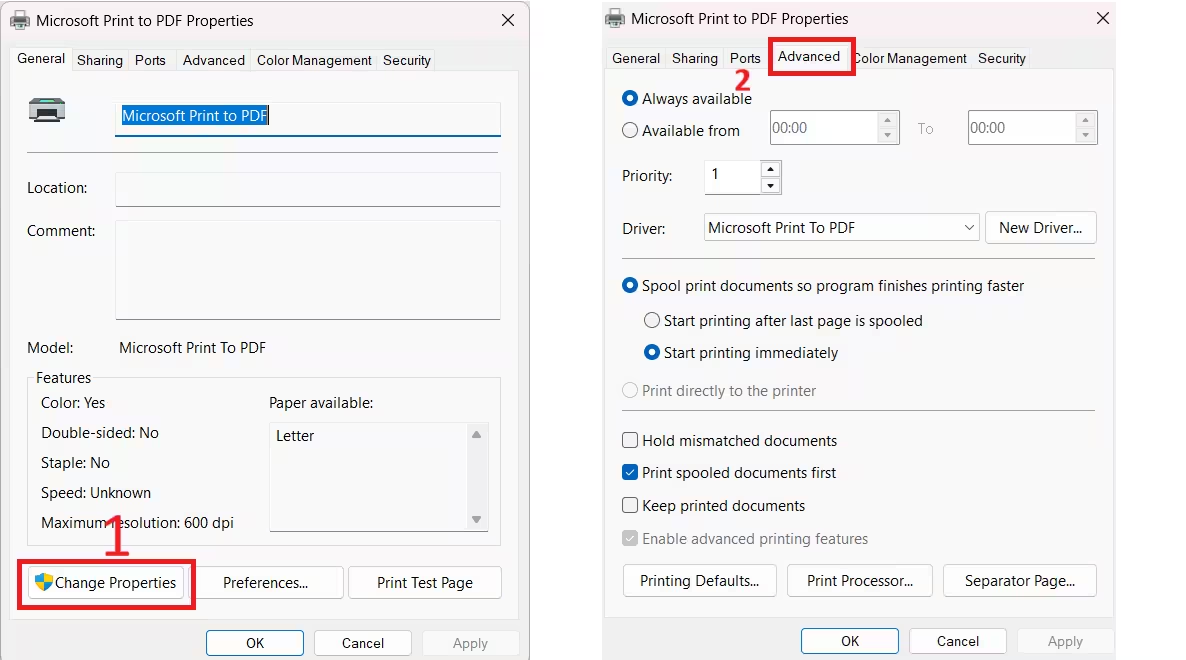
- Check the box next to Keep printed documents.
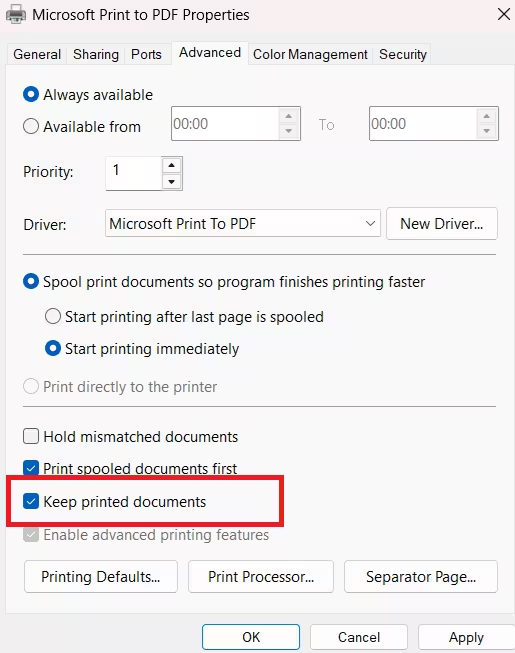
- Click Apply, then click OK.
- Press Windows + R, type
services.msc, and press Enter. - Scroll down to Print Spooler, right-click it, and select Restart.
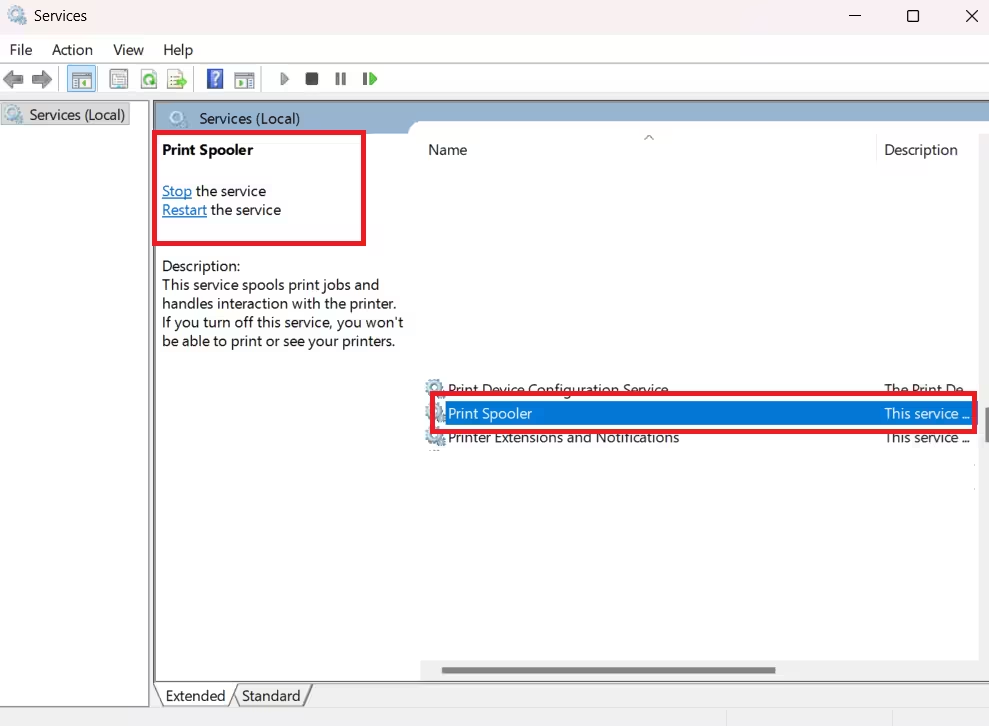
Restarting the Print Spooler applies the change to the active session immediately.
Method 2: Enable Keep Printed Documents via Control Panel
If you prefer Control Panel or the Settings method does not open the right window, use this approach.
- Press Windows + R to open the Run dialog.
- Type
control printersand press Enter. - In the Devices and Printers window, right-click your printer.
- Select Printer properties from the context menu.
- Click the Advanced tab.
- Check the box next to Keep printed documents.
- Click Apply, then click OK.
- Press Windows + R, type
services.msc, and press Enter. - Scroll down to Print Spooler, right-click it, and select Restart.
Method 3: Enable Keep Printed Documents via Print Queue Window
You can also access printer properties directly from the active print queue.
- Press Windows + S, type Printers and scanners, and open it.
- Click your printer, then click Open print queue.
- In the print queue window, click the Printer menu at the top.
- Select Printer properties.
- Go to the Advanced tab.
- Check Keep printed documents.
- Click Apply, then OK.
- Press Windows + R, type
services.msc, and press Enter. - Find Print Spooler, right-click it, and select Restart.
Method 4: Enable Keep Printed Documents via Print Management
Print Management is an advanced tool available on Windows 11 Pro and Enterprise. It lets you configure multiple printers from a single console, making it useful on business PCs or shared workstations.
- Press Windows + R, type
printmanagement.msc, and press Enter. - In the left pane, expand Custom Filters, then expand Print Servers.
- Click your PC name, then click Printers.
- Right-click the printer you want to configure and select Properties.
- Click the Advanced tab.
- Check the box next to Keep printed documents.
- Click Apply, then click OK.
- Press Windows + R, type
services.msc, and press Enter. - Scroll to Print Spooler, right-click it, and select Restart.
- Close Print Management.
Note: Print Management is not available on Windows 11 Home. Use Methods 1, 2, or 3 if you are on the Home edition.
How to Reprint a Document from the Print Queue
Once you enable Keep printed documents, reprinting is a two-step process.
- Press Windows + S, search for Printers and scanners, and open it.
- Click your printer, then click Open print queue.
- You will see all completed print jobs listed in the queue.
- Right-click the document you want to reprint.
- Select Restart.
Windows sends the job back to the printer immediately. No need to open the original file or adjust print settings again.
How to Disable Keep Printed Documents
If the queue grows too large or you no longer need this feature, you can turn it off through the same steps.
- Open Settings and go to Bluetooth and devices then Printers and scanners.
- Click your printer and select Printer properties.
- Click the Advanced tab.
- Uncheck Keep printed documents.
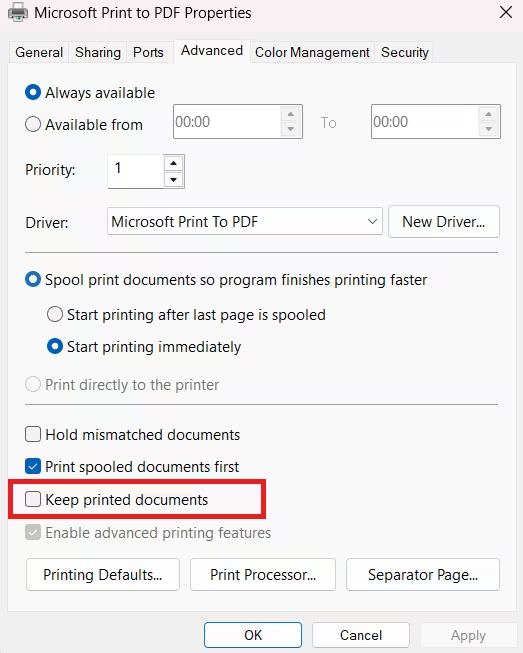
- Click Apply, then OK.
After you disable the option, Windows goes back to removing completed jobs from the queue automatically.
How to Clear the Print Queue Manually
Completed jobs stored in the queue take up space. Clear them manually when you no longer need them.
- Open the print queue from Settings or search for Printers and scanners.
- Click your printer, then Open print queue.
- Right-click a job and select Cancel to remove it, or press Ctrl + A to select all jobs.
- Press Delete to clear the selected jobs.
Enabling Keep printed documents on Windows 11 saves time when you reprint the same documents regularly. Turn it on through Printer properties in the Advanced tab using Windows Settings, Control Panel, the print queue window, or Print Management on Pro and Enterprise editions. Every completed job stays in the queue ready to restart with a right-click. Restart the Print Spooler after enabling the setting to make sure the change takes effect on the current session.
Related Guides
- PCL XL Error Fix: How to Fix PCL XL Error on HP Printers in Windows 11/10
- XPS Printer Error 1168 Fix: Repair Services, Drivers, and Registry Issues
- Canon Printer Drivers on Windows 11: How to Download & Install
- How to Enable or Disable Windows Ready Print in Windows 11
- How to Update Drivers in Windows 11 Using Device Manager (6 Methods)

