If a program on your PC refuses to install, uninstall, or update through the normal Windows methods, the Microsoft Program Install and Uninstall Troubleshooter can clear the underlying problem automatically. This guide explains what the tool does, how to download and run it on Windows 10 and older Windows 11 builds, and what your options are on newer versions of Windows 11 where Microsoft has retired it.
What Is the Microsoft Program Install and Uninstall Troubleshooter?
The Microsoft Program Install and Uninstall Troubleshooter is a standalone diagnostic file (.diagcab) that Microsoft built to fix software installation and removal problems caused by corrupted Windows Installer data. It targets MSI-based programs (the kind installed via the Windows Installer engine) and repairs the registry and installer records those programs depend on.
It is not built into Windows Settings. You download it separately from Microsoft’s support site and run it directly.
What Problems Does It Fix?
The troubleshooter addresses several specific failure types:
- Corrupted registry keys that block new program installations
- Broken registry keys on 64-bit Windows that cause MSI installer failures
- Corrupted patch data inside Windows Installer registry entries
- Stuck uninstall entries that prevent a program from being removed through Settings or Control Panel
- Blocked reinstallation caused by incomplete previous uninstalls
- Programs that no longer appear in Add/Remove Programs but still have leftover installer data
It does not remove malware, fix application bugs, or repair non-MSI installers such as portable apps or UWP apps from the Microsoft Store.
Is the Troubleshooter Still Available in 2026?
Partially. Microsoft began retiring its legacy MSDT-based troubleshooters in 2023. The MSDT platform was removed in 2025 as part of that phased deprecation.
The Program Install and Uninstall Troubleshooter uses a .diagcab format that runs independently of the MSDT platform, so it still works on Windows 10 and Windows 11 version 22H2 and older. However, Microsoft no longer actively promotes or hosts the download in the same location it previously used.
For Windows 11 23H2 and later, Microsoft now directs users to the built-in troubleshooters inside the Settings app and to the manual repair steps in the Settings app. The legacy MSDT troubleshooters, including this one, are no longer the recommended path on those builds.
How to Download the Troubleshooter
Microsoft provides a direct download link for the troubleshooter file.
- Click this official Microsoft link: aka.ms/Program_Install_and_Uninstall
- Your browser will immediately download
MicrosoftProgram_Install_and_Uninstall.meta.diagcabto your Downloads folder.
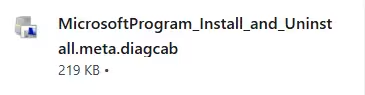
- Do not rename the file. Keep it in
.diagcabformat.
Note: Download only from Microsoft’s official link above. Third-party mirrors may bundle the file with unrelated software.
How to Run the Program Install and Uninstall Troubleshooter
Step 1: Open the File
- Open File Explorer and go to your Downloads folder.
- Double-click MicrosoftProgram_Install_and_Uninstall.meta.diagcab.
- If Windows asks for permission, click Yes.
Step 2: Start the Troubleshooter
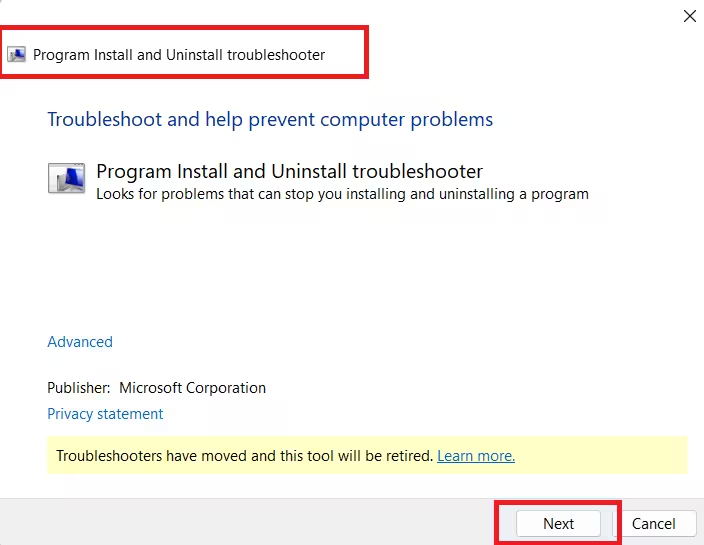
The troubleshooter opening screen appears. You will see a yellow notice at the bottom that reads: “Troubleshooters have moved and this tool will be retired.” This is expected. The tool still works on Windows 10 and Windows 11 22H2 and older. Click Next to continue.
Step 3: Choose Installing or Uninstalling
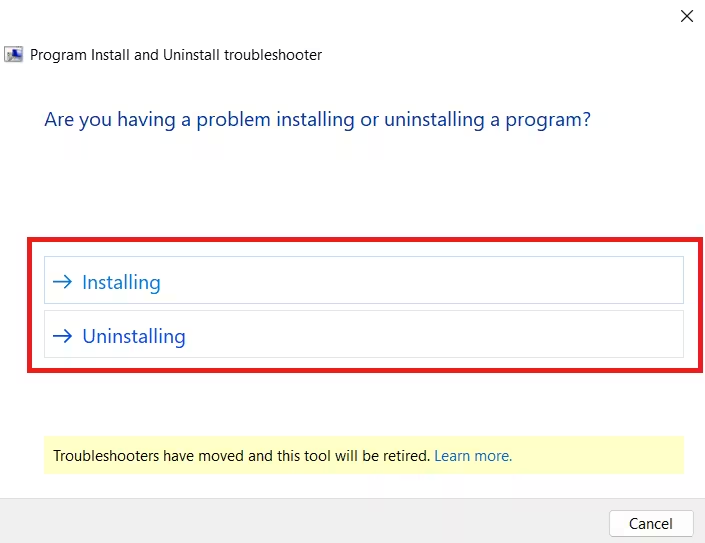
The next screen immediately asks whether you are having a problem installing or uninstalling a program.
- Select Installing, if a program setup fails to complete or throws an error mid-install.
- Select Uninstalling, if a program refuses to remove, throws a “Windows cannot find the file” error, or stays stuck in your installed apps list.
Step 4: Select the Program
The troubleshooter shows a screen titled “Select the program you want to uninstall.” A scrollable list of installed programs appears, with Not Listed as the first entry at the top.
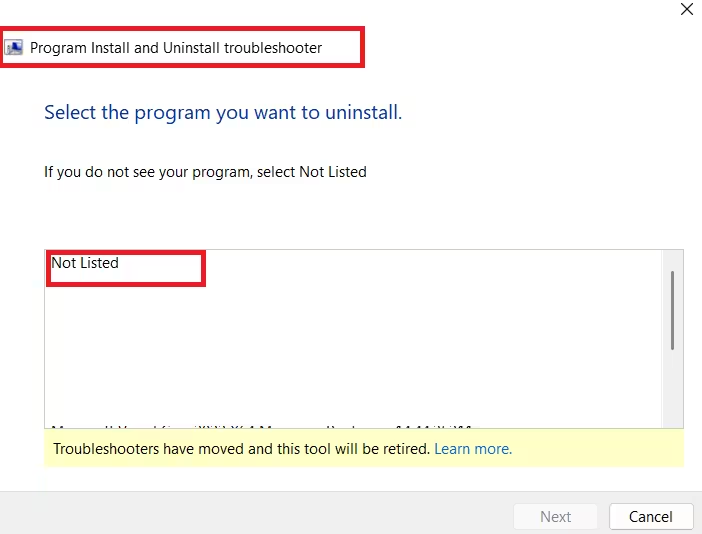
- Scroll through the list and click the program causing the issue.
- If your program does not appear, click Not Listed at the top of the list. You will be asked for the program’s product code. You can find the product code in the Windows Registry under
HKEY_LOCAL_MACHINE\SOFTWARE\Microsoft\Windows\CurrentVersion\Uninstall.
Step 5: Apply the Fix
- The troubleshooter scans for problems with the selected program.
- When it finds an issue, select Yes, try uninstall (or the relevant install fix option).
- Wait for it to complete.
- Click Close and restart your PC.
What Does “Name Not Available” Mean in the Troubleshooter?
When the troubleshooter lists a program as Name Not Available, it found a Windows Installer registry entry that contains no readable display name. This usually means:
- The entry belongs to a program that was partially uninstalled and left behind a broken registry record.
- The entry belongs to a component, runtime, or update package that never had a user-facing display name.
- The original program was deleted manually (by removing files directly) without going through the proper uninstaller, which left orphaned registry keys.
Do not select a “Name Not Available” entry unless you can confirm it belongs to the program you are trying to remove. Removing an unknown entry can strip out a shared component that another program depends on.
To investigate a “Name Not Available” entry before touching it:
- Press Win + R, type
regedit, and press Enter. - Navigate to
HKEY_LOCAL_MACHINE\SOFTWARE\Microsoft\Windows\CurrentVersion\Uninstall. - Look through the subkeys for entries with a
DisplayNamevalue that is blank or missing. Check theUninstallString,InstallLocation, orPublishervalues for clues about what the entry belongs to.
If you cannot identify the entry, leave it alone.
What to Use Instead on Windows 11 23H2 and Later
On Windows 11 23H2 and newer builds, use the built-in repair and uninstall tools in Settings:
Option 1: Repair or Reset the App
- Go to Start > Settings > Apps > Installed apps.
- Find the app, click the three-dot menu next to it, and select Advanced options.
- Click Repair. If the problem continues, click Reset.
Not all apps support Repair or Reset. The option only appears for apps that expose it.
Option 2: Uninstall from Settings
- Go to Start > Settings > Apps > Installed apps.
- Find the app, click the three-dot menu, and select Uninstall.
- Follow the on-screen steps.
Option 3: Uninstall from Control Panel (Programs Only)
- Open the Start menu and search for Control Panel.
- Go to Programs > Programs and Features.
- Right-click the program and select Uninstall.
Option 4: Use Windows Security Before Removing Suspicious Apps
If the program you want to remove looks like malware or behaves suspiciously:
- Go to Start > Windows Security > Virus and threat protection.
- Run a Quick scan or Full scan.
- Remove any detected threats before attempting to uninstall the app.
Additional Fixes When the Troubleshooter Does Not Resolve the Issue
Run SFC and DISM
Corrupted system files can block the Windows Installer engine from working correctly.
- Open Command Prompt as administrator.
- Run
sfc /scannowand wait for it to finish. - Then run
dism /online /cleanup-image /restorehealthand wait. - Restart your PC and try the install or uninstall again.
Restart the Windows Installer Service
- Press Win + R, type
services.msc, and press Enter. - Scroll to Windows Installer.
- Right-click it and select Restart (or Start if it is stopped).
Reinstall the Program Before Uninstalling
If a program shows a “Windows cannot find the file” error when you try to uninstall it, reinstall it to the same directory first. The installer will recognize the existing installation and repair it. After reinstalling, run the standard uninstall from Settings or Control Panel.
This approach works particularly well for apps installed through Steam or Epic Games Launcher. Reinstall through the launcher, then uninstall through it using the launcher’s built-in remove option.
Use Revo Uninstaller as a Last Resort
If the Windows troubleshooter and built-in Settings options both fail, Revo Uninstaller (free version available) can force-remove stubborn programs. It scans for leftover files and registry entries even after a standard uninstall fails. It also handles apps that give a “not found” error during removal by offering a forced scan mode.
Frequently Asked Questions
Does the Program Install and Uninstall Troubleshooter work on Windows 11?
It works on Windows 11 version 22H2 and older. On Windows 11 23H2 and newer, Microsoft recommends using the built-in Settings tools instead.
Is it safe to let the troubleshooter apply fixes automatically?
Yes. The tool creates a PowerShell-based restore script before making any changes, so you can roll back if something goes wrong. Applying fixes automatically is safe for clearly identified programs.
What should I do if my program is not listed in the troubleshooter?
Select “Not listed” and enter the program’s product code. Find the product code in the Registry under HKEY_LOCAL_MACHINE\SOFTWARE\Microsoft\Windows\CurrentVersion\Uninstall.
Can the troubleshooter remove Microsoft Store apps?
No. It only works with MSI-based desktop programs. For Store apps, go to Settings > Apps > Installed apps, select the app, and click Uninstall.
What causes a “Windows cannot find the file” error when uninstalling?
This usually means the program’s original installer files were deleted or moved. The Windows Installer still has the app recorded in the registry but cannot find the uninstaller file it expects. Running the Program Install and Uninstall Troubleshooter or reinstalling the program first can clear this.
Is it safe to delete a “Name Not Available” entry in the troubleshooter?
Only if you can confirm what it belongs to. Unknown entries should be left alone. Removing an unidentified shared component can break other programs.

