The “Failed to verify username” error blocks you from joining a Minecraft server. Minecraft throws this message when its authentication system cannot confirm your account with Mojang or Microsoft servers. The most common triggers are a temporary auth server outage, an outdated launcher, corrupted Hosts file entries, a firewall blocking Minecraft, or conflicting software like Hamachi running in the background.
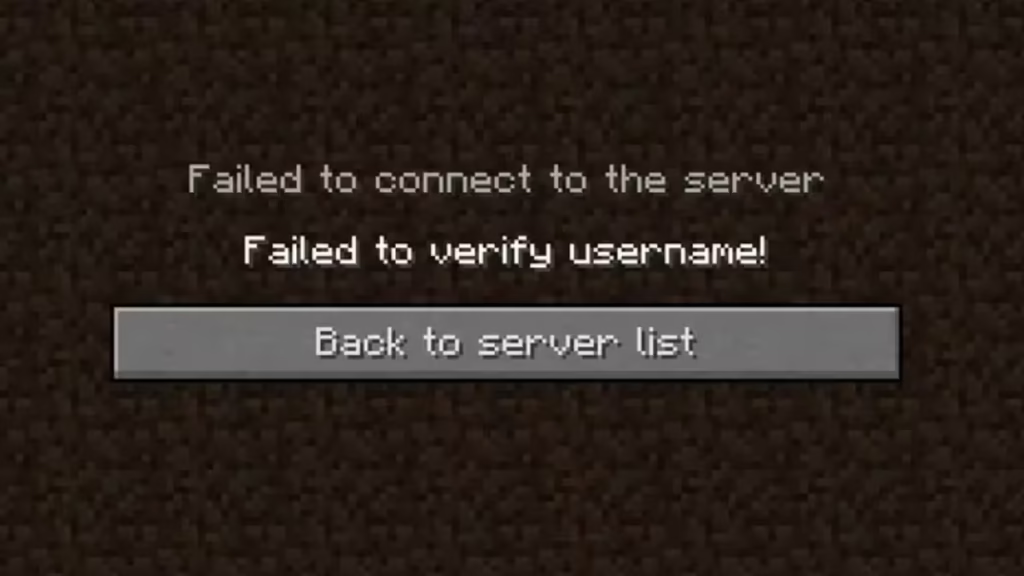
Work through the fixes below in order. Most players resolve this error after the first two steps.
Note: Cracked launchers cannot authenticate with servers that run
online-mode=true. If you use a non-premium launcher, you need to either purchase Minecraft or connect to a server running in offline mode.
Fix 1: Log Out and Back Into the Minecraft Launcher
A stale authentication token is the most common cause of this error. Logging out and back in forces Minecraft to generate a fresh token.
- Close the Minecraft Launcher completely.
- Open Task Manager and end any Minecraft-related processes still running.
- Reopen the Minecraft Launcher.
- Click your username in the top-right corner and select Log out.
- Sign back in with your Microsoft or Mojang account credentials.
- Launch the game and try joining the server again.
Fix 2: Check Mojang Server Status
If the Mojang authentication servers are down, no fix on your end will work until the servers recover.
- Open a browser and go to the Minecraft server status page.
- Check whether the Authentication service shows as operational.
- If it shows degraded or offline, wait 15 to 30 minutes and try again.
Fix 3: Restart Your Internet Connection
An unstable connection can interrupt the authentication handshake between your launcher and Mojang servers.
- Turn off your router and modem.
- Wait 30 seconds, then turn them back on.
- Once the connection restores, relaunch Minecraft and try joining the server.
Fix 4: Edit the Windows Hosts File
Minecraft entries that are incorrectly configured in the Windows Hosts file can block authentication. Removing those entries clears the conflict.
- Close the Minecraft Launcher and end all Minecraft processes in Task Manager.
- Press Windows, type Notepad, right-click it, and select Run as administrator.
- In Notepad, go to File > Open.
- Navigate to:
C:\Windows\System32\drivers\etc - Change the file type dropdown to All Files and open the hosts file.
- Go to Edit > Find and search for Minecraft or Mojang.
- Delete every line related to Minecraft or Mojang. These entries appear near the bottom and resemble website addresses.
- Save the file and close Notepad.
- Reopen Minecraft and try joining the server.
Fix 5: Update Minecraft Launcher and Java
An outdated launcher or Java version prevents proper authentication. Updating both resolves compatibility issues.
Update the Minecraft Launcher:
- Open the Minecraft Launcher.
- Near your username, click the Options button.
- Click Force Update and let it finish.
- Restart your PC and test the game.
If the launcher does not update through Options, download the latest Minecraft Launcher from the official Minecraft website and install it as an administrator without removing the existing installation.
Update Java:
- Press Windows, type Configure Java, and open it.
- Go to the Update tab.
- Click Update Now.
- Apply any available updates.
- If you have more than one Java installation, repeat the update for each version.
Fix 6: Free Up Space on Your System Drive
A nearly full system drive can cause Minecraft processes to fail, including authentication. Clearing space often resolves the issue.
- Open File Explorer and right-click your C: drive.
- Select Properties, then click Disk Cleanup.
- Select all file categories and run the cleanup.
- Delete any other unnecessary files on the drive.
- Relaunch Minecraft and check if the error is gone.
Fix 7: Allow Minecraft Through Firewall and Antivirus
Your firewall or antivirus (Kaspersky is a known offender) may block Minecraft from reaching authentication servers.
Test with temporary disable:
- Temporarily disable your antivirus and Windows Firewall.
- Launch Minecraft and try joining the server.
- If the error disappears, your security software was blocking the connection.
Add Minecraft as a trusted application in Kaspersky:
- Open Kaspersky and go to Settings.
- Navigate to Additional > Threats and Exclusions.
- Click Specify Trusted Applications, then click Add.
- Select Minecraft.exe from the applications list or browse to its installation folder.
- Enable all exclusion options and click Add.
- Repeat the same steps for
javaw.exe,java.exe, andMinecraftServer.exe.
Create Firewall rules in Windows Defender:
- Press Windows, type Firewall, and open Windows Defender Firewall with Advanced Security.
- Check that no existing inbound or outbound rule blocks Minecraft.
- In the Inbound Rules panel, click New Rule and select Program.
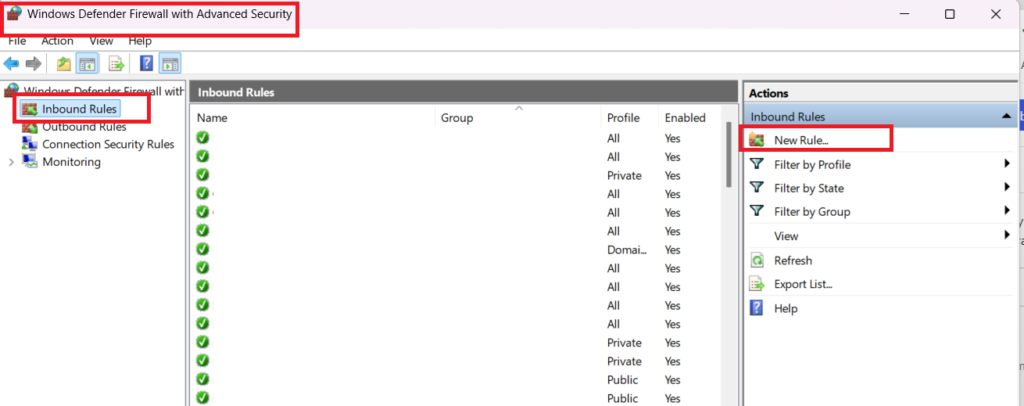
- Click Browse and navigate to the Minecraft installation folder.
- Select Minecraft.exe and click Next.
- Choose Allow the Connection and apply it to all three profiles: Domain, Private, and Public.
- Name the rule and click Finish.
- Repeat for the Minecraft server and any Java installations.
- Repeat all steps to create matching Outbound Rules.
- Restart your PC and test the game.
Fix 8: Disable Conflicting Applications
Certain apps interfere with Minecraft’s network activity. Hamachi and Relevant Knowledge are the two most commonly reported culprits.
- Perform a clean boot of Windows: press Windows + R, type
msconfig, and go to the Services tab. Check Hide all Microsoft services, then click Disable all. Do not disable Minecraft services. - Restart your PC and launch Minecraft.
- If the error is gone, re-enable services one by one until you identify the problem app.
- If you have Hamachi installed, disable it before launching Minecraft or uninstall it if you no longer need it.
- If Relevant Knowledge is installed, uninstall it through Apps and Features in Windows Settings.
Fix 9: Change the Server to Offline Mode (Server Owners Only)
This fix applies only if you run a custom Minecraft server. Setting the server to offline mode removes the Mojang authentication requirement entirely, but it comes with a significant security tradeoff. Any player can join using any username, including impersonating other accounts.
Warning: Switching to offline mode can reset player progress and exposes your server to unauthorized access. Install the AuthMe plugin if you switch to offline mode, as it adds password-based login to prevent impersonation.
- Execute
/stopin the server console to shut it down completely. - Open File Explorer and navigate to the server installation folder (the folder containing
server.jar). - Right-click server.properties and open it with Notepad.
- Go to Edit > Find and search for
online-mode. - Change the value to
online-mode=false. - Save the file.
- Start the server and confirm the error no longer appears.
The “failed to verify username” error in Minecraft almost always comes down to a stale authentication token, a Mojang server outage, or something on your system blocking the connection. Logging out and back into the launcher fixes it for most players. If that does not work, updating the launcher and Java, clearing the Hosts file, or adjusting your firewall settings will resolve the issue in most remaining cases. Server owners dealing with this error can set online-mode=false in server.properties as a last resort, paired with the AuthMe plugin to keep the server secure.
Related Game Error Fixes
- How to Fix the Failed to Get Minecraft Access Error (Too Many Requests and Transferring Server)
- How to Fix Minecraft Network Protocol Error on Java and Bedrock
- How to Make a Redstone Comparator in Minecraft: Crafting Recipe, Modes, and Uses
- Minecraft Error Code Wither Rose: 6 Fixes That Work
- 7 Best Modded Minecraft Server Hosting Services for 2026

