Windows 11 hides a powerful processor control called Processor Performance Boost Mode that most users never see. This setting lets you control how aggressively your CPU enters and holds boost frequencies, giving you more control over performance, thermals, and battery life than the default Power Options allow.
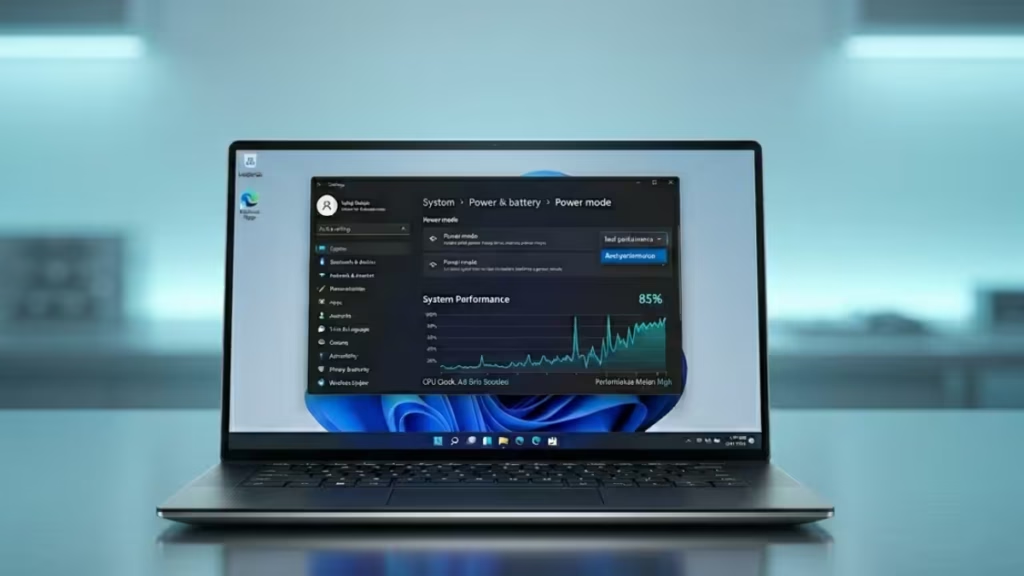
This guide shows you exactly how to unlock this hidden setting through the Registry and configure it for your needs.
What Is Processor Performance Boost Mode?
Modern CPUs from Intel and AMD can automatically increase their clock speeds above the base frequency whenever workloads demand it. This is called boost or turbo behavior. Windows 11 manages this through power management policies that run in the background.
By default, Windows 11 exposes only two processor controls in Power Options:
- Minimum Processor State
- Maximum Processor State
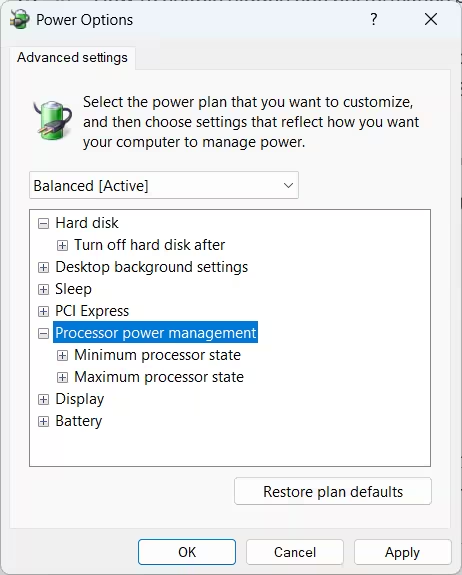
The Processor Performance Boost Mode setting sits hidden behind those two options. It controls how quickly Windows requests higher CPU frequencies and how long it sustains those boost states. Changing this setting does not increase your CPU’s maximum turbo frequency. It changes how aggressively the operating system asks your processor to reach that frequency.
This feature works alongside Intel Speed Shift, Intel Hardware P-States (HWP), and AMD Collaborative Processor Performance Control (CPPC). These hardware technologies allow frequency adjustments in milliseconds. The boost mode setting gives Windows a stronger or weaker voice in that process.
Important: This setting is separate from the Low Latency Profile feature introduced in Windows 11. Low Latency Profile delivers short bursts of performance during interactive tasks like opening menus and launching apps. Processor Performance Boost Mode influences overall CPU boost behavior across all workloads. If your system supports both features, they can run together without conflict.
Before You Start: Enable Hidden CPU Boost Mode on Windows 11
Editing the Windows Registry carries risk. A mistake can cause system instability or prevent Windows from booting. Follow these precautions before you begin:
- Create a full system backup or a restore point
- Follow each step exactly as written
- Do not modify any Registry key other than the one specified below
Step 1: Unlock the Hidden Boost Mode Setting via Registry
This step reveals the Processor Performance Boost Mode option inside Power Options. Windows hides it by default on all systems.
- Press Win + R, type
regedit, and press Enter. - Click Yes if User Account Control prompts you.
- Navigate to the following Registry path:
HKEY_LOCAL_MACHINE\SYSTEM\CurrentControlSet\Control\Power\PowerSettings\54533251-82be-4824-96c1-47b60b740d00\be337238-0d82-4146-a960-4f3749d470c7- In the right pane, locate the Attributes DWORD value.
- Double-click Attributes.
- Change the value from 1 to 2.
- Click OK.
- Close Registry Editor.
- Restart your PC.
After the restart, the Processor Performance Boost Mode setting will appear inside the advanced Power Options menu.
Step 2: Configure the Processor Boost Mode
Now that the setting is unlocked, you can choose the boost behavior that fits your use case.
- Open Control Panel.
- Click Hardware and Sound.
- Click Power Options.
- Next to your active power plan, click Change plan settings.
- Click Change advanced power settings.
- In the advanced settings window, expand Processor power management.
- Expand Processor performance boost mode.
- Click the dropdown under On battery or Plugged in and select your preferred mode.
- Click Apply, then click OK.
The change takes effect immediately without a restart.
Processor Boost Mode Options Explained
The available modes vary depending on your processor, Windows version, and hardware platform. Most systems include some or all of the following (via Neowin):
| Mode | What It Does |
|---|---|
| Disabled | Prevents the CPU from using turbo or boost frequencies. The processor stays near its base clock. Best for reducing heat and extending battery life. |
| Enabled | Standard Windows behavior. The CPU boosts when workloads demand it, balancing performance, power, and thermals. This is the default for most systems. |
| Aggressive | Windows requests boost frequencies faster and holds them longer under load. Best for gaming desktops and plugged-in laptops where performance matters more than power consumption. |
| Efficient Enabled | Allows boosting but prioritizes energy efficiency. The system avoids unnecessary frequency spikes when performance gains would be minimal. Good for everyday productivity and battery-conscious use. |
| Efficient Aggressive | A hybrid mode. The CPU boosts responsively but the system weighs efficiency more heavily than pure Aggressive mode. Works well on gaming laptops. |
| Aggressive at Guaranteed | Windows calculates the extra performance needed above the guaranteed performance level and requests that specific level from the processor. Available on select hardware. |
| Efficient Aggressive at Guaranteed | Windows requests the highest performance above the guaranteed performance level while still factoring in efficiency. Available on select hardware. |
Which Hidden CPU Boost Mode Should You Use on Windows 11?
For Gaming (Desktop or Plugged-In Laptop)
Use Aggressive mode. This tells Windows to request boost frequencies quickly as workloads increase and to sustain those frequencies longer. Gaming benefits from fast CPU ramp-up, especially in games that spike CPU usage in short bursts.
Do not expect dramatic frame rate improvements in every game. The gains vary by processor architecture, game engine, cooling capacity, and your GPU. The difference shows most in CPU-heavy titles and workloads.
For Battery Life (Laptop)
Use Efficient Enabled or Disabled. Both modes reduce how often the CPU enters high-frequency boost states, which cuts power consumption and lowers temperatures.
On Windows 11, you can set different boost modes for On battery and Plugged in separately inside the same Power Options window. Set Efficient Enabled or Disabled for battery use, and Aggressive or Efficient Aggressive when plugged in.
For Everyday Use (Desktop or Laptop)
Keep Enabled if you want the default balance. This mode handles most workloads well without pushing temperatures or power draw unnecessarily.
Bonus: Unlock Ultimate Performance Mode
Windows 11 also includes a hidden Ultimate Performance power plan designed for workstations and high-end desktops. This mode prevents your CPU from dropping below its base clock speed, which eliminates the micro-latency that occurs when the processor scales down during idle periods.
Unlike Processor Performance Boost Mode, Ultimate Performance affects the entire power plan rather than just the boost behavior.
How to Enable Ultimate Performance Mode
- Right-click the Start button and select Terminal (Admin) or Command Prompt (Admin).
- Paste the following command and press Enter:
powercfg -duplicatescheme e9a42b02-d5df-448d-aa00-03f14749eb61- Close the terminal.
- Open Control Panel and go to Hardware and Sound > Power Options.
- Select Ultimate Performance from the list of power plans.
Note for laptop users: Some laptops with Connected Standby may not show Ultimate Performance Mode. To check, run
powercfg /ain Command Prompt. If you see Standby (S0 Low Power Idle) Network Connected, you may need to add a Registry DWORD namedPlatformAoAcOverrideset to0underHKLM\System\CurrentControlSet\Control\Powerbefore the mode becomes available.
Also check whether manufacturer software like Armoury Crate, Command Center, or Lenovo Vantage overrides the selected power plan. These apps can revert your plan choice automatically.
What to Expect from Ultimate Performance Mode
- Your CPU will not drop below its base clock speed, even during idle periods
- Micro-stutters caused by frequency scaling go away
- Temperatures and fan speeds increase
- Laptop battery drains faster
Ultimate Performance Mode keeps the CPU running at peak readiness at all times. This works the same way as keeping a car engine idling rather than turning it off between tasks. On Intel systems with efficiency cores and performance cores, this mode prevents performance cores from entering sleep states.
This mode does not overclock your processor or push voltage beyond factory specifications. It runs within AMD and Intel certified safe limits, so it will not void your warranty.
Recommendation: Use Ultimate Performance on desktop systems or plugged-in gaming laptops with adequate cooling. Avoid it on battery, as the increased power draw significantly reduces runtime.
CPU Boost Mode: What to Know First
Before changing your boost settings, review these points:
- Higher boost activity raises CPU temperatures
- Fans run faster and louder under Aggressive or Ultimate Performance modes
- Battery life decreases on laptops running more aggressive modes
- Performance gains depend on workload type, cooling quality, and processor generation
- Many modern CPUs already boost aggressively under default Windows settings
- This setting does not increase your processor’s maximum turbo frequency
- Thermal and power limits set by your processor firmware still apply regardless of which mode you choose
How to Revert the Changes
If you experience overheating, instability, or unexpected behavior after changing the boost mode, revert your settings:
To change the boost mode back: Open Power Options > Change advanced power settings > Processor power management > Processor performance boost mode, and set it back to Enabled.
To hide the Registry change: Open Registry Editor, return to the same key, and change Attributes back from 2 to 1. Restart your PC.
To remove Ultimate Performance Mode: Open Power Options and switch back to Balanced or your previous power plan.

