Microsoft provides the Windows 11 Update Assistant as an official tool to manually download and install the latest Windows 11 feature update on your PC. If your device has not received the update through Windows Update automatically, you can use this tool to trigger the upgrade yourself without waiting for the rollout.
This guide walks you through everything you need to know about the Windows 11 Update Assistant, including what it does, who should use it, and the exact steps to complete the upgrade.
What Is the Windows 11 Update Assistant?
The Windows 11 Update Assistant is a free, portable tool from Microsoft. It downloads and installs the latest Windows 11 feature update directly on your PC. You do not need to create a bootable USB drive or download an ISO file to use it.
The tool works only on x86/64-based PCs. It does not support ARM-based devices.
You should use the Windows 11 Update Assistant when:
- Your PC has not received the latest Windows 11 feature update through Windows Update
- You want to install a feature update manually instead of waiting for an automatic rollout
- You need to upgrade a compatible PC from Windows 10 to Windows 11
If you only need smaller security patches or quality updates, go to Settings > Windows Update and check for updates there instead. The Update Assistant targets feature updates specifically.
What You Need Before You Start
Before you run the Windows 11 Update Assistant, confirm the following:
- Your PC runs on an x86/64-based processor (not ARM)
- Your hardware meets the Windows 11 minimum system requirements
- You have the PC Health Check app installed on your computer
- Your PC has a valid Windows license
- You have a stable internet connection for the download
- You have enough free disk space on your system drive
To check your current Windows version before starting, press Win + R, type winver, and press Enter. This shows you the exact Windows edition and build number currently installed.
How to Download the Windows 11 Update Assistant
- Open your browser and go to the official Microsoft software download page.
- Scroll to the Windows 11 Installation Assistant section.
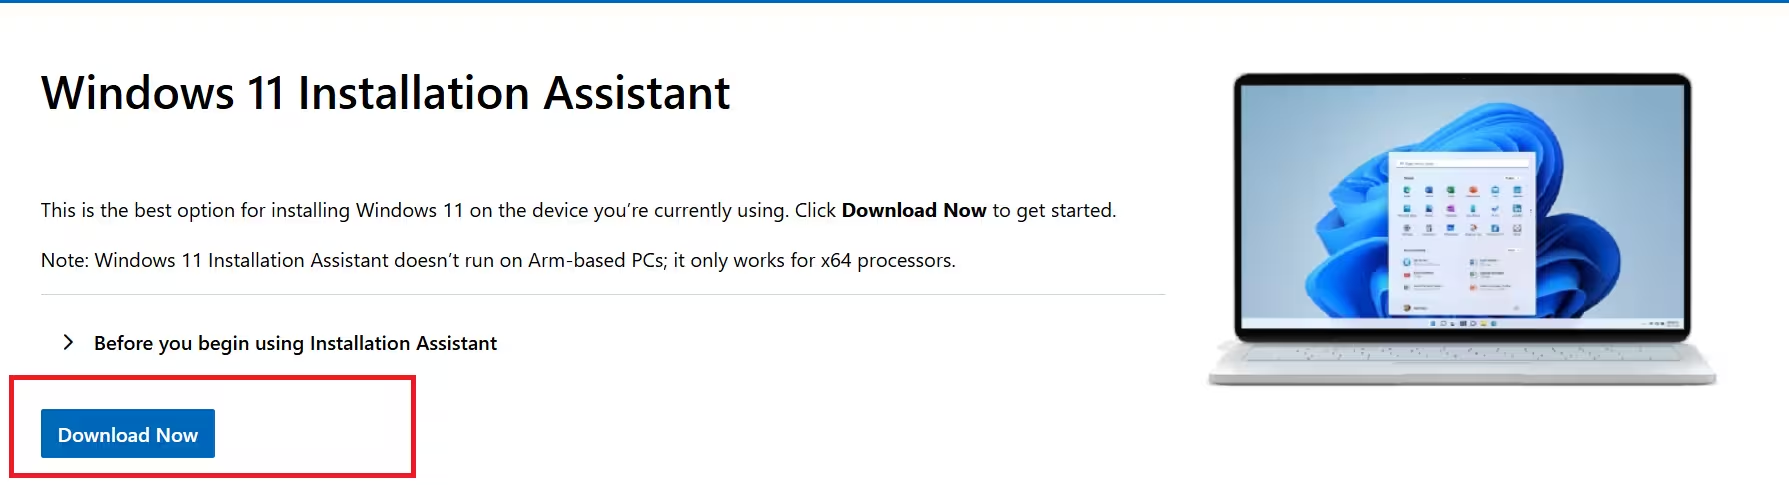
- Click Download Now to save the executable file to your PC.
The file downloads as a standalone executable. You do not need to install it. Just run it directly after downloading.
How to Use Windows 11 Update Assistant to Upgrade
Follow these steps to upgrade your PC using the Windows 11 Update Assistant:
- Double-click the downloaded executable file to launch the Update Assistant.
- The tool checks your PC for compatibility automatically.
- If you do not have the PC Health Check app installed, the tool prompts you to download it first. Install it, run the compatibility check, and then click Refresh inside the Update Assistant.
- Once the tool confirms compatibility, click Accept and Install to begin.
- The Update Assistant starts downloading the Windows 11 feature update from Microsoft servers. This process takes time depending on your internet speed.
- After the download completes, Windows 11 begins installing automatically. Save any open work at this point because the PC will restart.
- When the progress bar reaches 100%, click Restart Now if you want to reboot immediately. Otherwise, wait for the automatic restart timer.
- Your PC restarts and continues the Windows 11 installation. Do not shut down or unplug your PC during this stage.
- After the installation finishes, your PC boots to the Windows 11 lock screen. Enter your PIN or password to log in.
Your files, apps, and settings remain intact after the upgrade by default.
What Happens After the Upgrade
Once Windows 11 finishes installing, your PC runs the latest Windows 11 feature update version. You can verify the installed version by pressing Win + R, typing winver, and pressing Enter.
If you experience any issues after the upgrade, go to Settings > Windows Update > Update History to review the installed updates. You can also roll back within 10 days using Settings > System > Recovery > Go Back if needed.
Windows 11 Update Assistant Not Working? Try These Fixes
1. Update Assistant shows an error at startup: This usually happens when the PC Health Check app is missing or outdated. Download the latest version of PC Health Check from Microsoft, run the hardware check, and then relaunch the Update Assistant.
2. Download stops or gets stuck: Check your internet connection. Temporarily disable third-party antivirus or firewall software that might block the download, then restart the Update Assistant.
3. Tool says your PC is not compatible: Your hardware does not meet Windows 11 minimum requirements. Use the PC Health Check app to identify exactly which component is failing the check.
4. Installation fails at a specific percentage: Free up disk space on your C drive and try again. Windows 11 requires a minimum of 64 GB of free storage for the feature update installation.
5. PC restarts but boots back into Windows 10: The installation may have rolled back due to an error. Check the Windows Update troubleshooter under Settings > System > Troubleshoot > Other Troubleshooters.
Related Tech How-To
- How to Update Drivers in Windows 11 Using Device Manager (6 Methods)
- How to Update All Drivers in Windows 11 Using CMD Automatically
- How to Update BIOS on Windows 11 (3 Methods)
Errors & Fixes

